Bulk configuration allows you to efficiently add or edit multiple resources in Remote Access at once. This article explains how to perform bulk actions using CSV templates in the Remote Access Portal.
Bulk configuration is available for both users and devices.
Requirements:
Access to the Remote Access account where you want to configure resources
Permissions to upload resource data
Microsoft Excel or compatible spreadsheet software
Bulk upload new resources
Log in to the Remote Access Portal, go to the Users or Device Endpoints page, depending on the resource type to upload.
At the top of the resource list (user list or device list), enable the Bulk Config toggle to allow bulk actions.
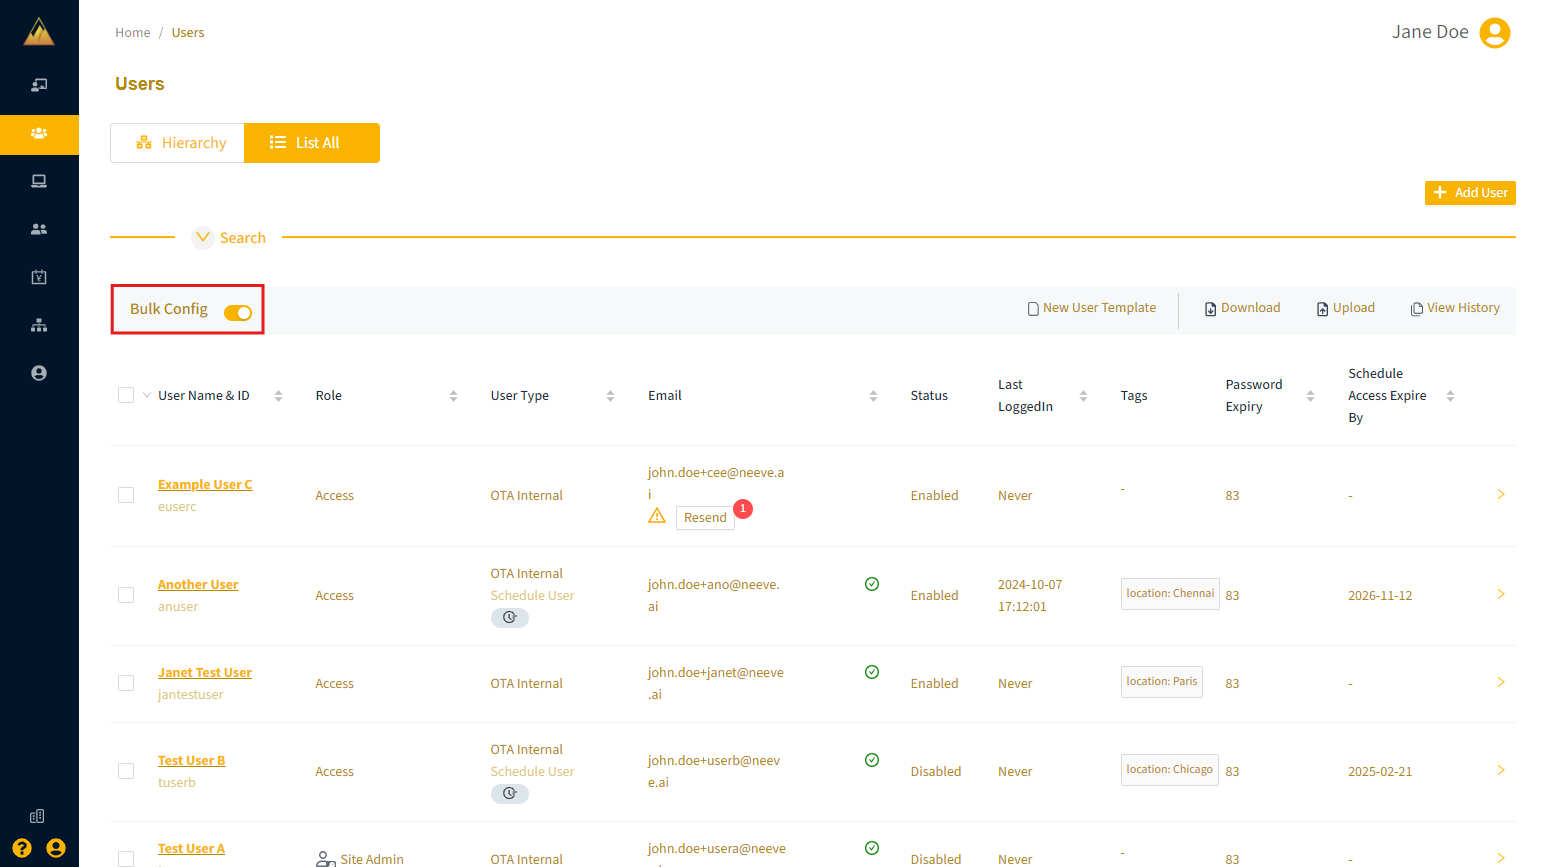
In the Bulk Config menu at the top of the list, select New {resource} template to download the CSV template file.
Open the downloaded CSV file and add the required information for each new resource. For a list of required fields, see Required template fields below.
Note
Ensure that you follow any formatting guidelines in the template, such as specific date formats or data validation rules.
The following image shows the columns in a new device template.
After filling in the required details, save the file to your computer and keep a backup for future reference.
Return to the Bulk Config menu in the portal, select Upload, and choose Create resource.
Browse your computer to select the saved template file and then select Submit or Upload to initiate the upload process.
Verify and correct your data, as needed:
For device uploads: Once the upload is complete, select View History to check the processing status. The status can show as Processed, Complete, or Failed. If the upload failed, correct the errors in the template and re-upload the file.
.png)
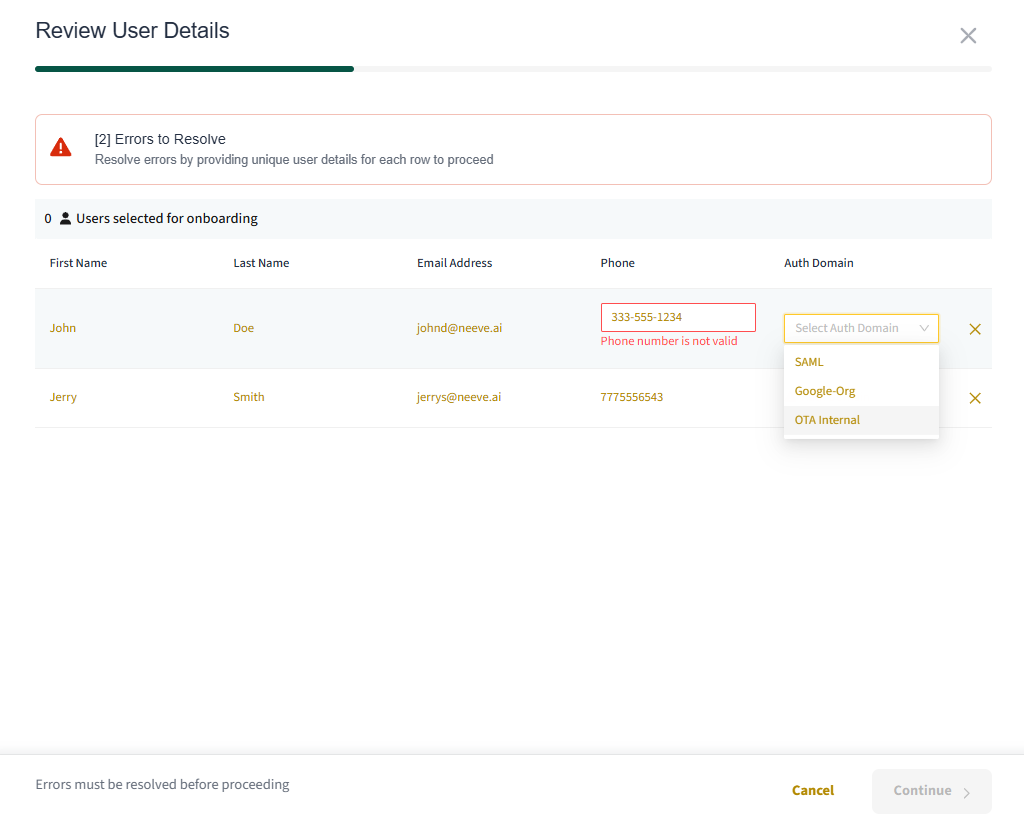
For user uploads:
Once the upload is complete, select Continue to review and correct any file errors, such as incorrect phone format or a misspelled authentication domain.
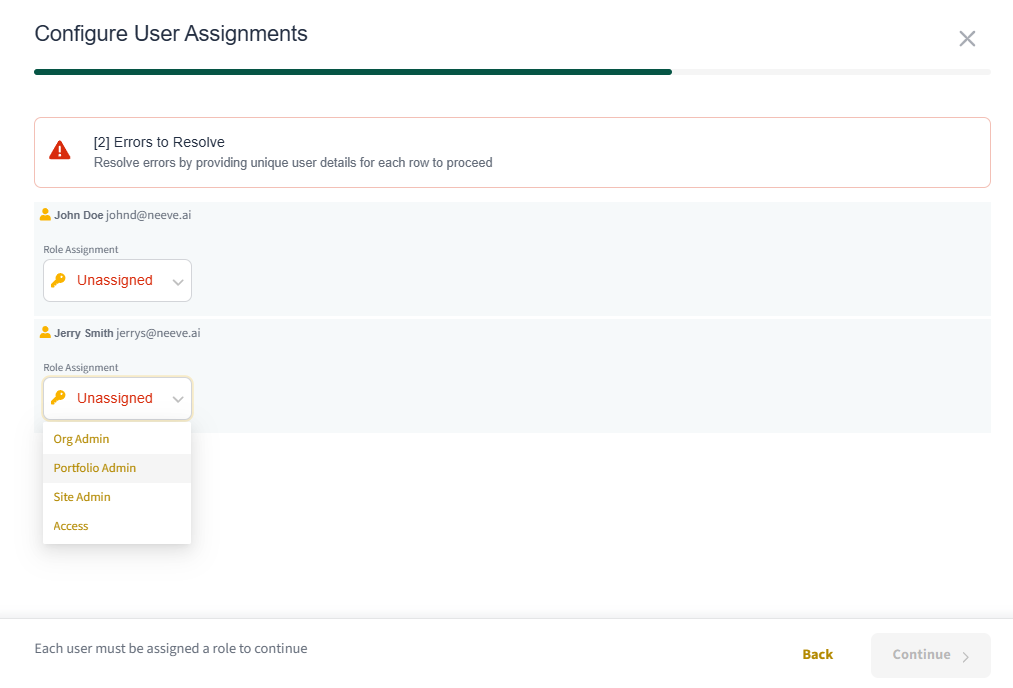
Continue to the Configure User Assignments page, select the role for each new user, and the applicable sites, access groups, or portfolios.
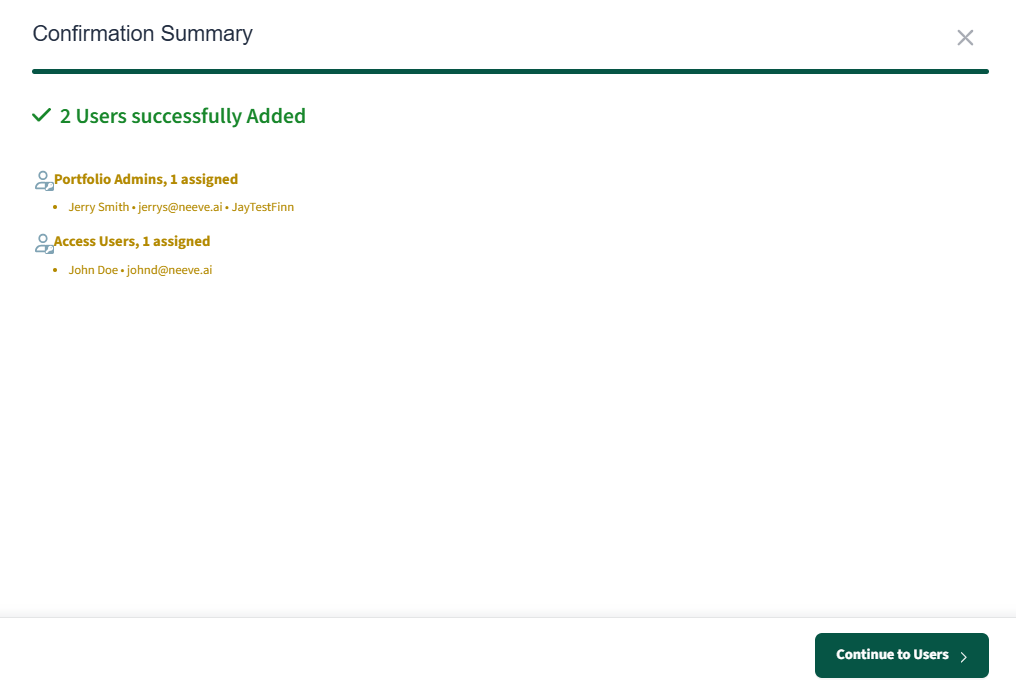
Review the details on the Confirmation Summary page, and then select Continue to Users to return to the Users page.
After processing, check the user or device list to confirm the new resources were added.
Bulk edit existing resources
Log in to the Remote Access Portal, go to the Users or Device Endpoints page, depending on the resource type to upload.
In the Bulk Config menu at the top of the resource list (user list or device list), enable the Bulk Config toggle (if not already enabled) and select Download to download the CSV resource template for editing.
Open the downloaded CSV file and edit the resource entries as needed. For a list of editable fields, see Required template fields below.
Note
You cannot add new resources (users or devices) at the same time that you perform a bulk resource edit. Add new resources separately, per the steps in Bulk upload new resources.
The following image shows example data in a downloaded user template for editing.
After making the necessary edits, save the edited template file to your computer and keep a backup for reference.
Return to the Bulk Config menu in the portal, select the Upload, and choose Existing resource.
Browse your computer to select the saved template file and then select Submit or Upload to initiate the upload process.
Once the upload is complete, select View History to check the processing status. The status can show as Processed, Complete, or Failed. If the upload failed, correct the errors in the template and re-upload the file.
After processing, confirm that you see the resource edits in the list.
Required template fields
The following fields are editable unless otherwise noted.
Required user values
Note
The UserID column only appears when editing existing users.
First Name
Last Name
UserId: This column is available only when editing existing users.
Email Address
Auth Domain: This field is not editable after creation
Phone
Required device values
Note
The Device ID column appears only when editing existing devices.
Device ID: This column is available only when editing existing devices.
Site Name
Device Name
IP Address
Host Name
Description
Street
City
Country
State
Zip code