Before running services on an Edge Node or Virtual Edge Node (formerly Edge iNode and Virtual Edge iNode), you need to add a local network to the node. (For instructions on adding a local network, refer to specific instructions for your node type.)
This article gives general instructions for running edge services as well as specific instructions for deploying SkySpark and Niagara4.
Run a service
To add a service, you need to add the service to the node, associate it with a network, and then configure service-specific options.
To run an edge service:
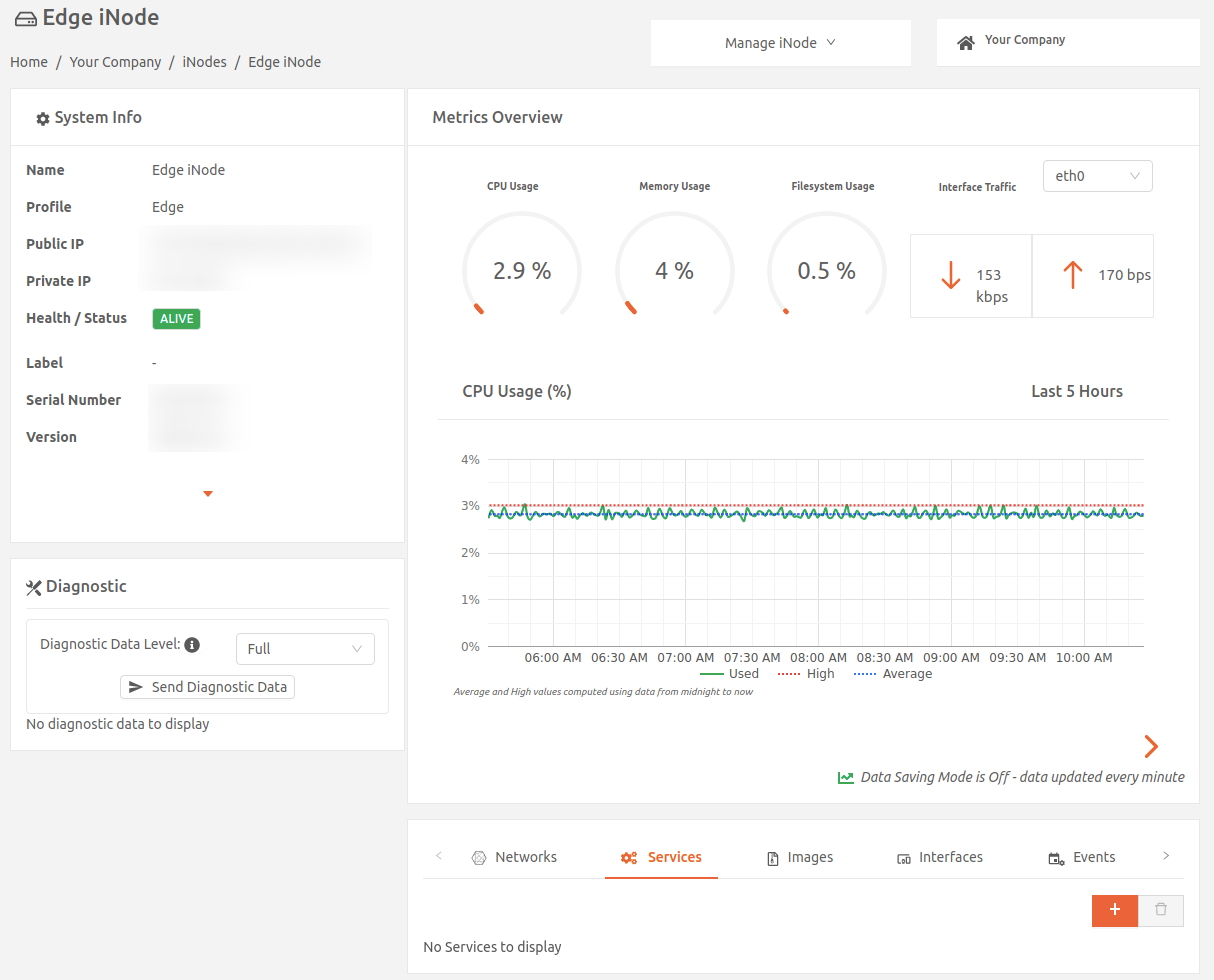
- In the Secure Edge Portal, select Nodes > All Nodes, and then select the node to open its details page.
- On the Services tab, select the plus icon (+) to open the Add Service page.
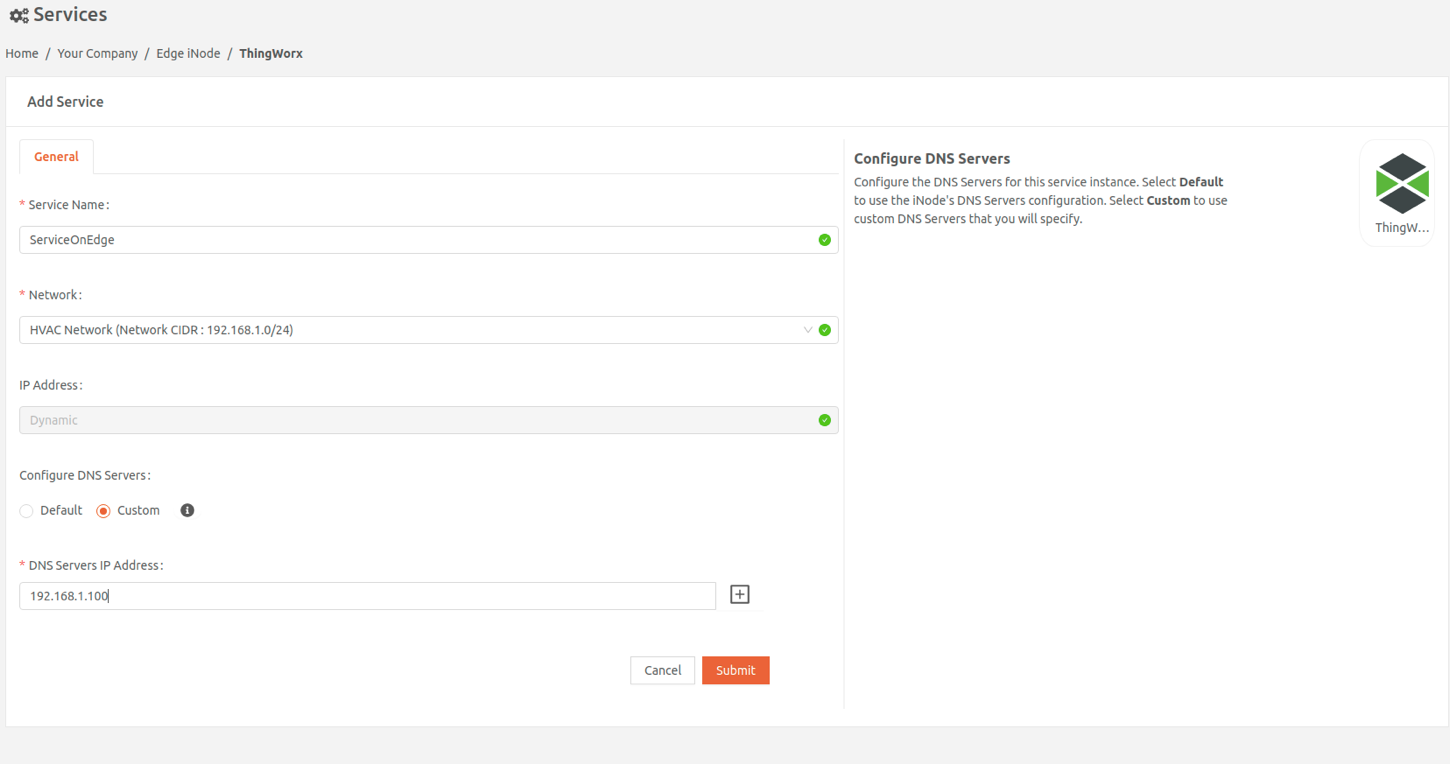
- Choose a service from the list of options. You can also select Custom to add a custom service. Refer to Deploy a custom service for instructions.
- Enter the name for the service instance, and select the network for this instance. If the network uses dynamic service addressing (default), then the node will allocate an IP address dynamically for the service instance. For static service addressing, specify the static IP address for the service instance.
- Configure DNS servers, if needed. By default, the service uses the node's DNS server configuration, which is displayed under DNS Servers IP Address. (For more details, see Configuring DNS servers for services.)
- Complete any service-specific options for the service you selected.
- Select Submit.
Run SkySpark as a service
Complete the steps below to add SkySpark to a node, provide the service license (required), and enable secure shell access:
- In the Secure Edge Portal, select Nodes > All Nodes, and then select the node to open its details page.
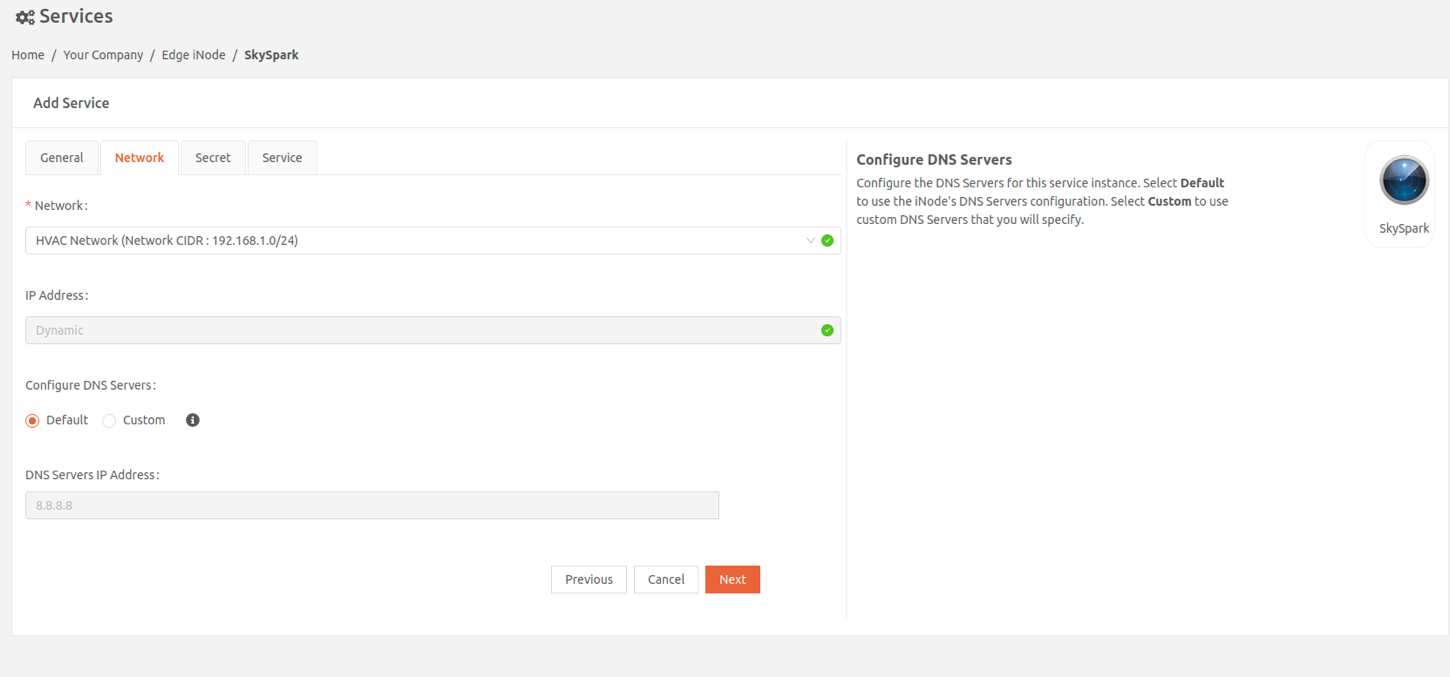
- On the Services tab, select the plus icon (+) to open the Add Service page, then select SkySpark.
- On the Add Service page, enter a name for this service instance.
- Continue to the Network tab. Configure DNS servers, if needed. By default, the service uses the node's DNS server configuration, which is displayed under DNS Servers IP Address. (For more details, see Configuring DNS servers for services.)
- Continue to the Secret tab. Upload a new license or select a previously uploaded license.
- To enable Secure Shell access (optional), upload a new SSH public key or select a previously used key. When uploading a new public key, enter a key name and paste the key file contents as plain text or base64-encoded format.
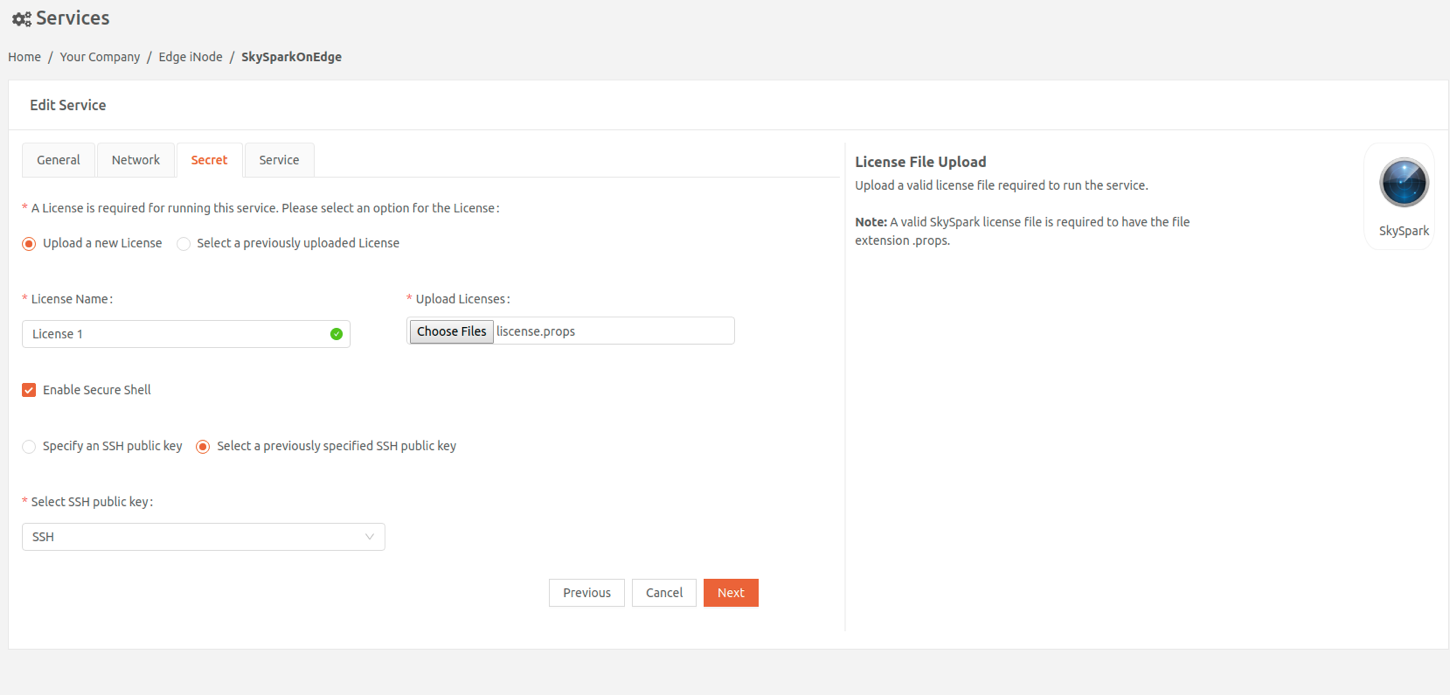
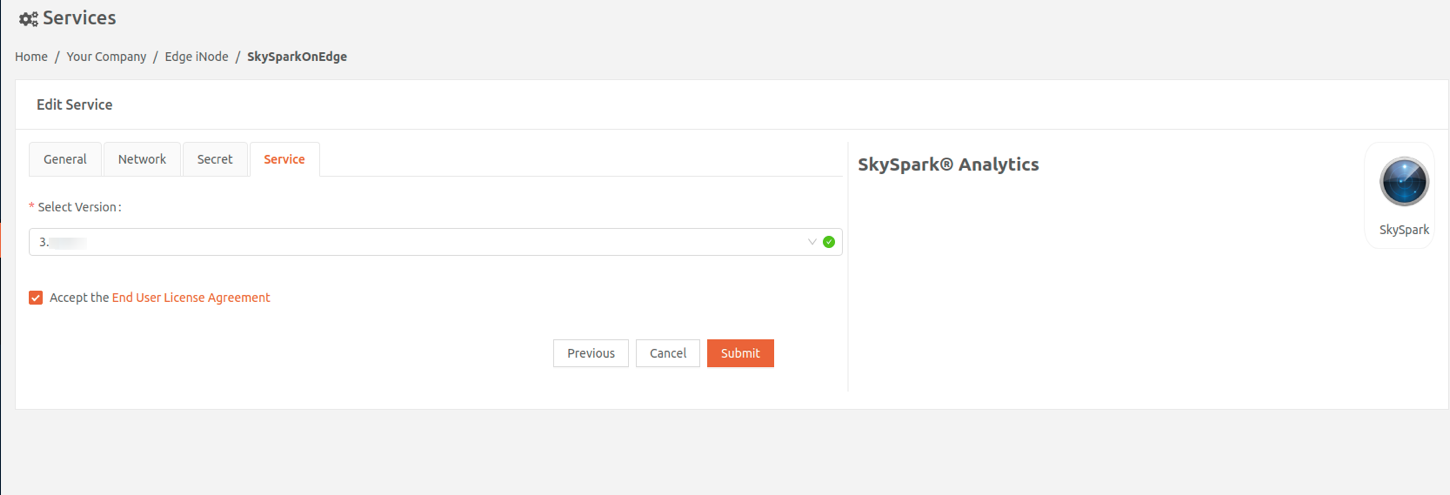
- Continue to the Service tab and select the SkySpark version, accept the End User License Agreement, and select Submit.
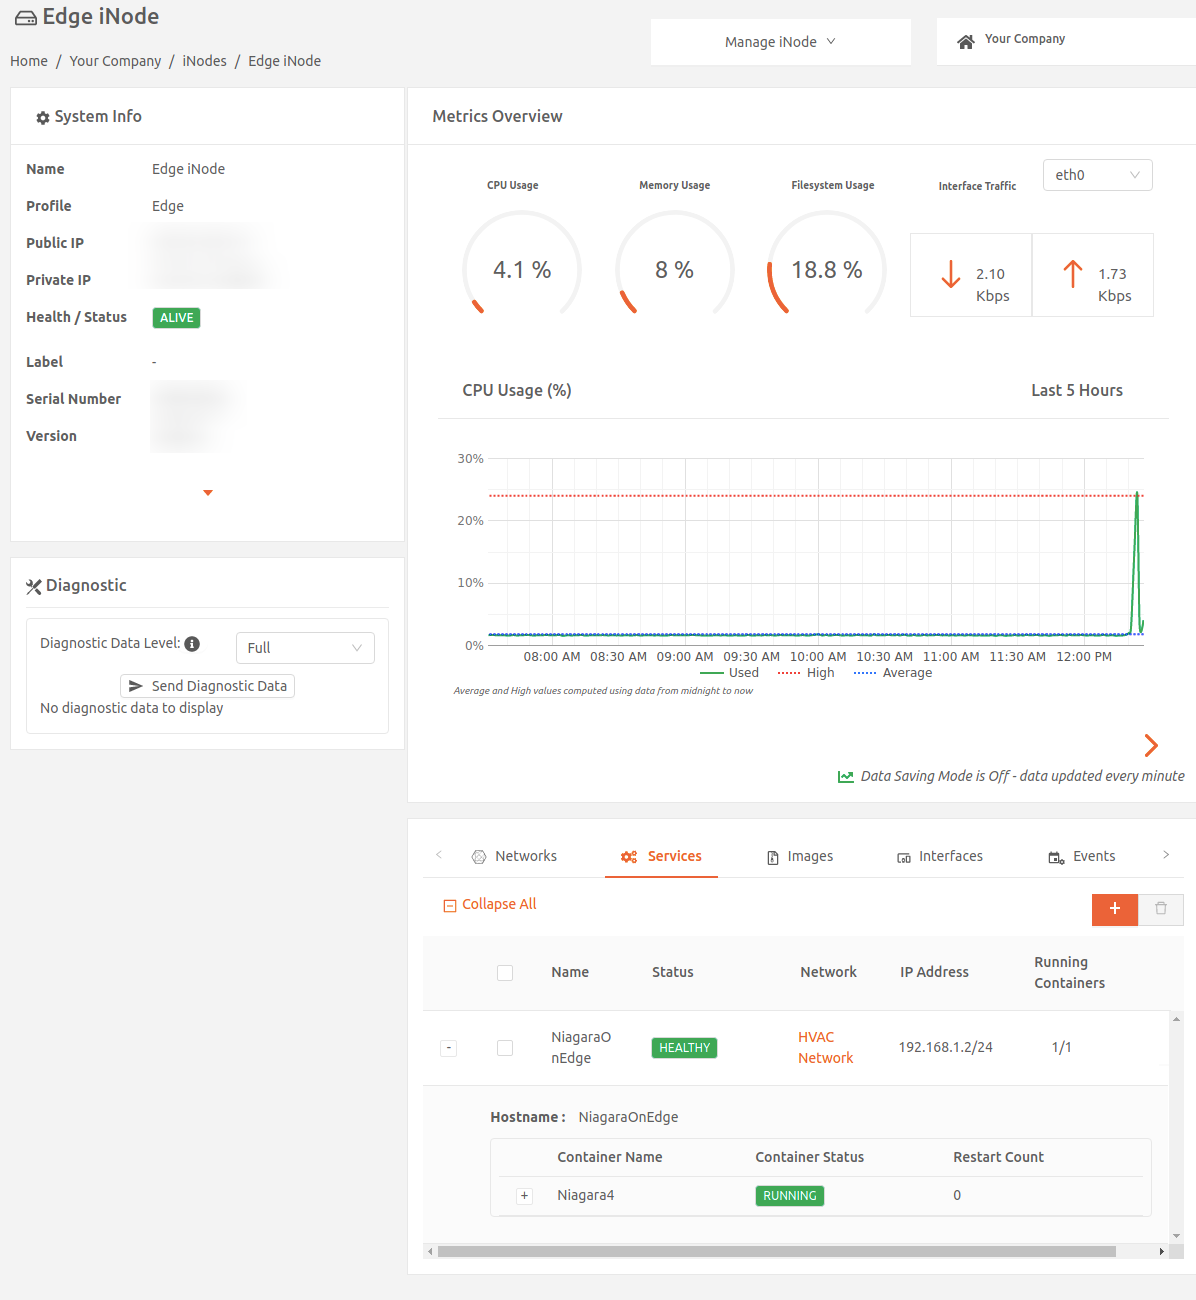
Service status is available on the node's Services tab. Once the service is successfully running, its status will change to HEALTHY. This may take a few minutes. Expand the service line item to see status and information on the containers in the service.
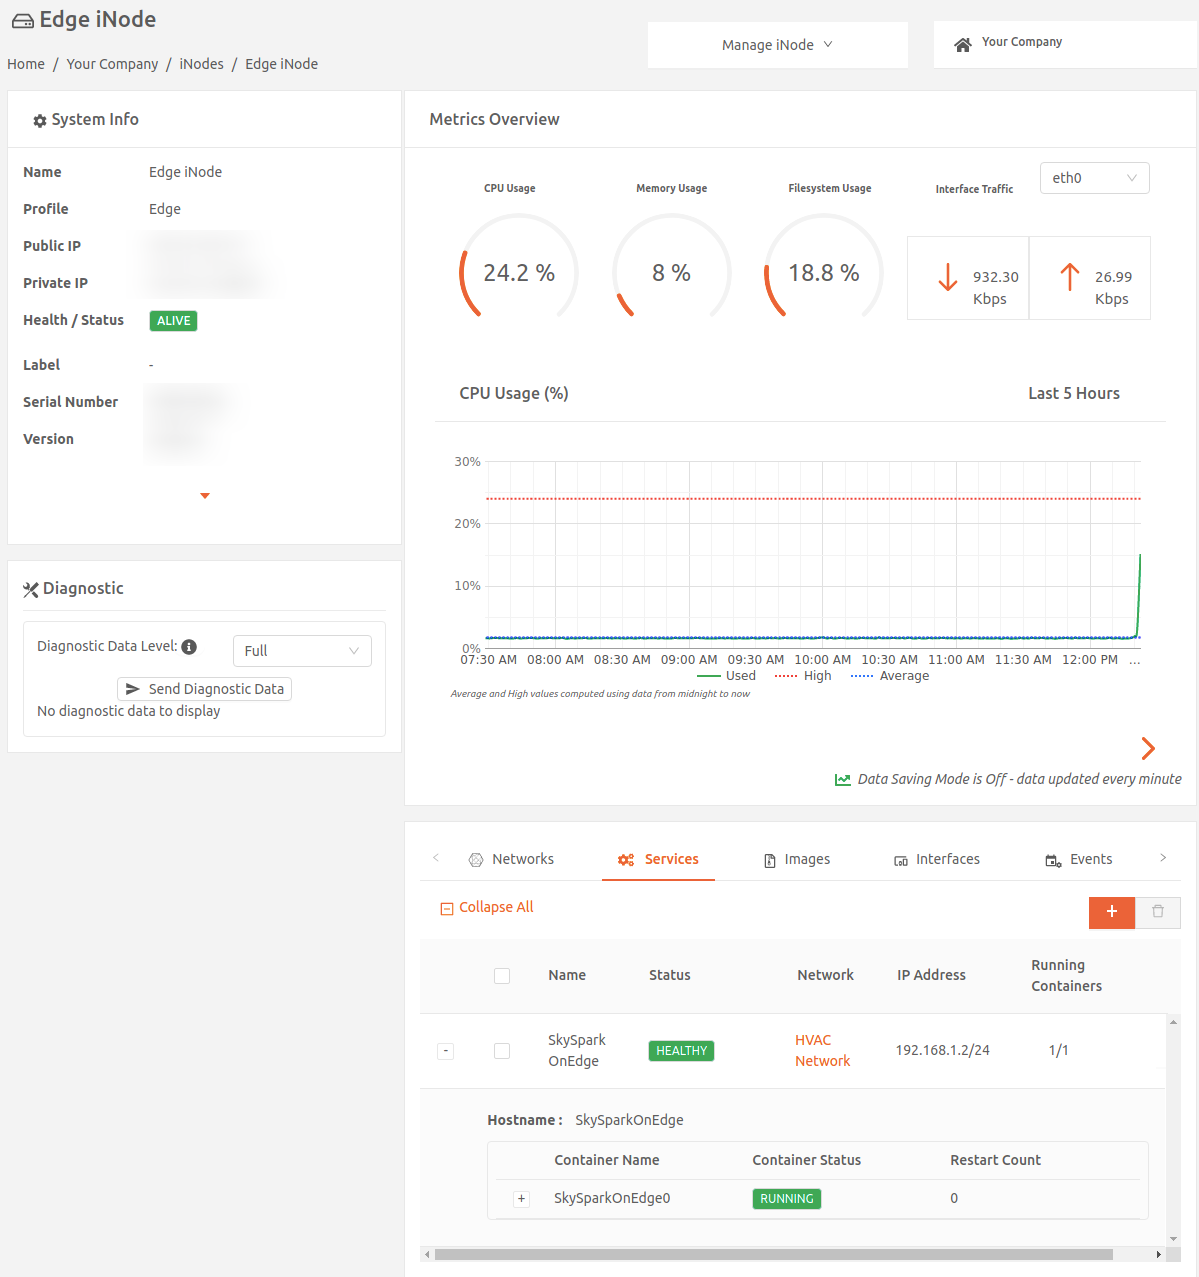
You can access the SkySpark instance through a browser using the service's IP address. Use the default user name and super user password specified during setup to log in.
Run Niagara4 as a service
To run Niagara4 as a service on a node:
- In the Secure Edge Portal, select Nodes > All Nodes, and then select the node to open its details page.
- On the Services tab, select the plus icon (+) to open the Add Service page, then select Niagara4.
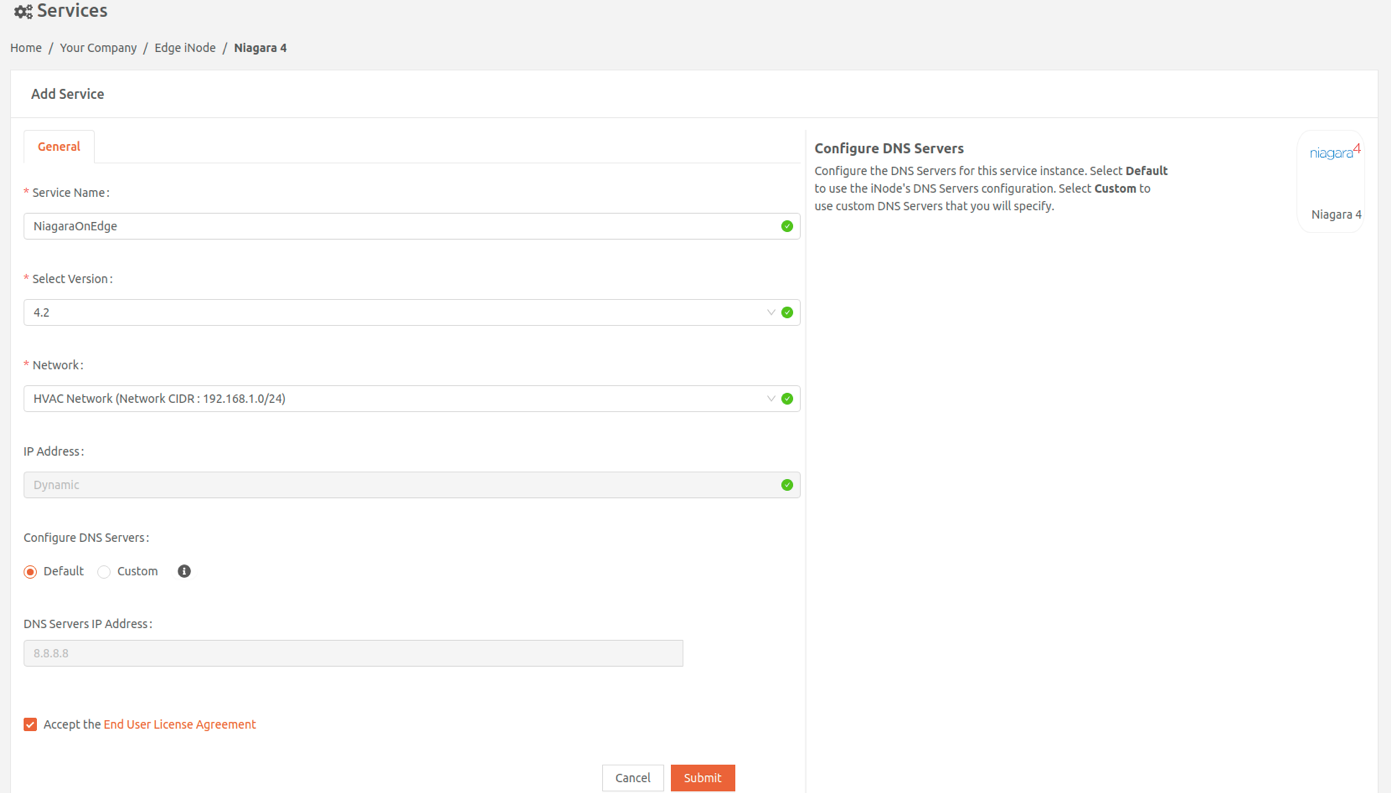
- Enter the name for the service instance, and select the network for this instance. If the network uses dynamic service addressing (default), then the node will allocate an IP address dynamically for the service instance. For static service addressing, specify the static IP address for the service instance.
- Configure DNS servers, if needed. By default, the service uses the node's DNS server configuration, which is displayed under DNS Servers IP Address. (For more details, see Configuring DNS servers for services.)
- Accept the End User License Agreement and select Submit.
Service status is available on the node's Services tab. Once the service is successfully running, its status will change to HEALTHY. This may take a few minutes. Expand the service line item to see status and information on the containers in the service.