Alerts in the Secure Edge Portal provide real-time notifications about critical events, helping you stay informed about the status of your nodes, services, and network. With alerts, you can monitor the status of connectivity, service health, resource usage, and more, to swiftly address any potential issues.
There are two ways to set up and receive alerts:
- Set up webhooks to receive programmatic notifications.
- Set up alerts through the Secure Edge Portal to receive email notifications.
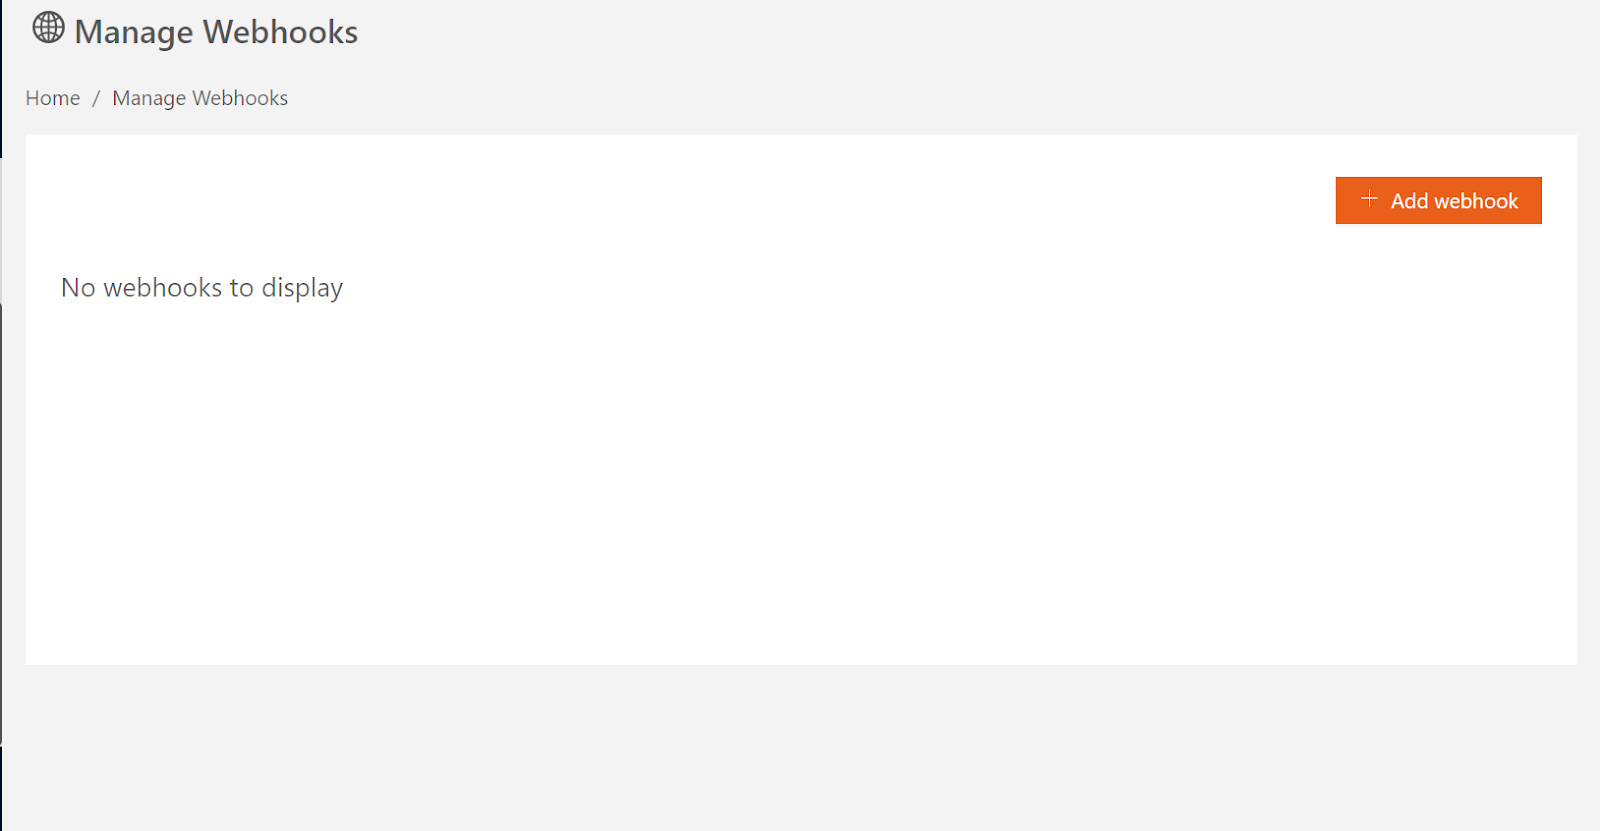
Managing webhooks
Webhooks notify you when an event that matches a specific condition is triggered. To receive alerts via webhooks, you need to add and configure them.
First, ensure the webhook feature is enabled at the organizational level. Once enabled, you will see the Manage Webhooks option under My Account in the portal's left menu.
For more information, see Using webhooks in the developer guide.
Add a webhook
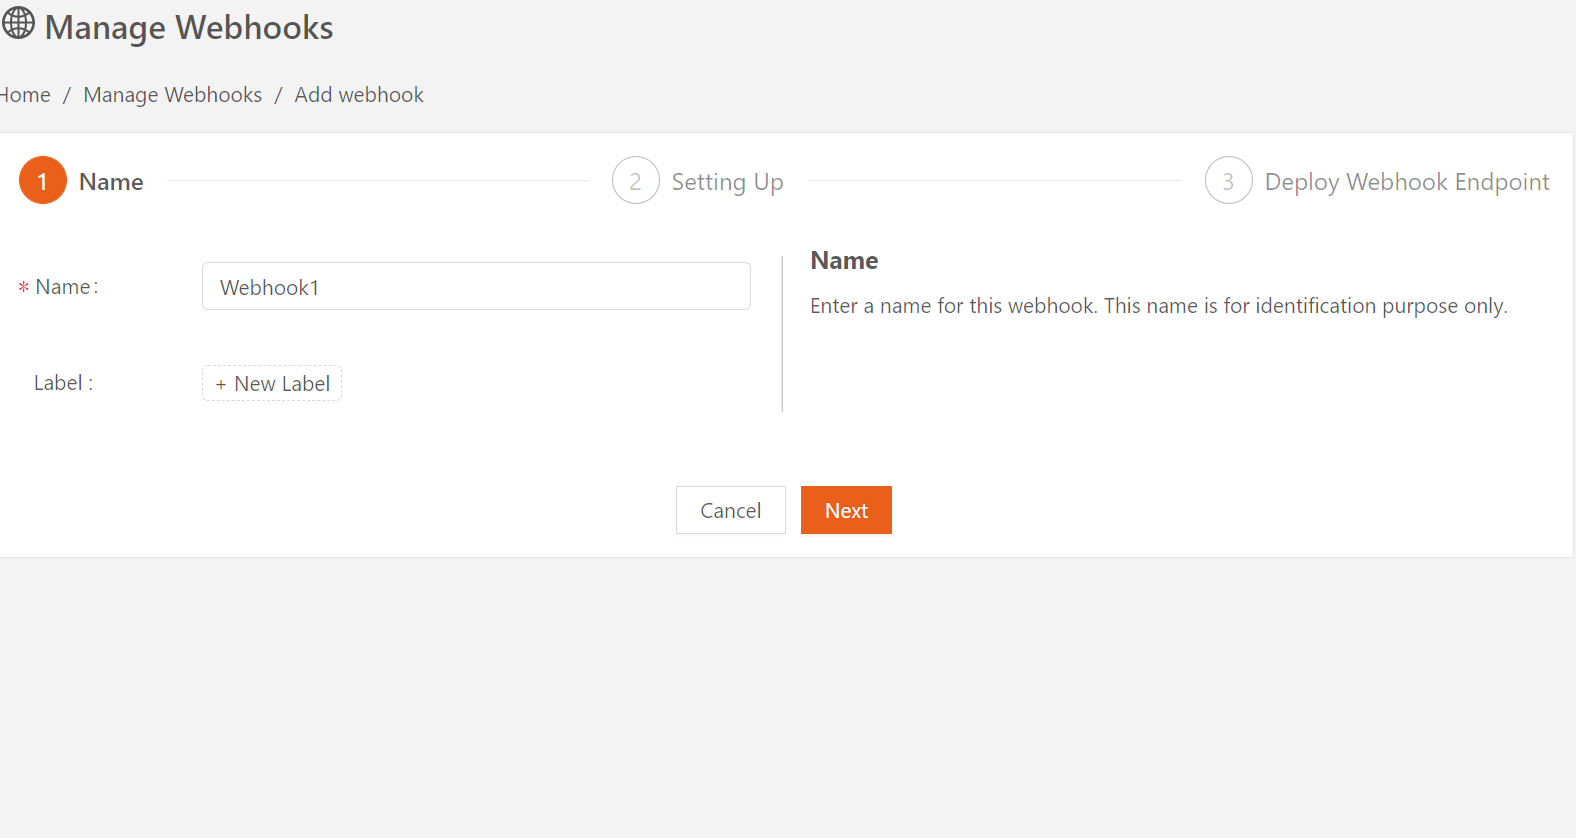
To add a webhook:
- In the Secure Edge Portal left menu under My Account, select Manage Webhooks and then select(+) Add webhook.
- Enter a name for the webhook and then select Next.
- Specify the webhook’s HTTPS URL and secret.
- Optionally, add up to three HTTP request headers to include when calling the webhook.
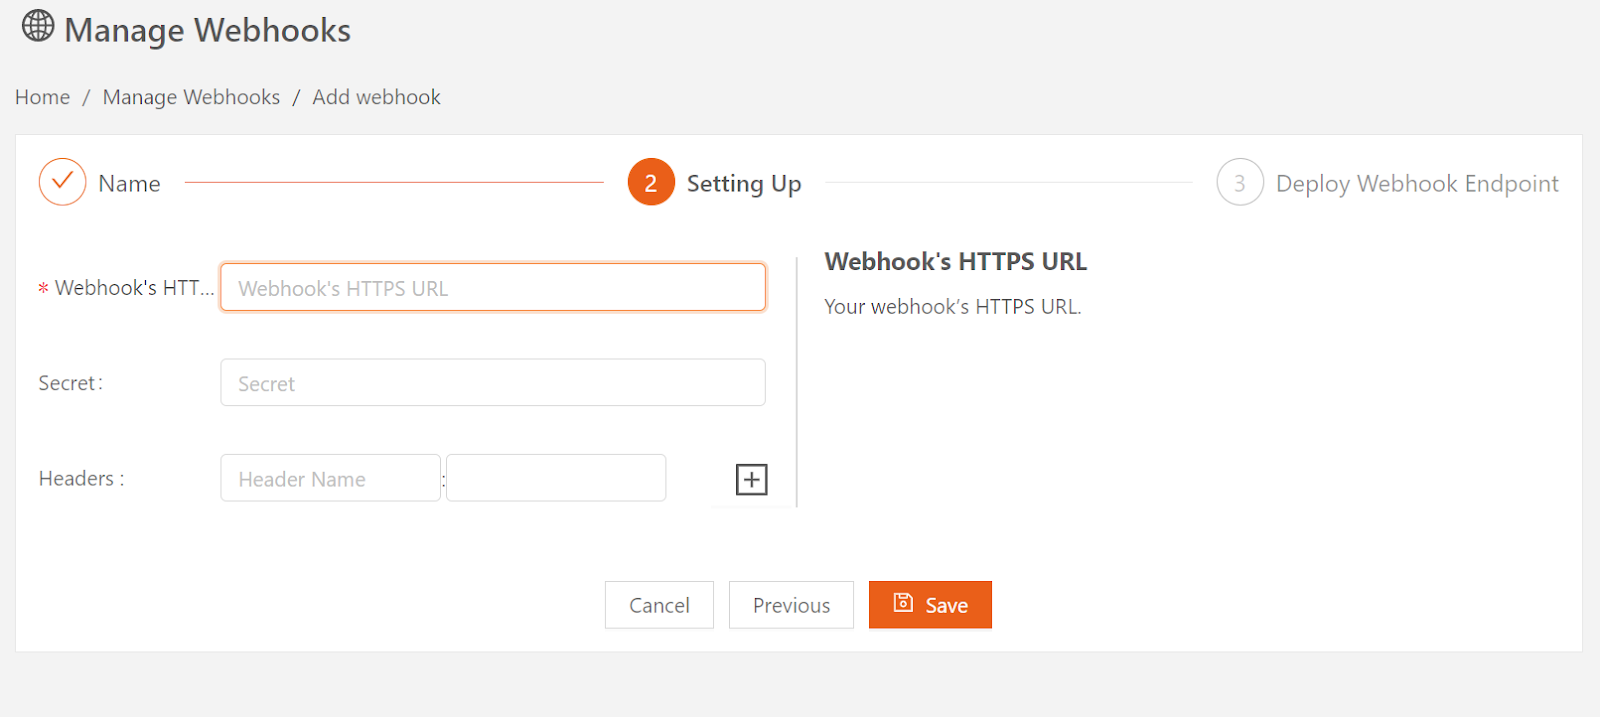
- Select Save to create the webhook.
Verify and test a webhook
- Select Verify webhook. Once verified, the webhook will appear in the alerts subscription list.
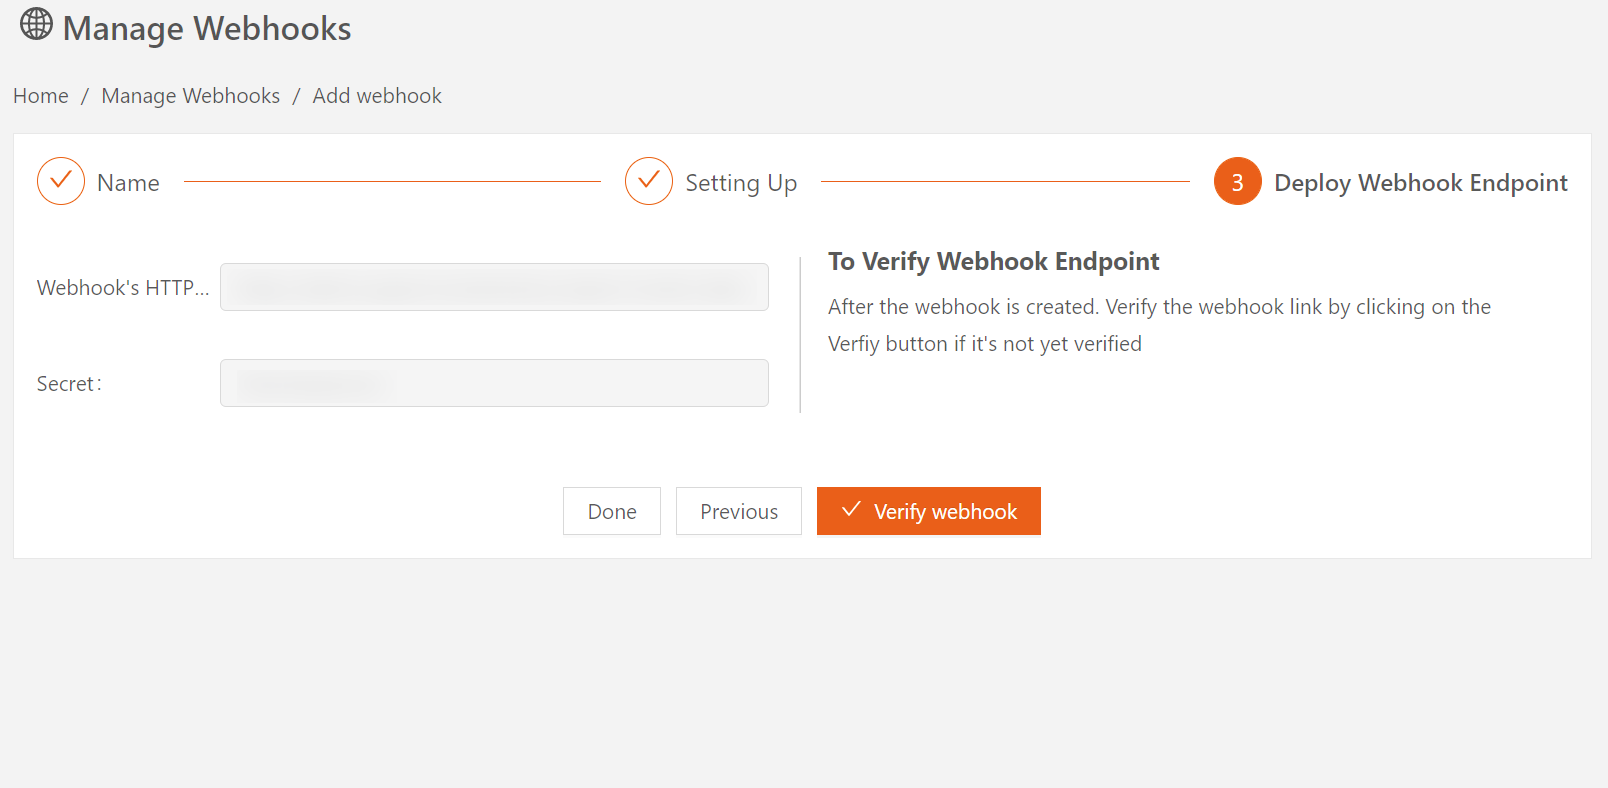
- Select Test webhook to ensure it works before associating it with an alert notification.
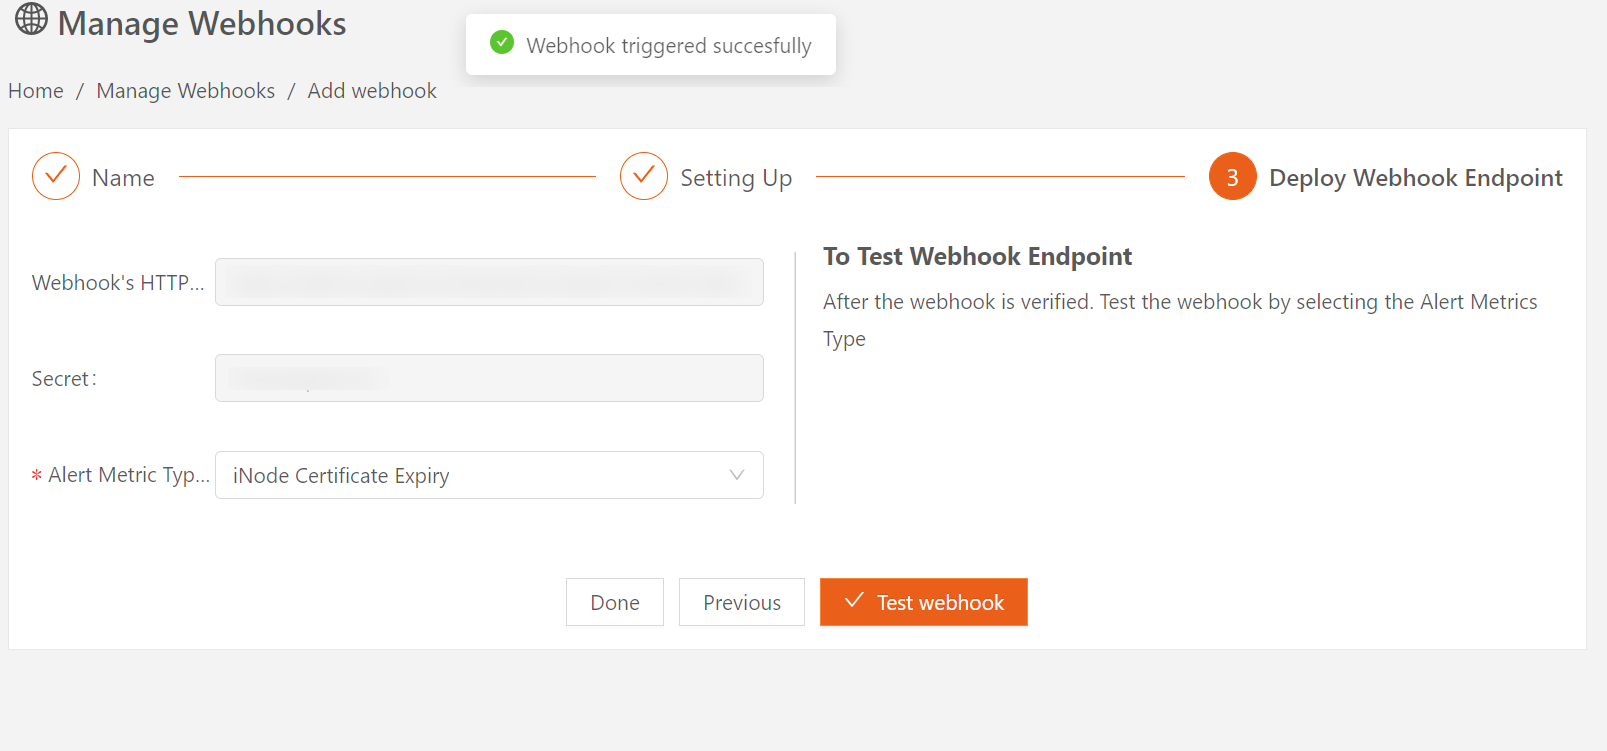
Once verified, the webhook will appear on the Manage Webhooks page.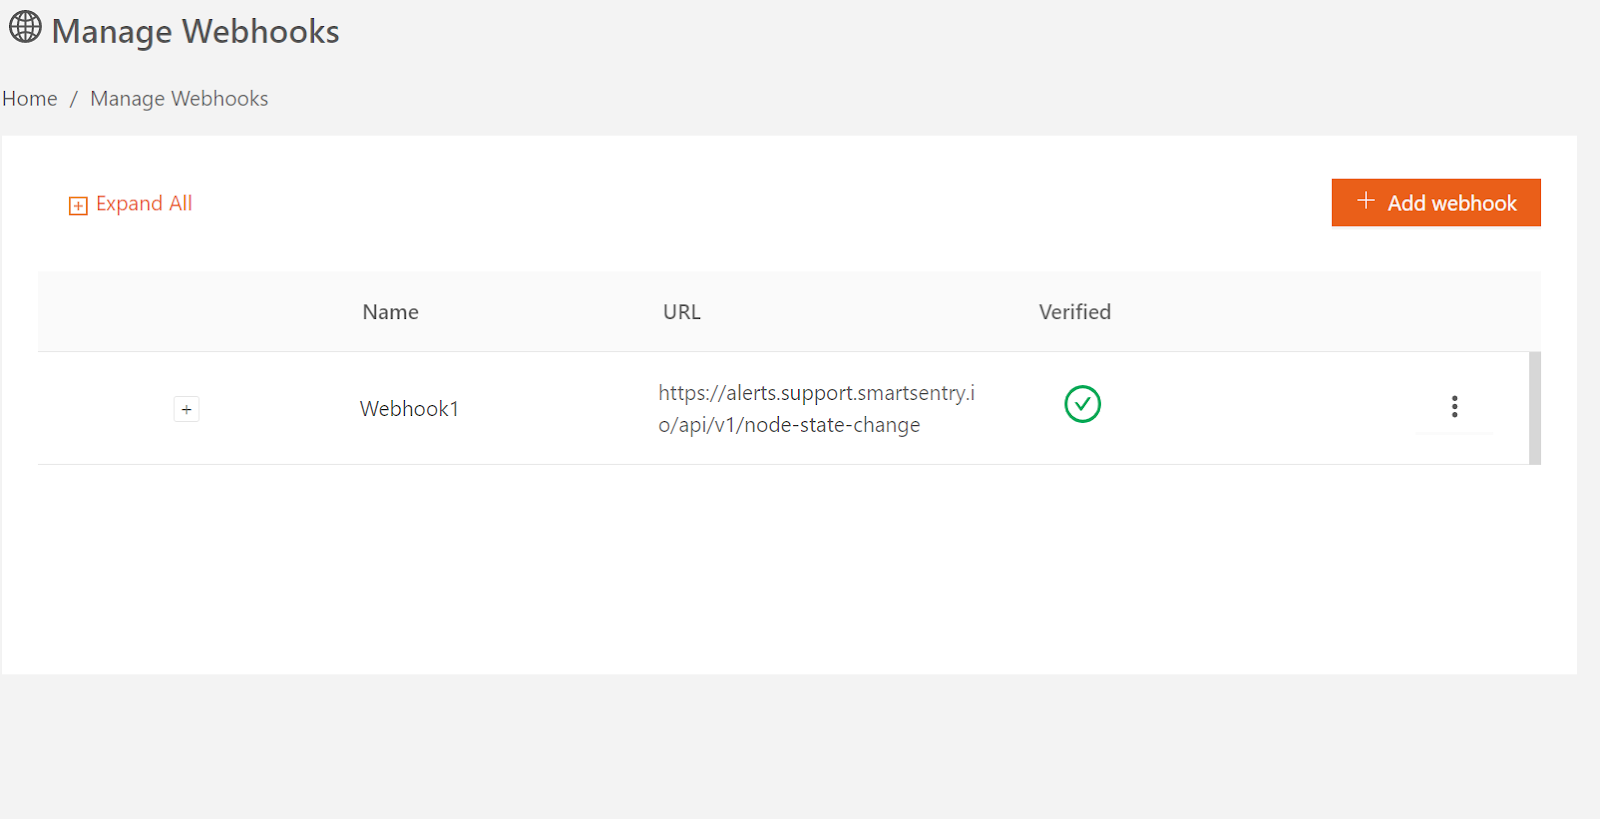
Alert conditions
Alerts can be triggered by a variety of conditions, outlined in the table below. You can set the target resource to be one of the following (unless otherwise noted below):
- All nodes in an organization
- A group of nodes (based on a label)
- An individual node
| Metric | Condition |
|---|---|
iNode Status | Node status ALIVE or UNREACHABLE for more than a specified period. Default is 5 minutes.
|
Remote Network Connection Status | Remote network connection status CONNECTED or TERMINATED for more than a specified period. Default is 5 minutes.
Note: When targeting an individual node, you can monitor all remote connections or a specific remote connection for that node. |
Service Status | Service status HEALTHY, UNHEALTHY, or TERMINATED for more than a specified period. Default is 5 minutes. See Edge services for more information about service status. Note: When targeting an individual node, you can monitor all services on that node or a specific service. |
Standalone Mode Expiry | Standalone mode has expired for the node(s) or is nearing expiration (less than 20% of the expiry period). Note: When you activate standalone mode for a node, a default alert is created for you automatically. |
iNode Certificate Expiry | Node certificate expired or will expire soon (less than 20% of the certificate's validity period). Notes:
|
iNode IP Address Change | Node’s public or private IP address changes and does not revert for more than a specified period. Default is 5 minutes. |
iNode Upgrade Status | Upgrade status of a node SUCCESSFUL or FAILED.
|
iNode Metrics | CPU, memory, or file system usage goes above the configured monitoring level and doesn’t fall below the limit for more than a specified period. Default is 5 minutes. |
Duplicate Address Detection | Duplicate Address status of a node DETECTED or RESOLVED.
|
| Threat Intelligence | A high-priority threat is detected, or the alert notification includes the daily threat summary report. |
Set up an alert in the portal
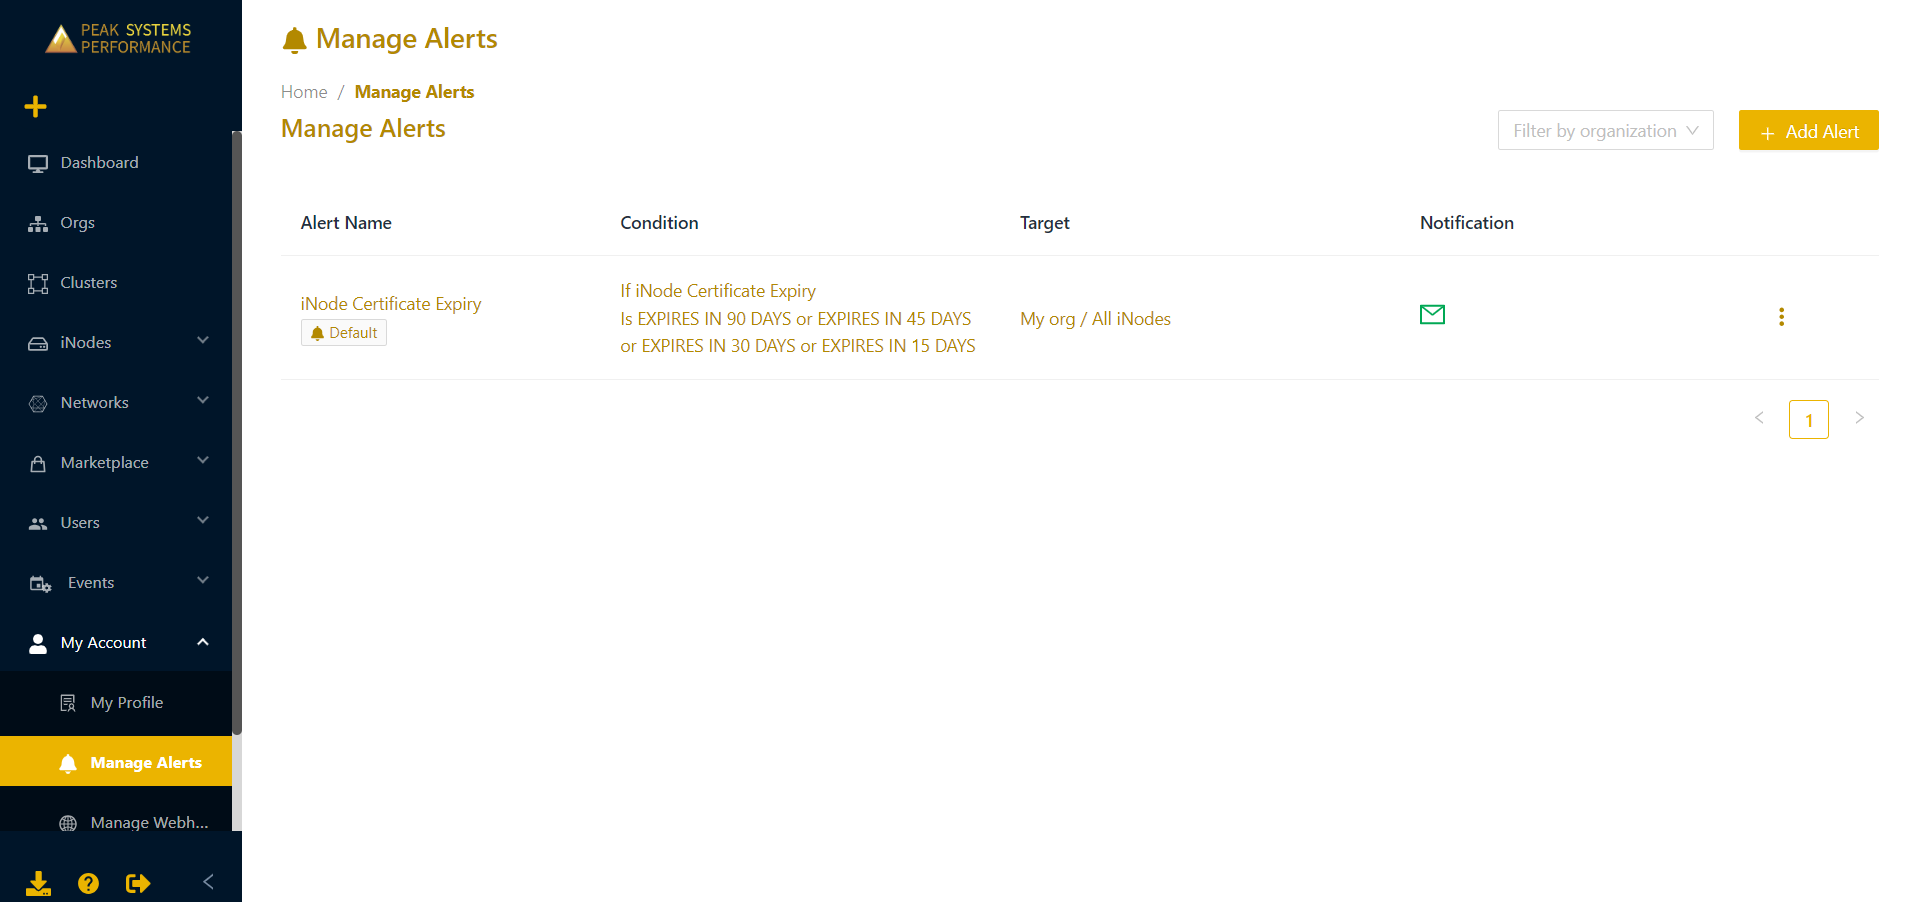
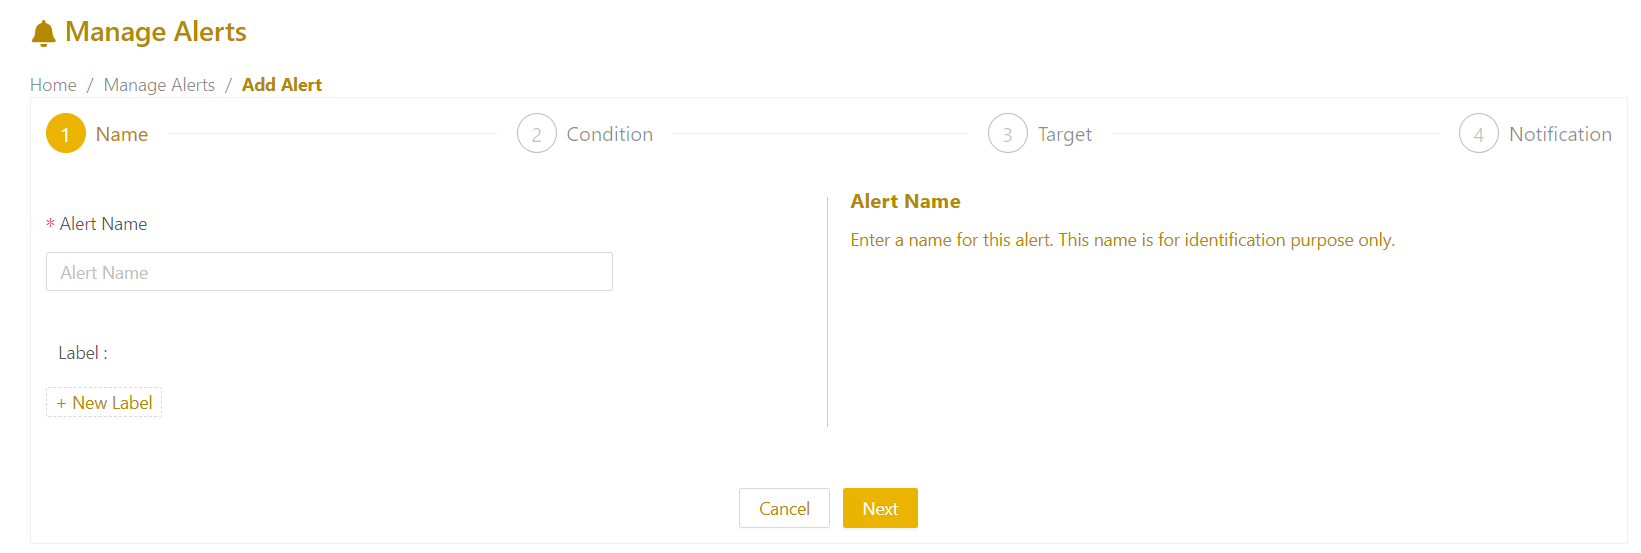
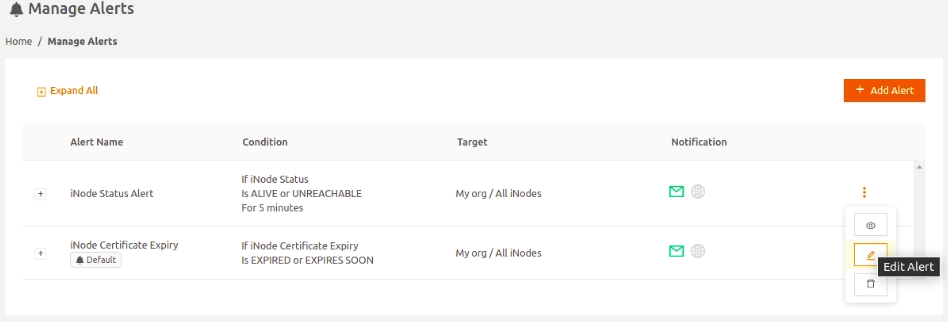
- In the Secure Edge Portal left menu under My Account, select Manage Alerts to open a list of your alerts.
- Select Add Alert and enter a name for the alert. Optionally, you can add a label to categorize the alert. Select Next.
- Choose the condition (metric) that will trigger the alert. Use the If drop-down to select the metric, and the Is field to define the condition value.
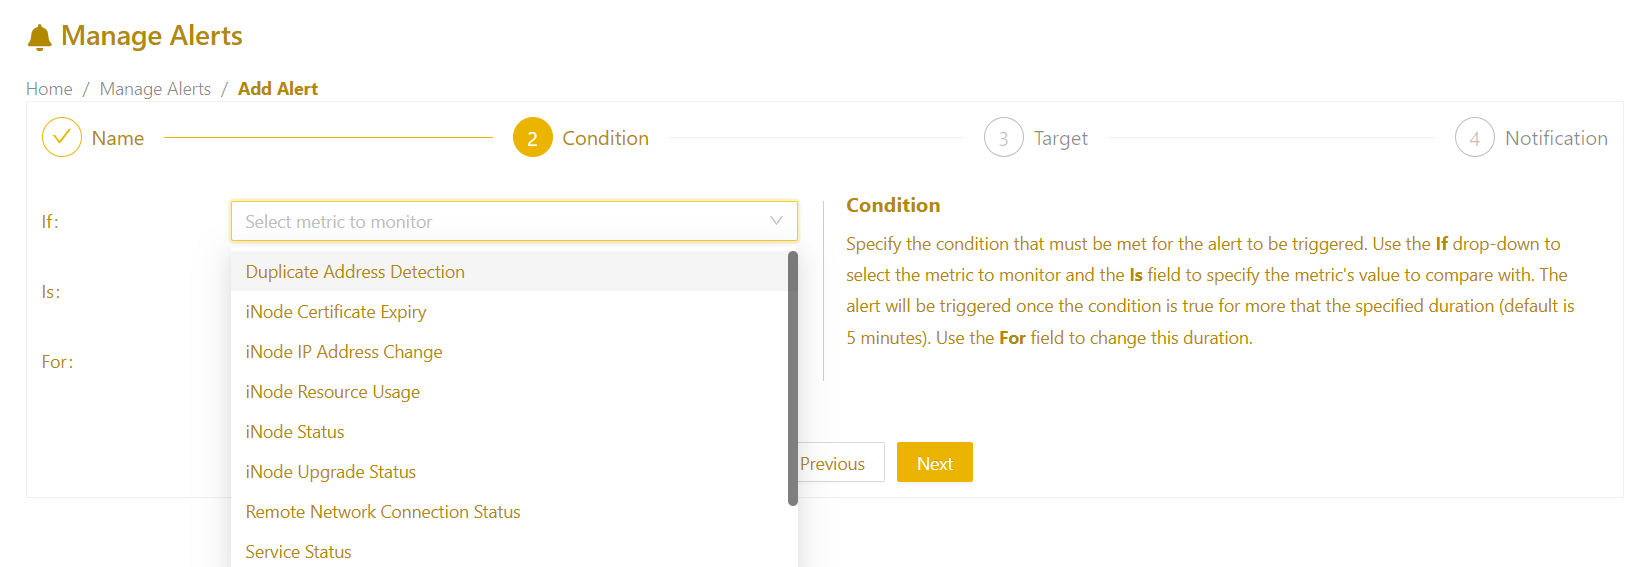 By default, alerts for Node Status, Remote Network Connection, Service Status, IP Address Changes, and Node Metrics are triggered after 1 minute. You can adjust this duration using the For field (for example, to eliminate false positives).
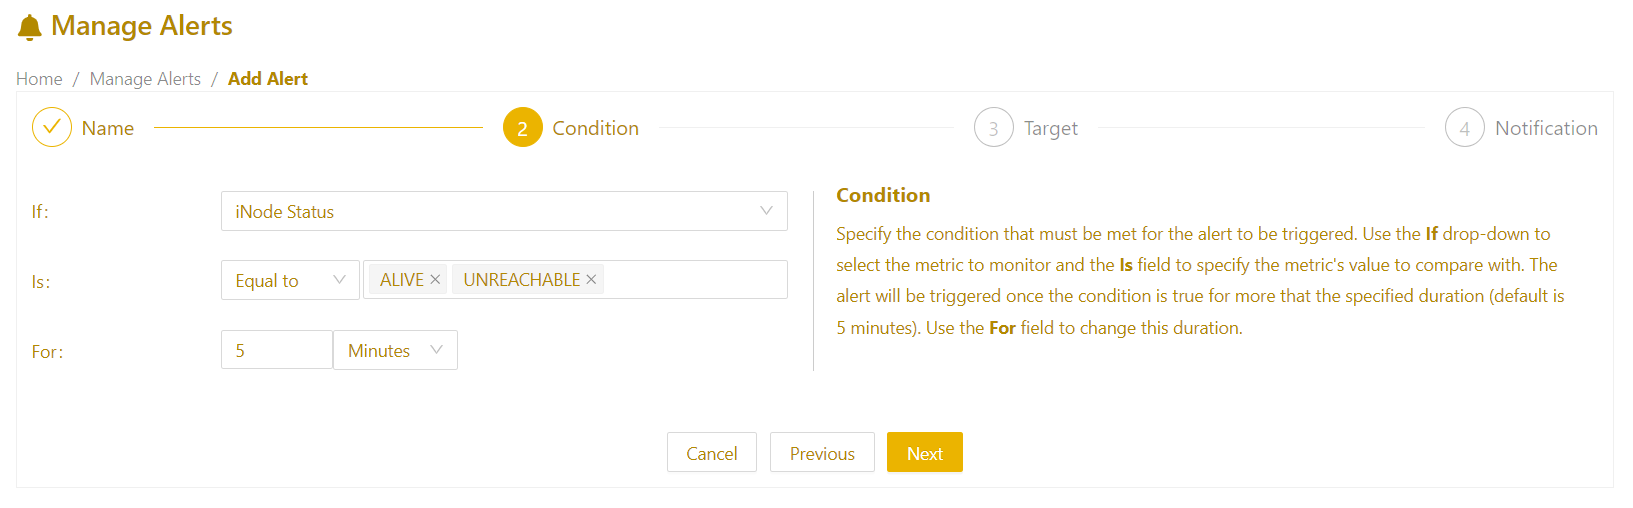
- Define the target resource for the alert:
- Select Scope as Org: Apply the alert condition to all applicable resources in the organization(s) you specify, either your org, your org and all child orgs, or a specific org.
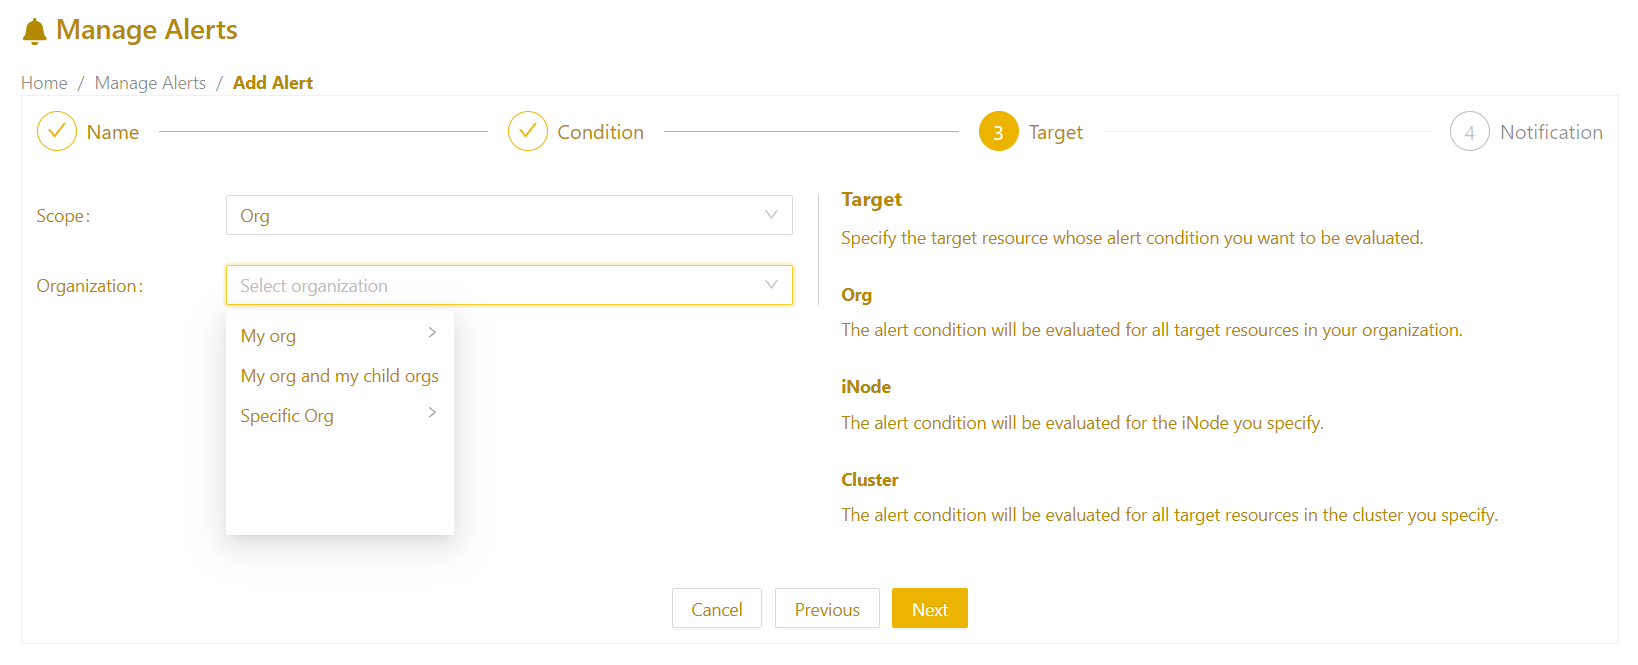 OR,
OR, - Select Scope as Node: Apply the alert condition to a specific node or a group of nodes by label. Or enter a new label in the format KEY:VALUE.
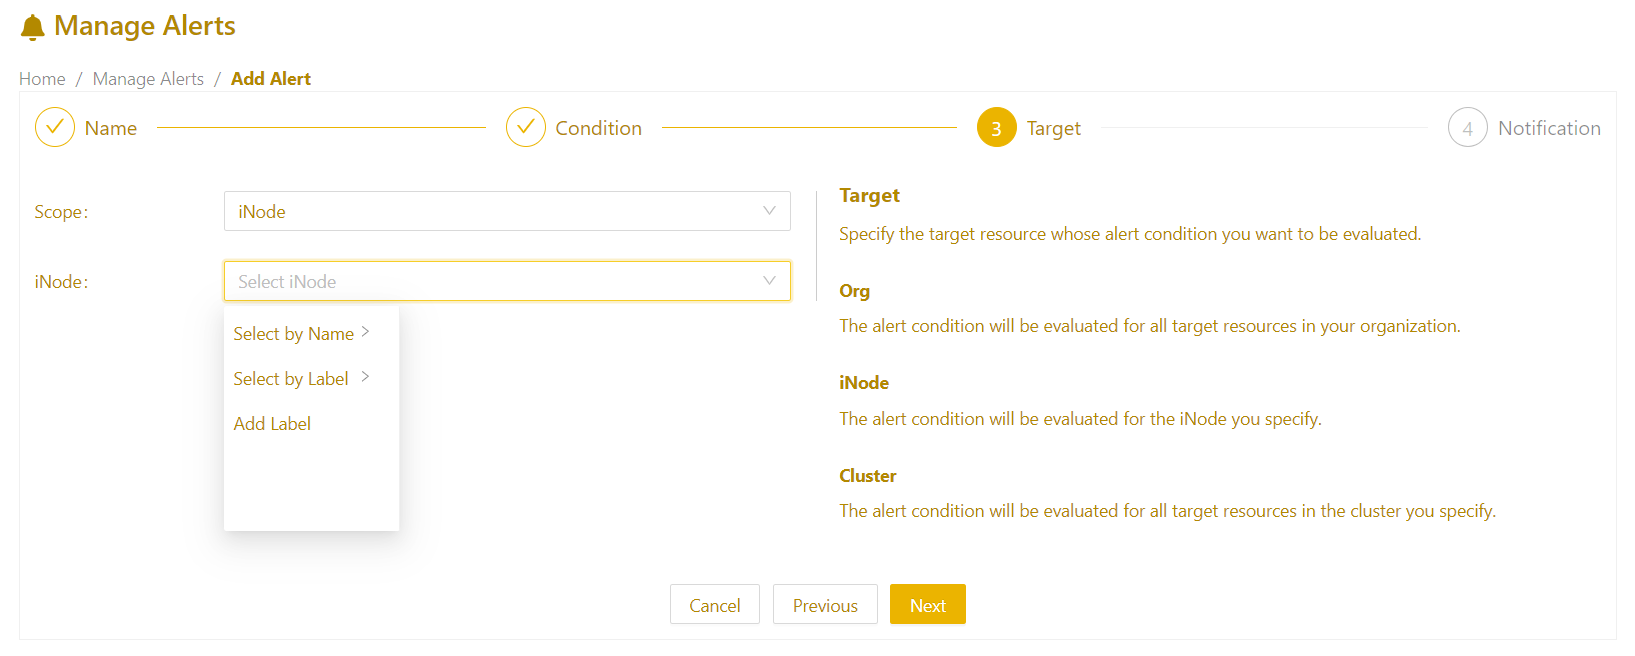
- Select Scope as Org: Apply the alert condition to all applicable resources in the organization(s) you specify, either your org, your org and all child orgs, or a specific org.
- Select Next to choose how to reveice notifications:
- Notification Email: The notification is sent to the email address of the currently logged-in user.
- Webhook. The webhook notification is sent to the configured HTTP URL in the webhook.
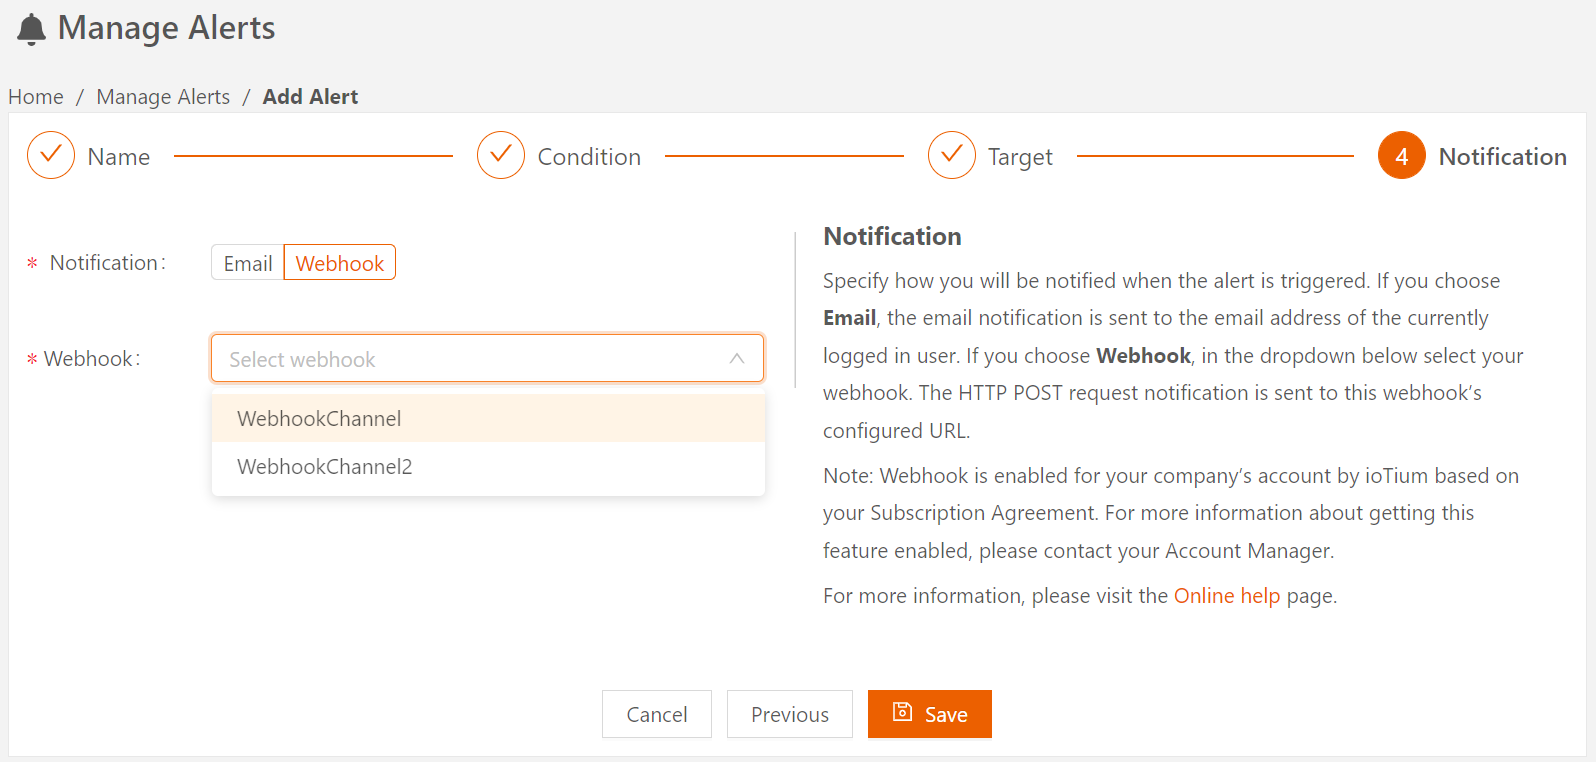
- Select Save to add the alert. Once the alert is successfully added, you can see it listed in the Manage Alerts page.
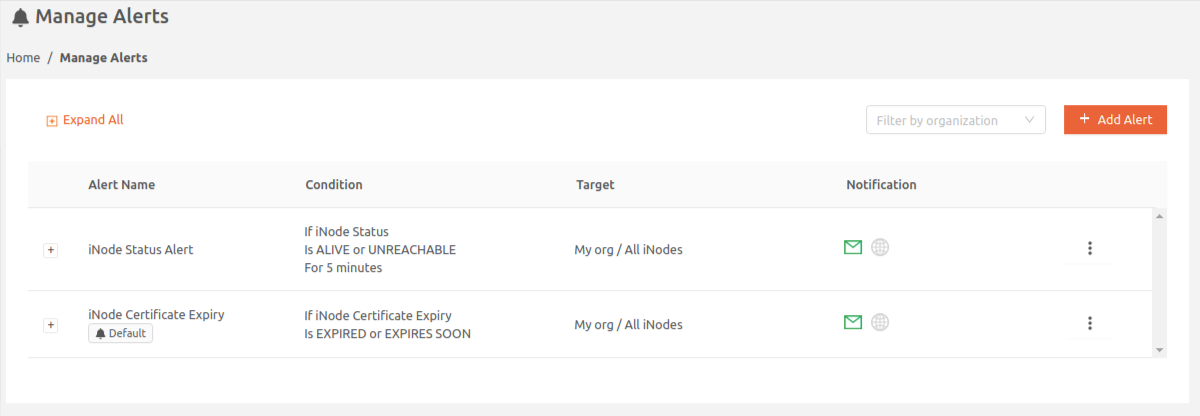
- Use the menu options to the right (three vertical dots) to view, edit, or delete alerts. Note that you cannot edit the If drop-down and notification details of an alert once it's been created.
Alert notification email
You’ll receive alert notifications by email from no-reply@neeve.ai.
Following is an example of an alert email notification.
.png)