This article explains how to use the Secure Edge Portal to provision Virtual Local Area Networks (VLANs). VLANs allow you to segment a single physical network behind an Edge Node (formerly Edge iNode) into multiple logical networks. This ensures that traffic on each VLAN is isolated, providing enhanced security and traffic management.
VLANs are enabled for your company’s account based on your Subscription Agreement. For more information, contact your Account Manager.
Before you provision a VLAN, ensure you know the VLAN IDs on the switch that the Edge Node's local network is connected to.
To add a VLAN:
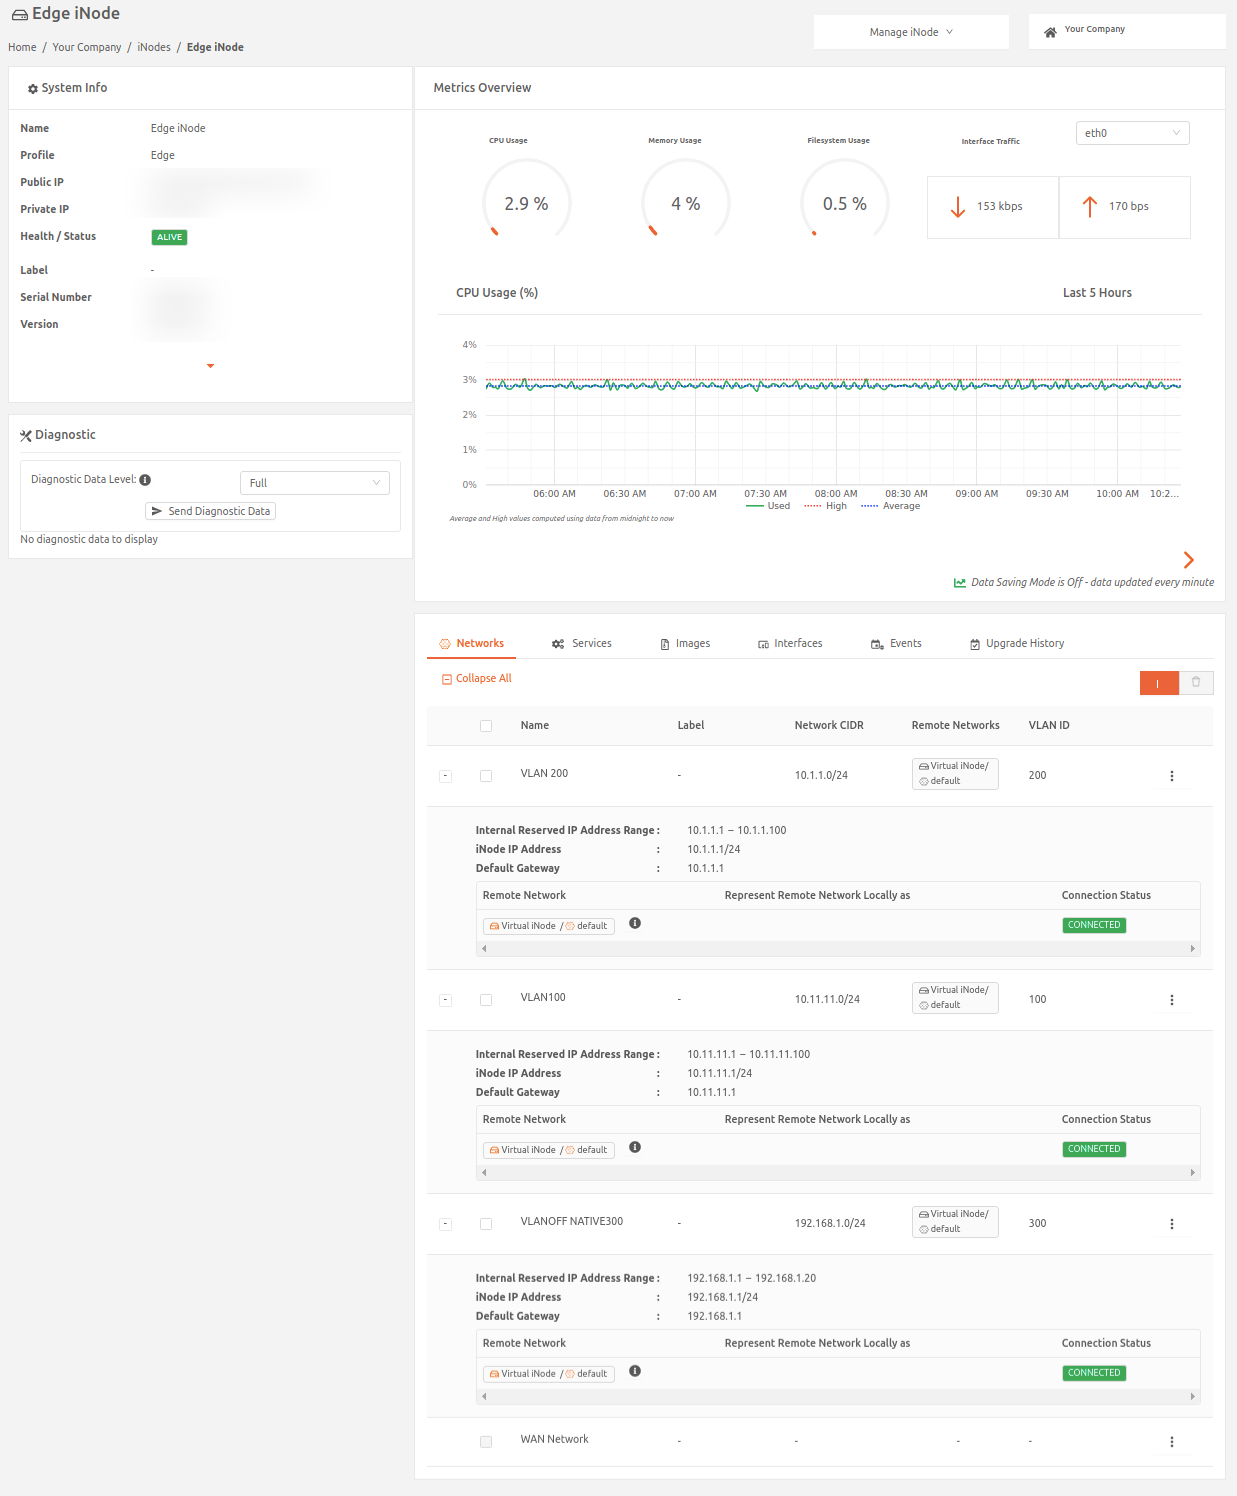
- From the Secure Edge Portal left menu, select Nodes > All Nodes, and then select the Edge Node to display its details page.
- On the Networks tab, select the plus sign (+) to open the Add Network page.
- Add the network Name, Network Addressing, Network CIDR, and Internal Reserved IP Address Range.
- Set VLAN to Enabled if you're adding a VLAN for tagged packets or Disabled if you're adding a native VLAN that handles untagged packets (Note: You can have only one disabled VLAN per Edge Node.)
- For enabled VLANs, set a unique VLAN ID in the range of 1 to 4094. You can’t set a VLAN ID for a native (disabled) VLAN.
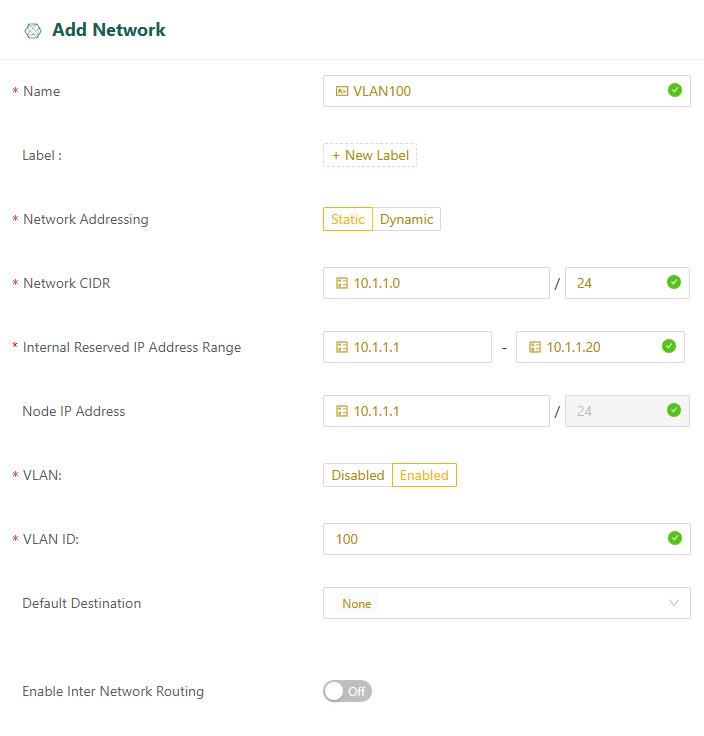
- Select Save.
Repeat these steps to add more VLANs as needed.
Once VLANs are added, they'll appear on the Networks tab of the node details page.