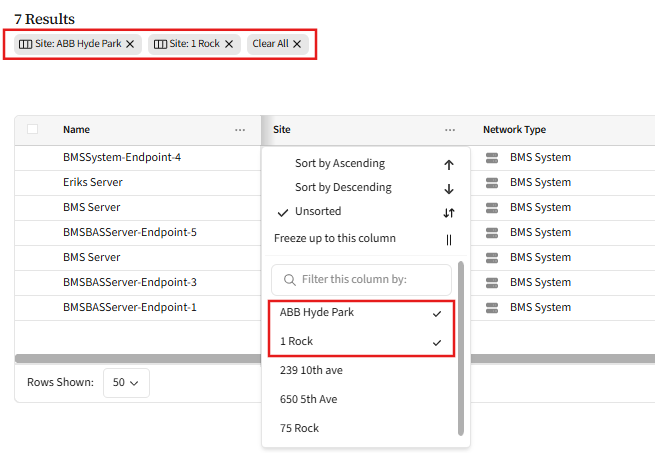
Currently, Admins can customize both the Endpoints and Users tables beyond the default display. Use the top-level search bar to search on any value, or to quickly apply a filter. However, you can also customize which columns to include in the table, and sort, freeze, or filter at the column level. Any changes you make to your custom view will save to your profile for the next time you log in to the portal, and will also apply to the data you export (Export CSV option).
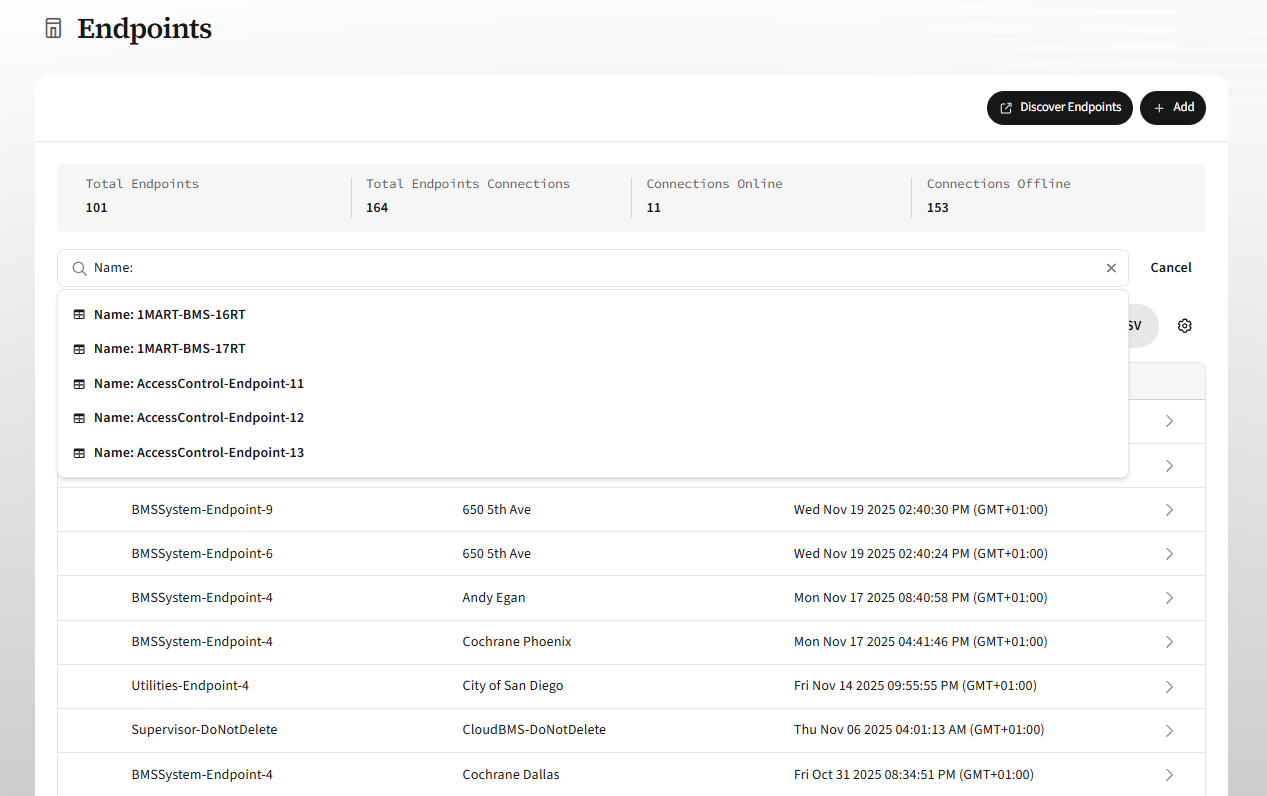
To search across all table fields, start typing in the top-level search bar. You can also search within a specific column from the top-level search bar, as shown below.
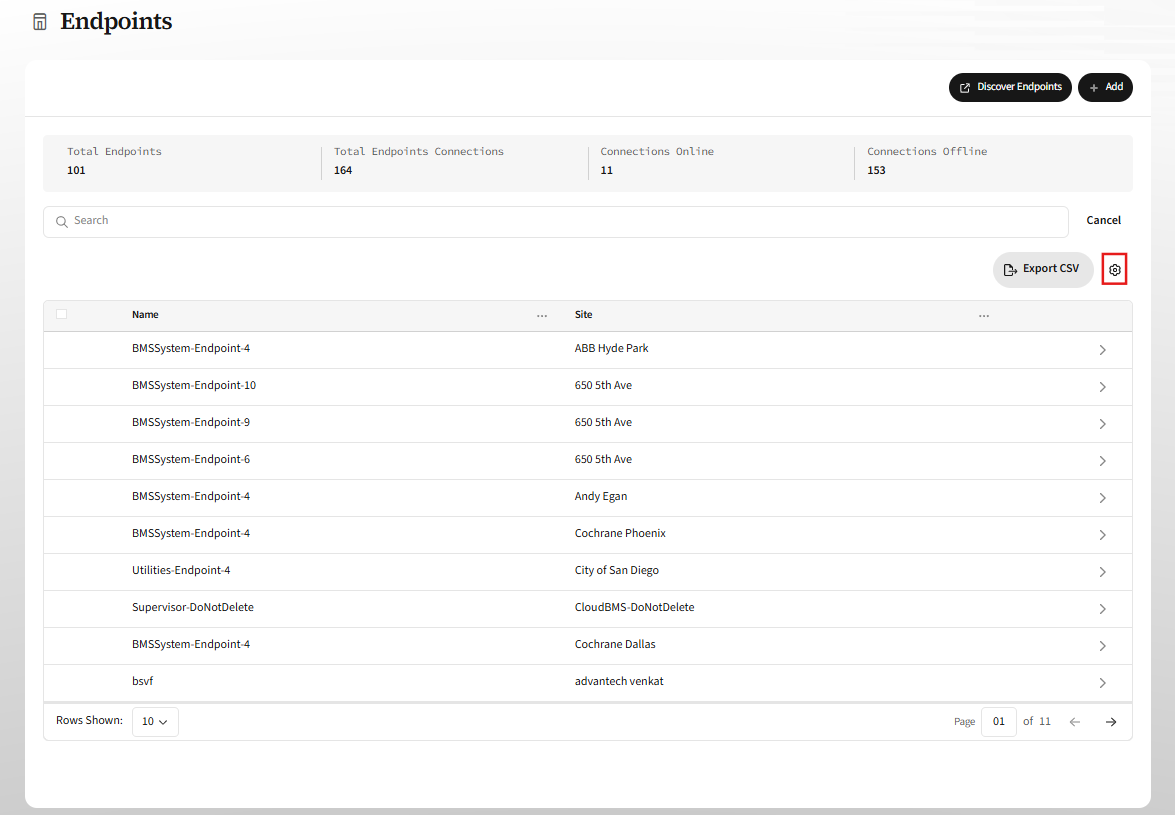
To modify column width, simply drag a column border. To customize your table columns further, select the gear icon on the upper right.
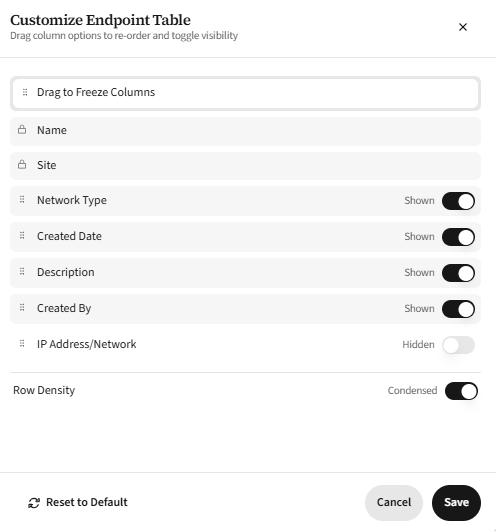
In the Customize Endpoint/User Table dialog, toggle any columns you want to add to Shown. You can also drag these columns to change their order. To increase the number of rows per page, toggle Row Density to Condensed. To undo any changes, select Reset to Default.
Default columns
You cannot move or hide a table’s default columns. For the endpoints table, those are Name and Site. For the users table, those are Name, Permission Type, and Company.
You can apply additional customization at the column level. Use the column headers to sort data, filter on one or more column values, or drag columns to rearrange their order. You can also choose to freeze one of the default columns when scrolling horizontally.
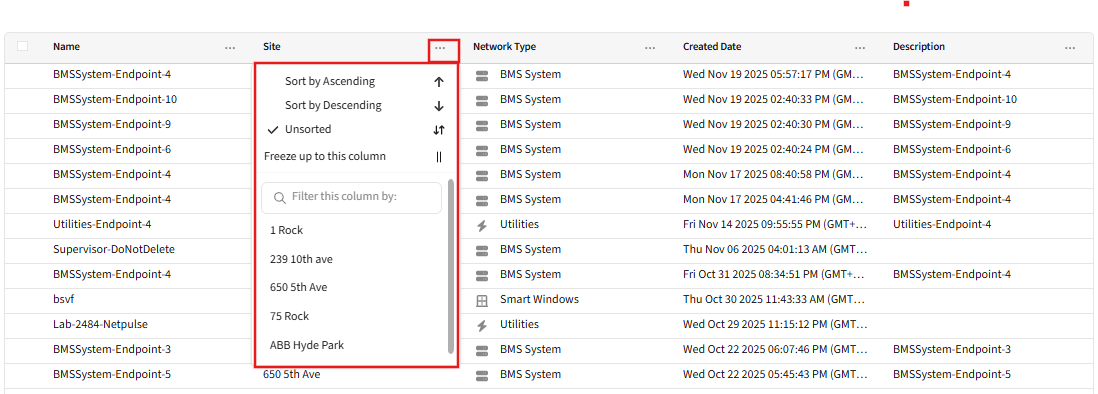
To remove a column filter, click the X of the filtered value above the table, or deselect it in the column setting.