Security policies protect your node networks by controlling traffic both to and from the network, as well as traffic between a service running on the Edge Node (formerly Edge iNode) or Virtual Edge Node (formerly Virtual Edge iNode) and devices behind it in the local network. Each security policy consists of rules based on an 8-tuple structure:
- Source/destination network
- Traffic direction
- Source/destination CIDR
- Source/destination port
- Protocol
Each security policy rule contains the following fields:
- From/To Network — The originating or destination network for the traffic.
- Traffic Direction - The direction of traffic flow: either from a service running on the node to a local device behind the node, or vice versa. It is applicable only when both source and destination network are specified as local network in a rule.
- Priority — A value from 1 to 65535, inclusive. Security policy rules are processed based on priority, with lower numbers taking precedence. Note that custom security policy rules use the priority range 1000 to 10000; the rest are reserved for Secure Edge internal use.
- Protocol — Protocol for the traffic (SSH, TCP, etc.).
- Source/Destination Port — A specific port or a range.
- Source/Destination CIDR — A specific IP address or a CIDR block.
- Action — Allow or deny the traffic that matches the rule.
The security policy rules are stateful. Thus, if a rule allows traffic in one direction, return traffic in the opposite direction is also allowed.
Default security policies
By default, each node network is assigned a security policy. You can modify these policies by adjusting network settings or creating custom security policies. The default security policy, related network settings, and any custom security policies are aggregated to create one set of security policy rules, which is matched against all traffic passing through the node network.
WAN network default security policy
Node WAN networks have the following default security policy:
- Inbound:
- For Cloud Connectors (formerly Virtual iNodes) only: Allow all HTTPS traffic rule, set at high priority. This is required for the Secure Edge service to function and cannot be overridden.
- Deny all traffic rule, set at low priority. You can create custom policies to override this rule and allow for specific traffic, for example: Allow inbound SSH.
- Outbound:
- Allow all HTTPS traffic rule, set at the highest priority. his is required for the Secure Edge service to function and cannot be overridden.
- Allow all traffic rule, set at low priority. You can create custom policies to override this rule and deny specific traffic, for example: Deny outbound ICMP.
Local network default security policy
Node local networks have the following default security policy:
- Inbound:
- Allow all traffic rule, set at low priority. You can create custom policies to override this rule and deny specific traffic, for example: Deny outbound ICMP.
- Outbound:
- Deny all traffic between remote networks via this network, set at low priority. You can override this rule by changing the network setting Inter Remote Network Traffic. For more information, see Inter-remote network traffic below.
- Allow all traffic rule, set at low priority. You can create custom policies to override this rule and deny specific traffic, for example: Deny outbound ICMP.
Inter-remote network traffic
When multiple Edge Nodes are connected to one Cloud Connector, you can allow or deny communication between the Edge Node networks through the Cloud Connector network. By default, the Cloud Connector network is set to deny all traffic between remote networks. You can modify this setting to allow traffic and use the Cloud Connector as the hub.
Use the following steps to change the Cloud Connector network to allow all traffic between remote networks:
- In the Secure Edge Portal, select Nodes > All Nodes, and then select the Cloud Connector to display its details page.
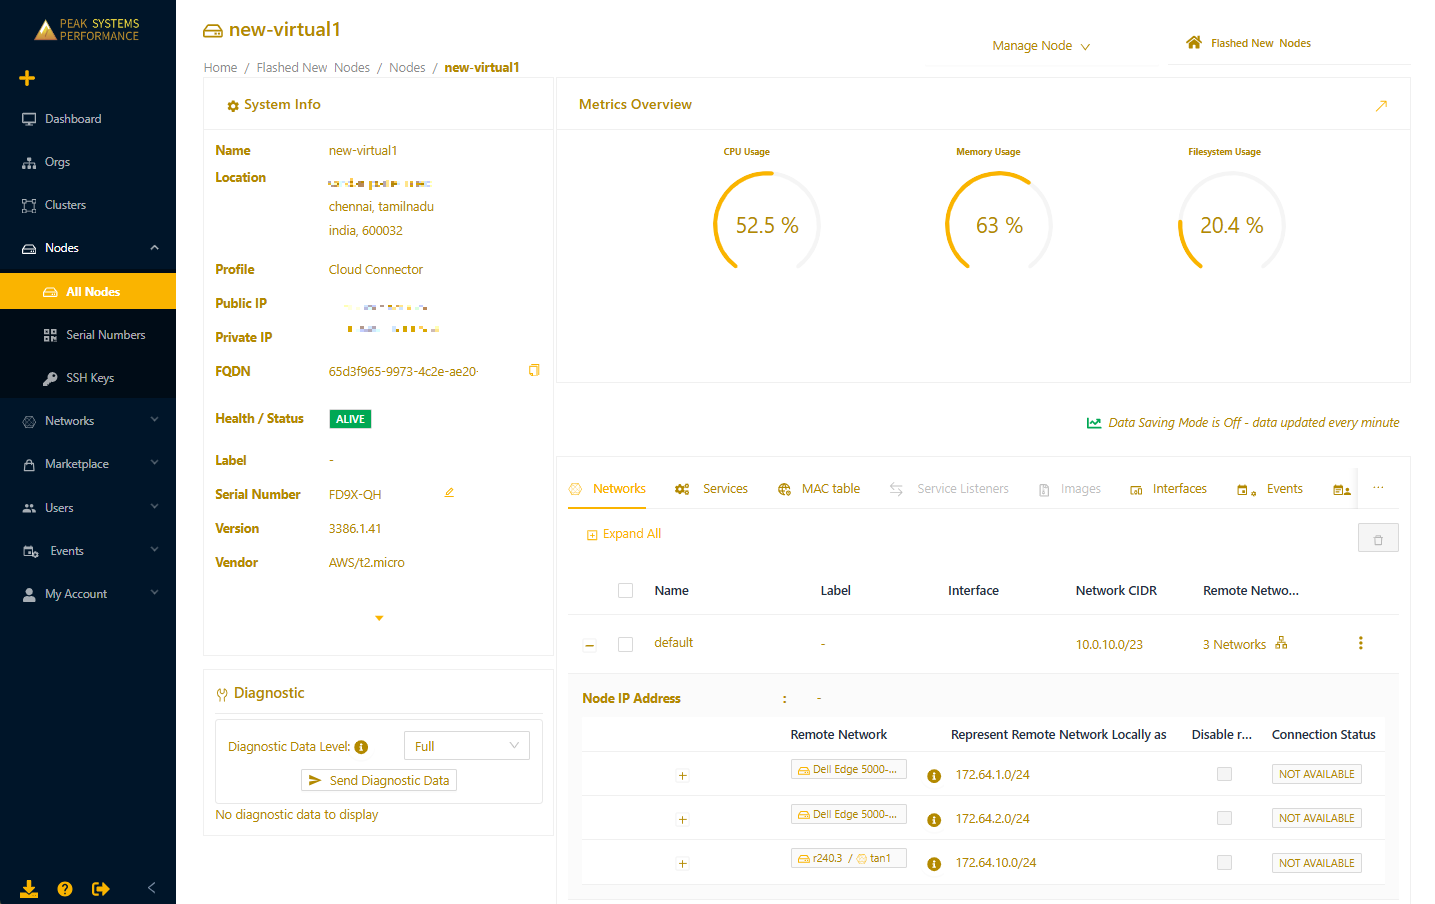
- In the Networks tab, select the name of your local network to open the Edit Network page.
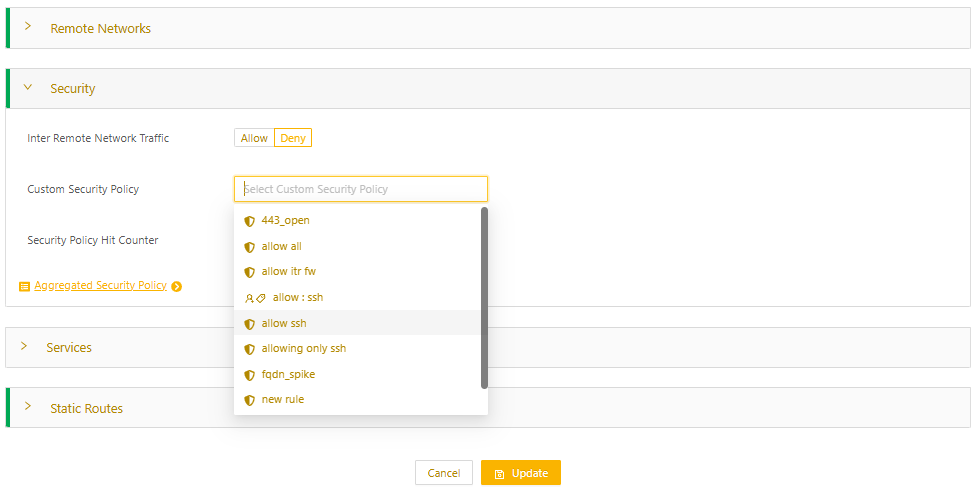
- Expand Security and then change Inter Remote Network Traffic to Allow.
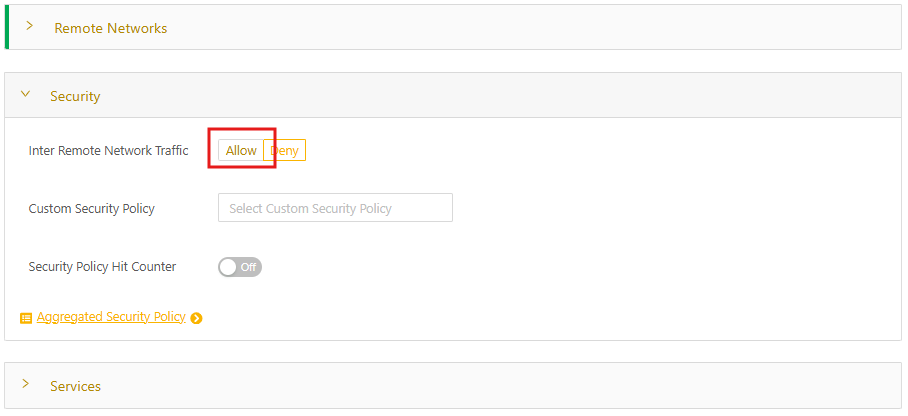
- Confirm this change in the pop-up.
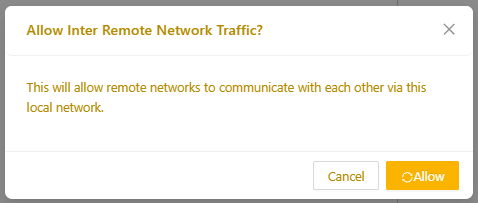
- Select Update to apply the change.
Traffic direction
When you connect a local node network to a remote node network, you can control the direction in which traffic can be initiated between the two networks. Note that when traffic is allowed in one direction, all associated traffic in either direction is allowed. By default, traffic is allowed to be initiated in both directions.
Use these steps to change from the default to allow traffic to be initiated in a specified direction:
- From the Nodes > All Nodes page, select the Edge Node to open its details page.
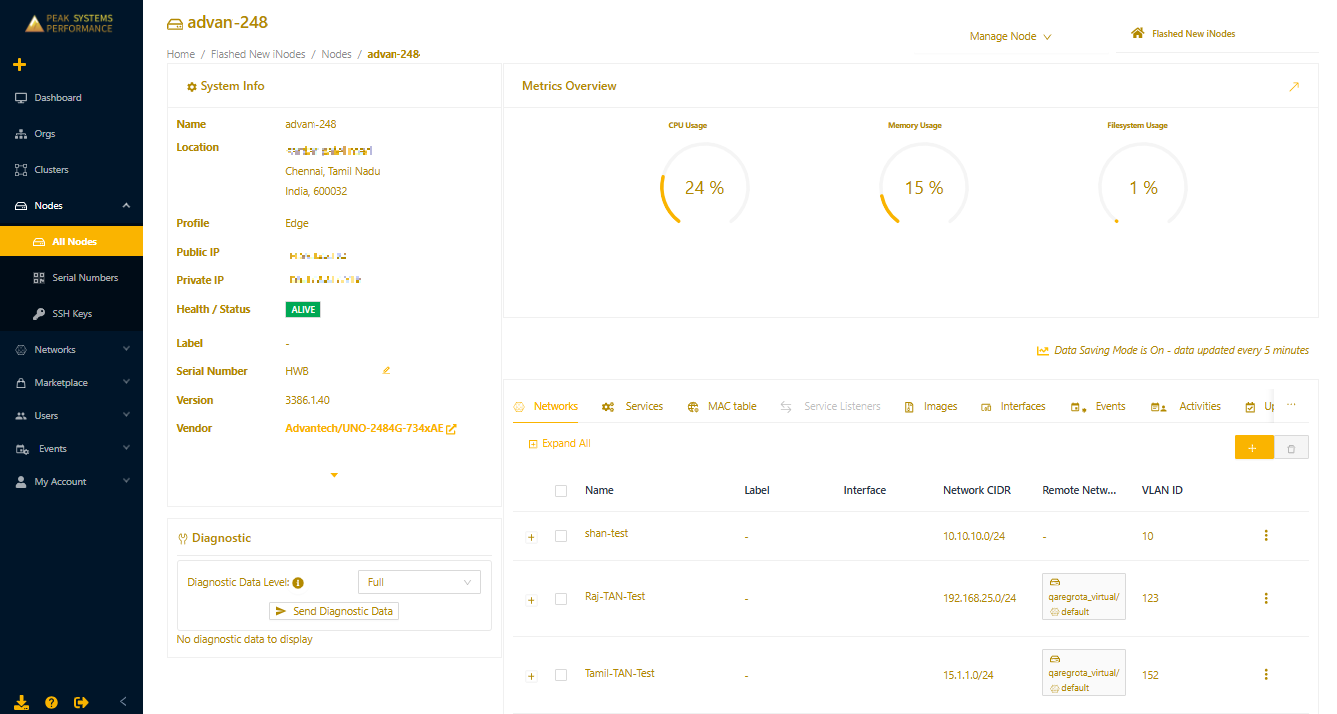
- In the Networks tab, select the name of your local network to open the Edit Network page
- Expand Remote Networks, then select Traffic Direction for the applicable network. The remote network row expands and shows the options for Traffic Direction:
- Bidirectional (default)
- Local to remote network only
- Remote to local network only
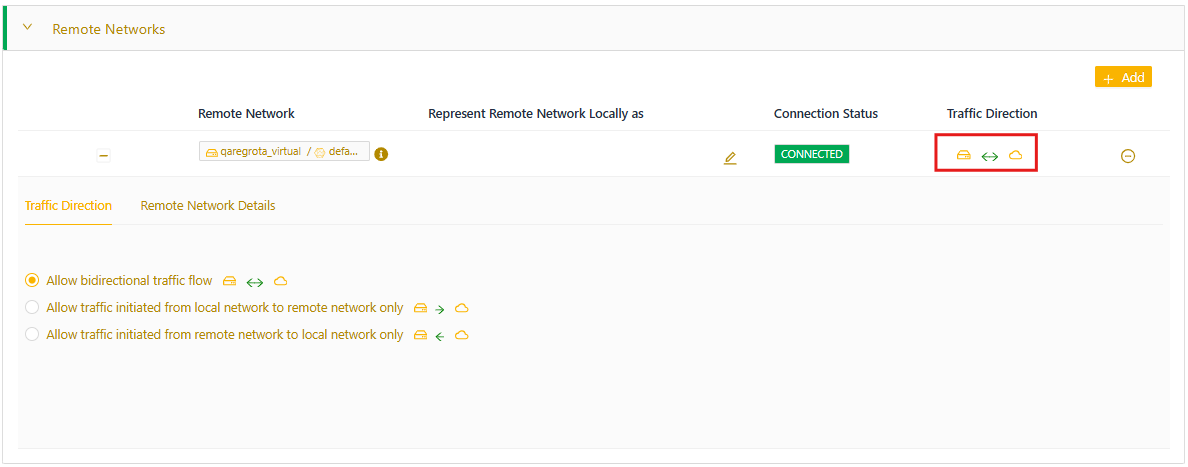
- Select Update for the change to take effect.
Custom security policies
A custom security policy allows more granular control over traffic to and from your node networks. To use a custom security policy, you have to define it and then apply it to the desired network.
Add a custom security policy
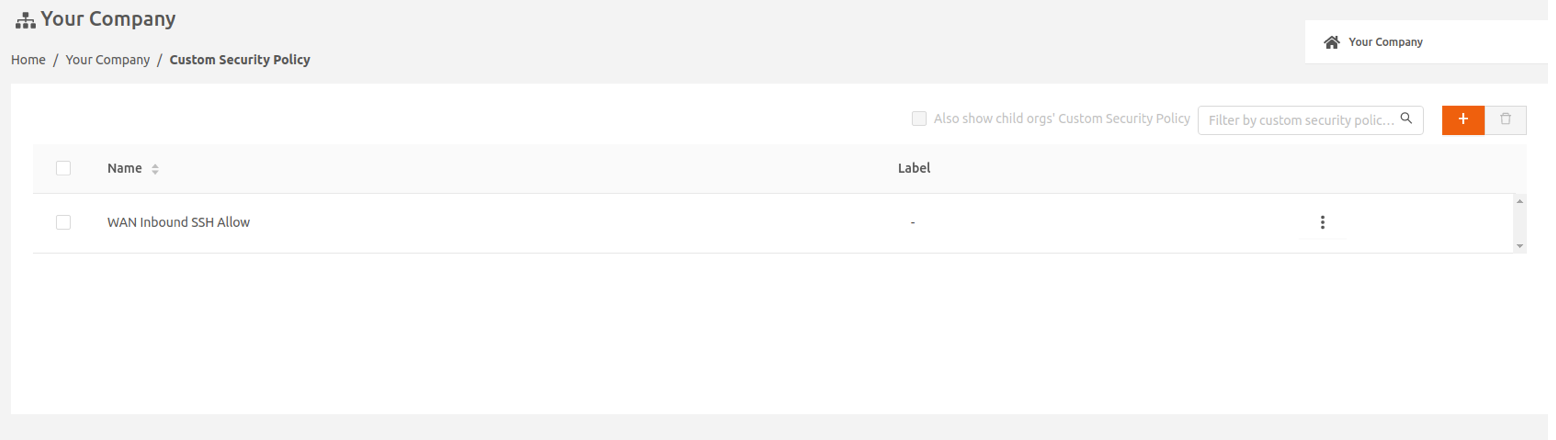
- From the Secure Edge Portal left menu, select Networks > Custom Security Policy, and then select the plus sign (+) on the top right.
- Enter a name for the policy and any labels, if needed.
- On the Rules table, select + Add Ruleand then configure the rule parameters as necessary:
- For traffic within the local network, specify From Network and To Network both as local networks (select by name), expand the row entry (plus sign), and choose the appropriate traffic direction.
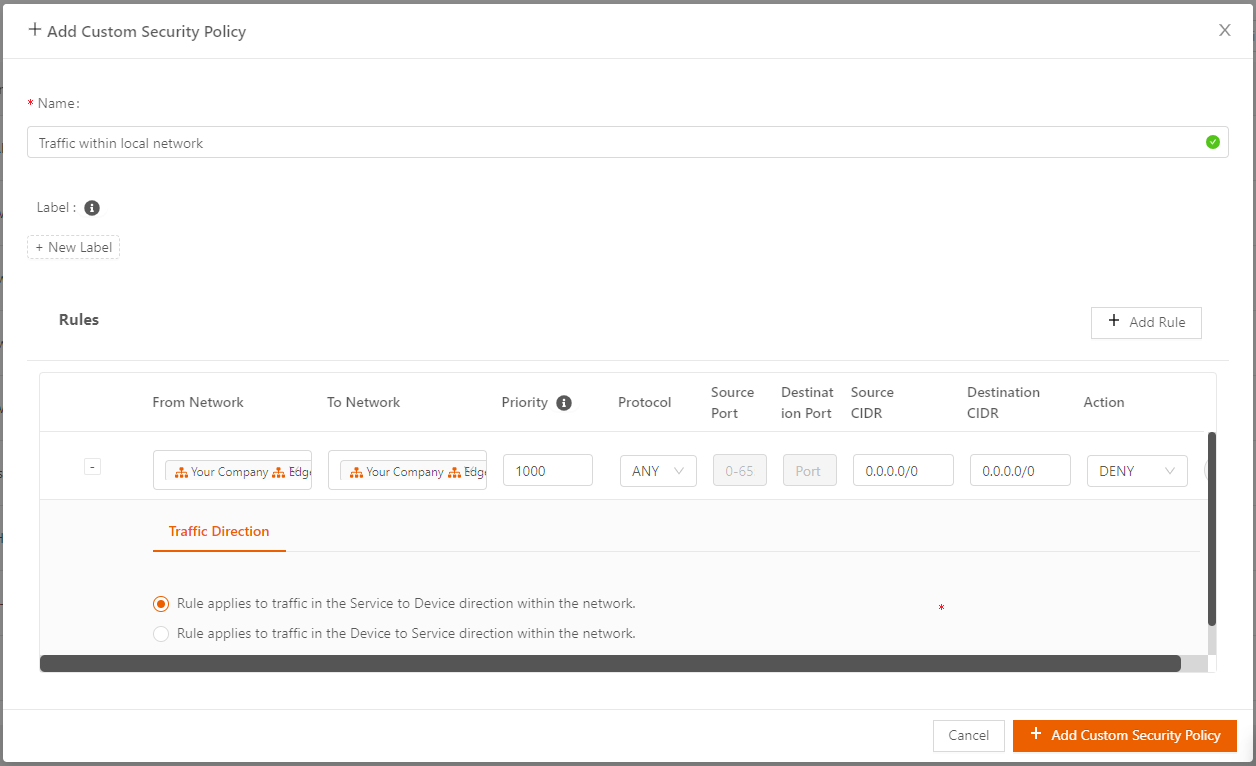
- For Priority, specify a number from 1000 to 10000, inclusive.
- Specify rest of the fields (Protocol, Source/Destination Port, Source/Destination CIDR) as needed. The default is Any.
- Select which action to take for the traffic that matches the rule, either Allow or Deny.
- For traffic within the local network, specify From Network and To Network both as local networks (select by name), expand the row entry (plus sign), and choose the appropriate traffic direction.
- Select + Add Custom Security Policy to save the policy. The newly added custom policy is listed in the Custom Security Policy screen.
Apply a custom security policy
To apply the rules in a custom security policy to a network:
- From Nodes > All Nodes, select the Edge Node to open its details page.
- In the Networks tab, click the three-dot menu to the right of the network and select Edit Network.
- On the Edit Network page, expand Security, and for Custom Security Policy, specify the security policy by name or by label.You can’t apply more than one custom security policy to a node network.
- Select Update to apply the change.
Troubleshooting security policy rules
If you notice unexpected traffic flow on your node network, troubleshooting your security policy rules in the Secure Edge Portal.
View aggregated security policies
To look at the complete set of security policy rules being applied to networks in your node:
- In the portal, select Nodes > All Nodes and then open the node details page.
- From the Manage Node dropdown menu (top right), select Aggregated Security Policy to review the complete set of security policy rules applied to networks in your node.
- By default, the Secure Edge Portal doesn’t display ineffective rules that didn’t resolve to any local or remote network for this node. Instead, to show all the rules set by this node, select Also show ineffective rules on the top right.
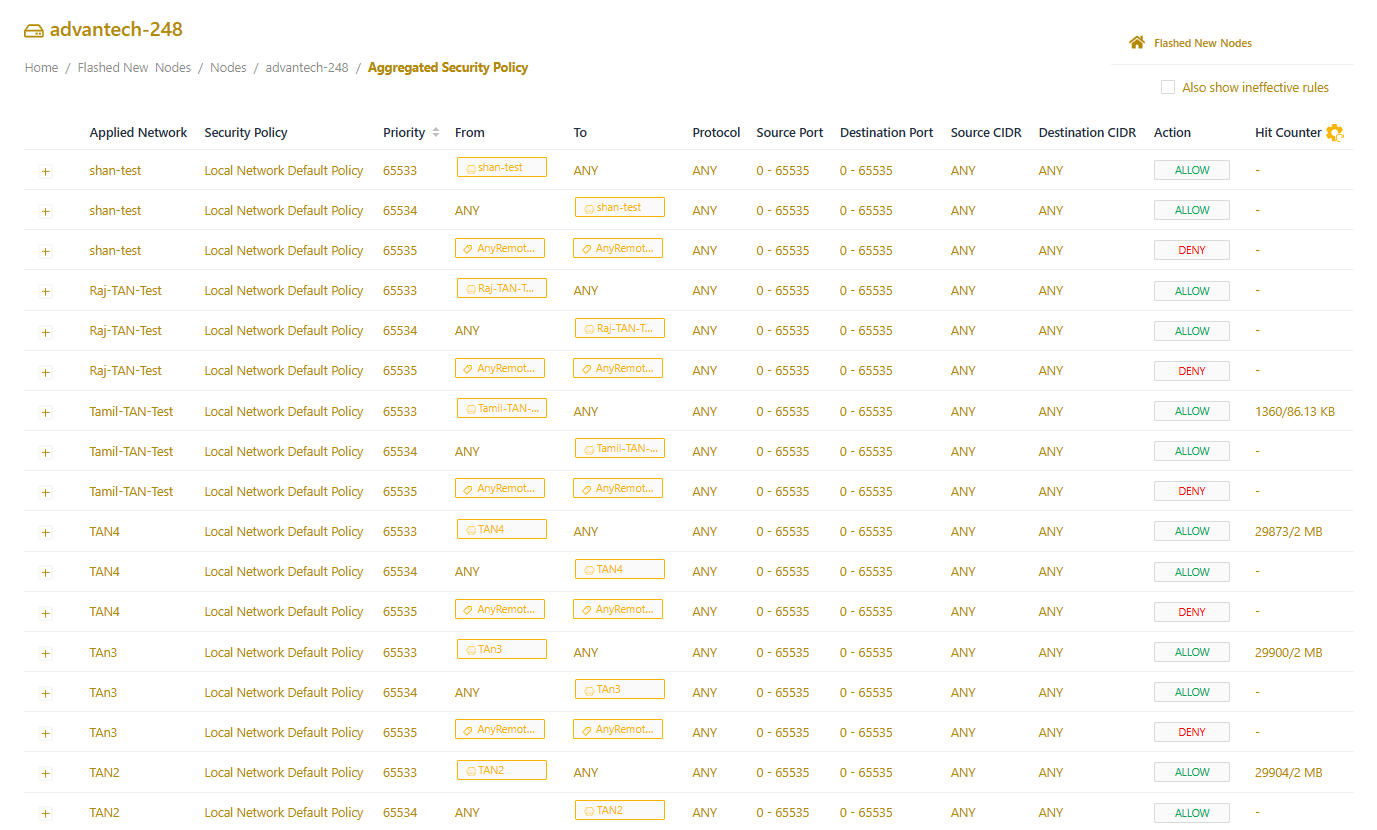
The Aggregate Security Policy lists rules in priority order, their associated policies, the networks they apply to, and their settings. Also, the list flags ineffective rules and rules with duplicate priority.
To access the policy rules for an individual node network:
- In the portal, select Nodes > All Nodes to open the node details page.
- Select the applicable network and then from the three-dot menu, select Edit.
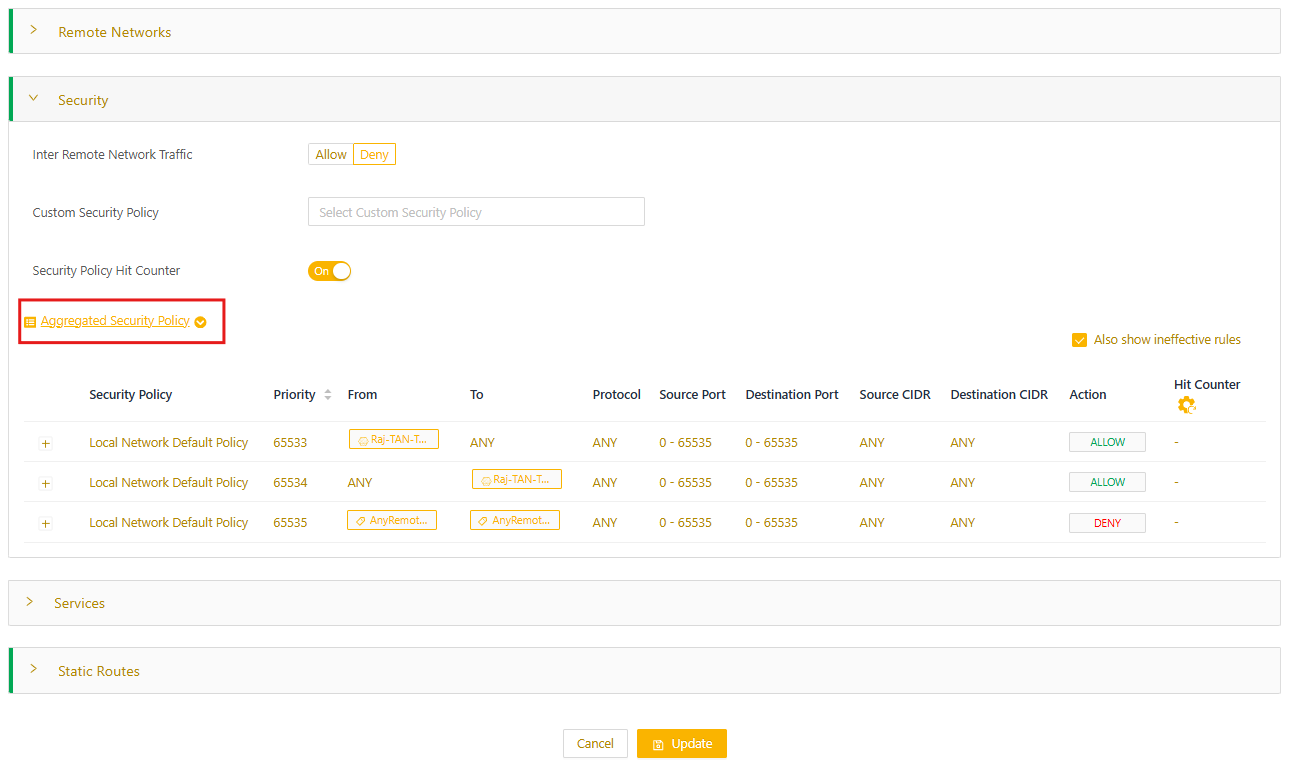
- Select the Security expansion panel and then select the Aggregated Security Policy widget.
- Toggle Also show ineffective rules to show all rules set for this network.
To help with troubleshooting, you can review the entire set of security policy rules applied to your each of your nodes or networks.
Use the security policy hit counter
The hit counter shows the count of packets and bytes that match each security policy rule, helping you track how often each rule is applied. A zero hit count may indicate that a higher-priority rule is being matched instead. You can enable and reset hit counters to analyze traffic patterns and identify rules with high hit counts.
To turn on the hit counter to get information for troubleshooting:
- In the portal, select Nodes > All Nodes to open the node details page.
- Select the applicable network and then from the vertical dot menu, select Edit.
- Select the Security expansion panel and then toggle Security Policy Hit Counter to On.

- Wait one minute, and then review the Aggregated Security Policy. It now displays the count of packets and bytes that matched each security policy rule.
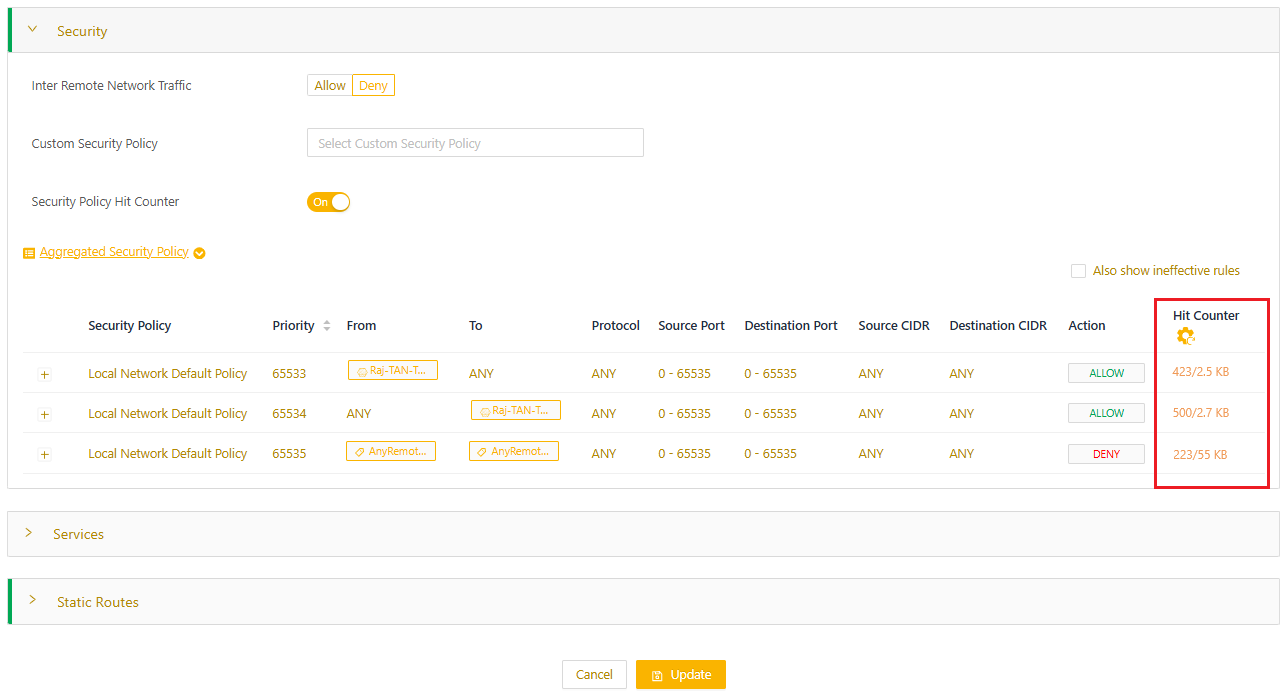
- You can reset the hit counters to gauge rule usage within a specified period of time. Select the icon on the Hit Counter column. This resets the hit counters for all rules in the network.
- Wait one minute, and then the Aggregated Security Policy will display the updated hit count since the reset.