This article describes how to provision and launch Cloud Connectors (formerly Virtual iNodes) and Virtual Edge Nodes (formerly Virtual Edge iNodes) on Amazon Web Services (AWS).
Provisioning and launching Cloud Connectors on AWS
In this section, learn how to provision and launch a Cloud Connector on AWS.
Provision a Cloud Connector on AWS
To provision a Cloud Connector on AWS:
- In the Secure Edge Portal, select the plus icon (+) from the left menu to open the Add Node page.
- Enter a unique name for the Cloud Connector.
- Optionally, you can also specify custom attributes as labels. (For more on labels, see Using labels.)
- Select the Cloud Connector profile.
- Download the security credentials required for launching the Cloud Connector by selecting the AWS logo. You will only be able to download this file once. These credentials are crucial for secure deployment, so save the downloaded file in a secure location and don't share it.ImportantThe security credentials file is only available for download once. It contains critical security information needed for the Cloud Connector. Ensure this file is stored securely and deleted after the Cloud Connector is successfully created.
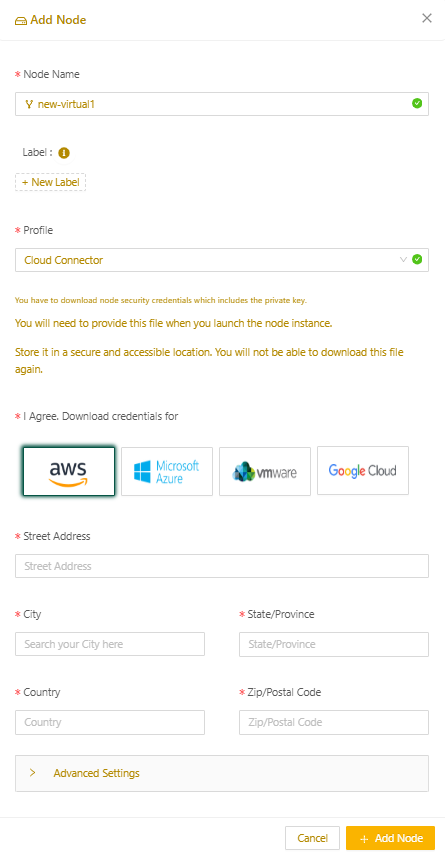
- Select Add Node to complete the provisioning.
Launch a Cloud Connector
To launch a Cloud Connector:
- Sign in to your AWS account using your AWS credentials.
- Ensure you have access to the Secure Edge Cloud Connector AMI for the region in which you want to launch. If you don’t already have the AMI, contact Secure Edge support for assistance.
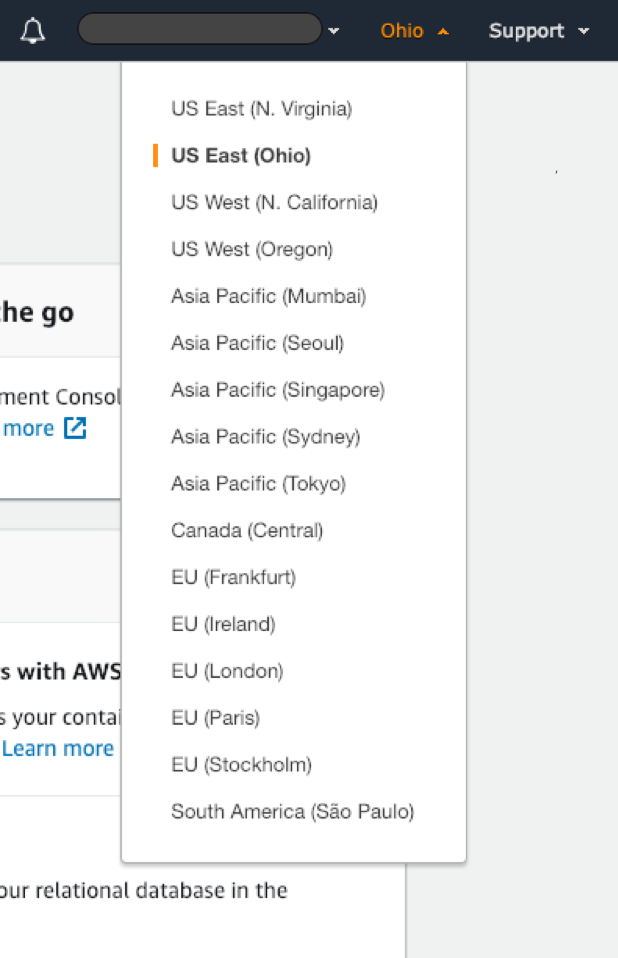
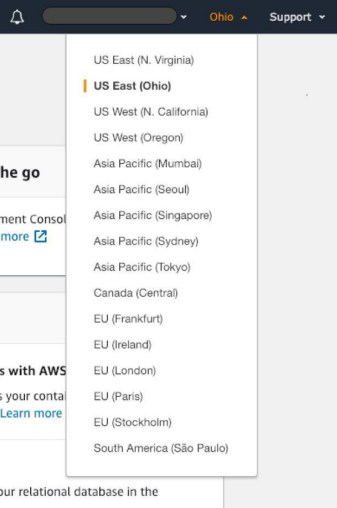
- When you have access to the AMI, select the AWS region where you want to launch it.
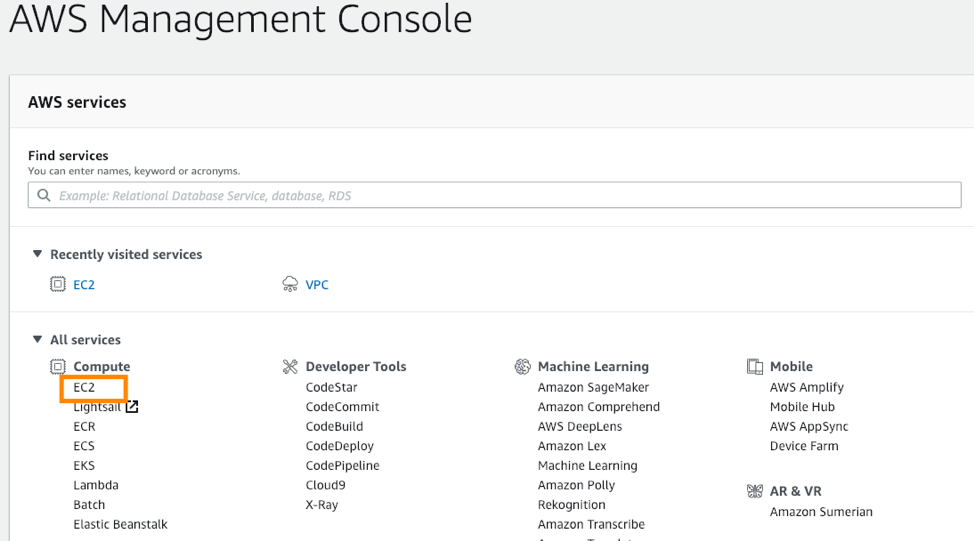
- In the AWS Management Console, under All services, select EC2 in the Compute section.
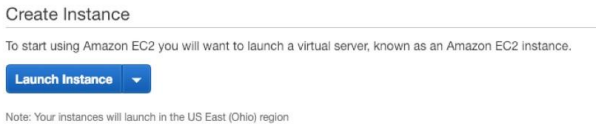
- Under Create Instance, select Launch Instance.

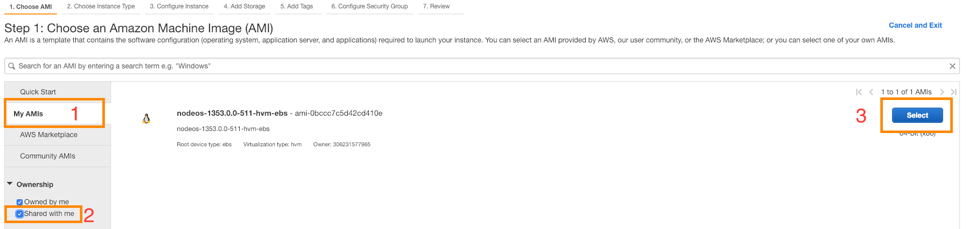
- When you’re prompted to choose the AMI, select the AMI Secure Edge gave you, under My AMIs.
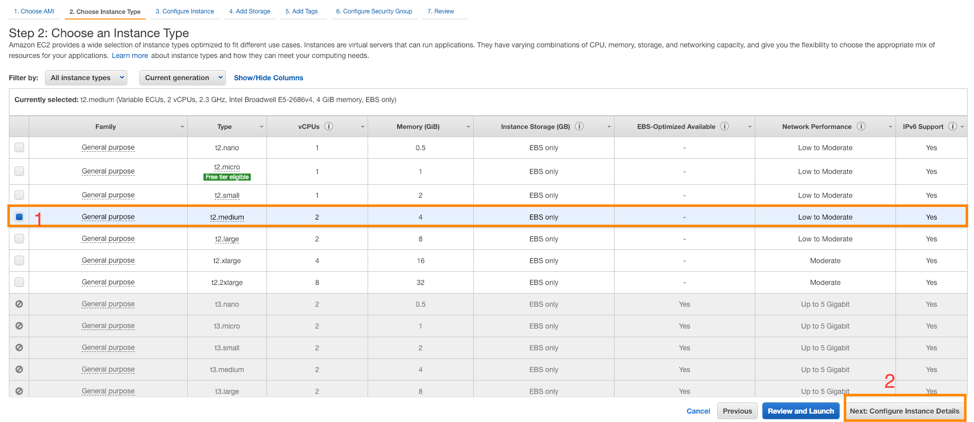
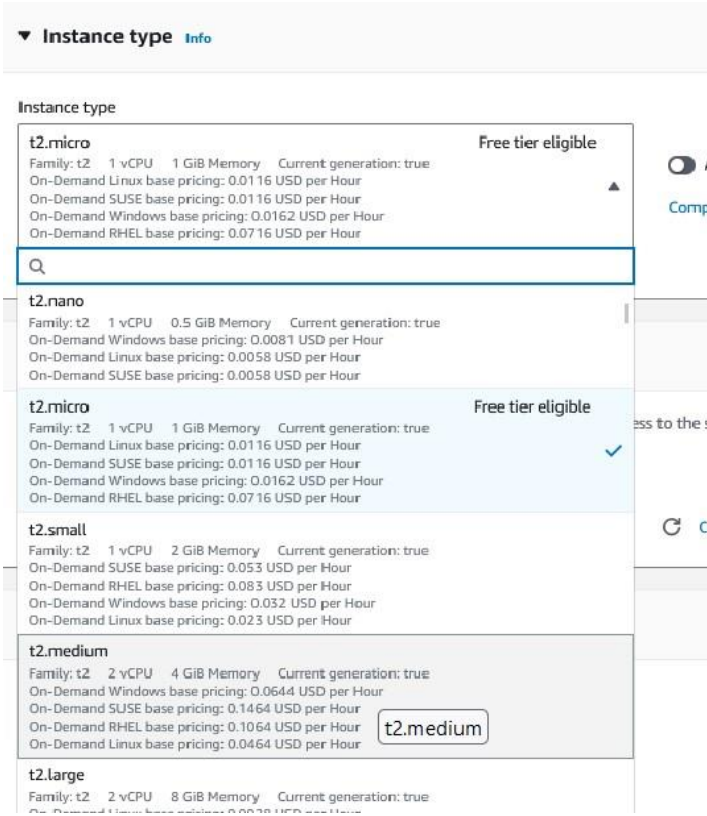
- On the Choose an Instance Type page, select t2.medium or higher. The minimum requirement is t2.medium. Then select Next: Configure Instance Details.
- On the Configure Instance Details page, select the Network (Virtual Private Cloud, VPC) and the Subnet in which you want to deploy the Cloud Connector.
- Enable Auto-assign Public IP.
- Near the bottom of the Configure Instance Details, select Advanced Details. For User data, select As file and attach the security credentials file you downloaded in the previous procedure.
- Select Next: Add Storage, and keep the default storage settings.
- Assign tags as needed, and then continue to Next: Configure Security Group.
- Name the security group and configure the following policies:
Type Protocol Source All traffic
All
Inter VPC/Subnet/YourIP
HTTPS
TCP
0.0.0.0/0
- Select Review and Launch, and check the configurations. Edit if needed, then select Launch.
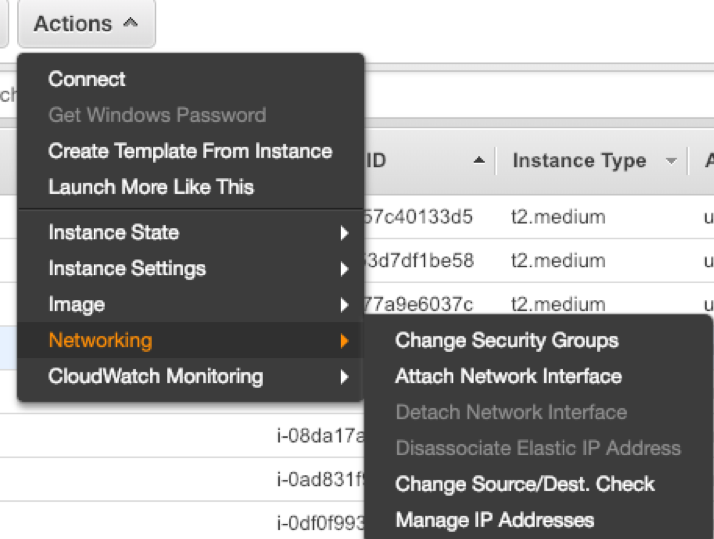
- After launch, select Actions > Networking > Change Source/Dest. Check. And then Disable the Source/Dest Check.
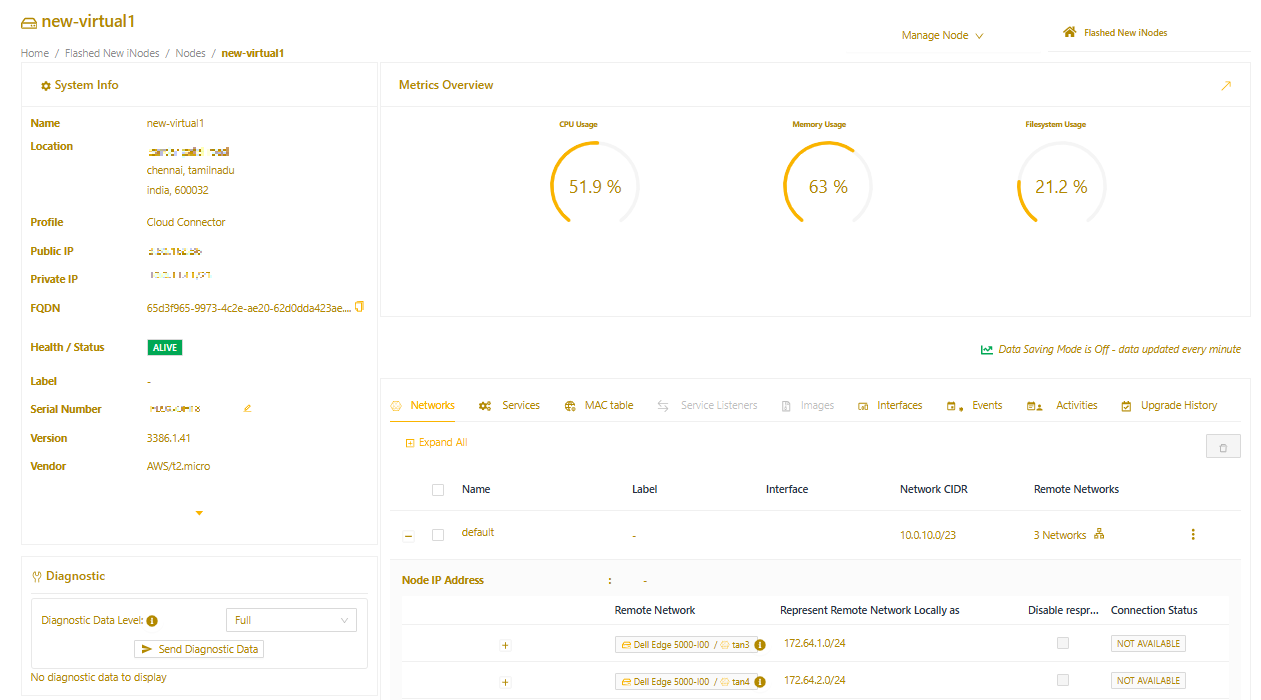
When the instance is established and running, you’ll see its status as ALIVE in the Secure Edge Portal.
Configure routing
Configure routing to allow application servers to communicate with the local network via the Cloud Connector:
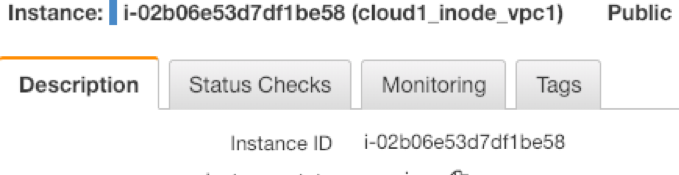
- Copy the Instance ID of the Cloud Connector.
- In the AWS Management Console, go to VPC > Route Tables.
- Select your VPC, and under Routes select Edit Routes.
- In the Destination field, add the local network's CIDR (the local network protected by your Edge Node). Select Target as Instance and then choose the Cloud Connnector. This will autopopulate the Instance ID.
- Select Save Routes.
Provisioning and launching Virtual Edge Nodes on AWS
A Virtual Edge Node is an Secure Edge network element that, in this case, is an AWS instance located at the edge of your private network. In this section, learn how to provision and launch Virtual Edge Nodes.
Provision a Virtual Edge Node
Before you start, make sure you have an SSH public key to use for access authentication of the Edge Node console. For details, see Managing SSH key authentication for a node
Add a Virtual Edge Node
To add a new Virtual Edge Node:
- In the Secure Edge Portal left menu, select the plus icon (+) > Add Node.
- Enter a name for the Virtual Edge Node.
- Optionally, add any custom labels. (For more on labels, see Using labels.)
- Select the Virtual Edge profile.
- For SSH Key, select the name of the SSH public key for console access to the Virtual Edge Node.
- Download the security credentials required for launching the Virtual Edge Node by selecting the AWS logo. You will only be able to download this file once. These credentials are crucial for secure deployment, so save the downloaded file in a secure location and don't share it.ImportantThe security credentials file is only available for download once. It contains critical security information needed for the Virtual Edge Node. Ensure this file is stored securely and deleted after the Virtual Edge Node is successfully created.
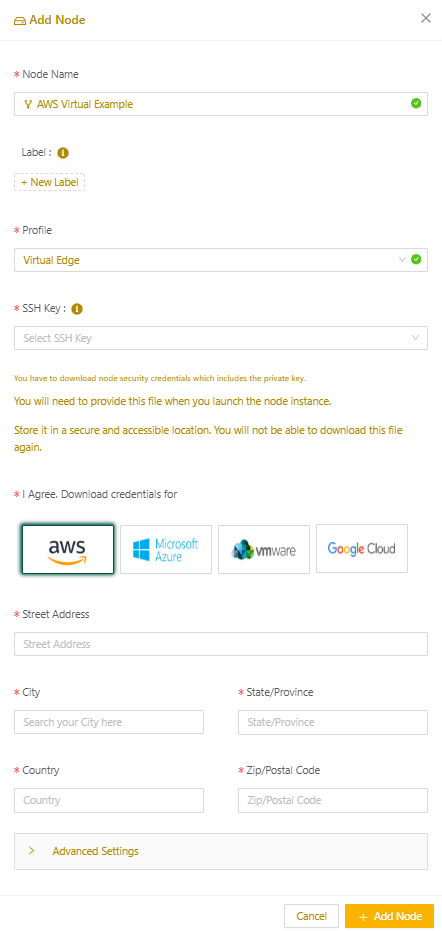
- Select Add Node.
Configure the local network
Use the following steps to configure the local network, which is the network that the Virtual Edge Node will protect:
- In the Secure Edge Portal, select the name of the new Virtual Edge Node to open the node details page.
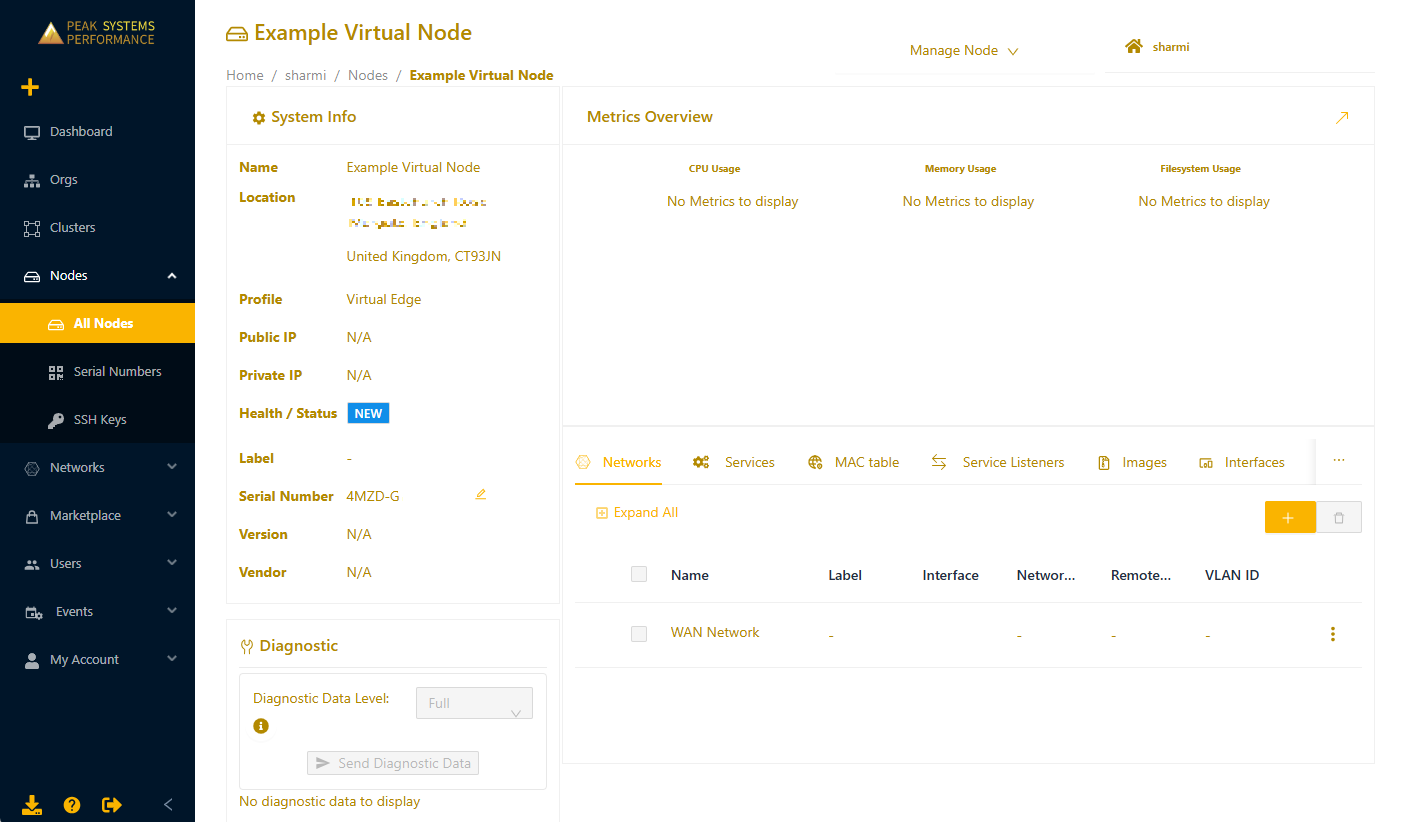
- Select the plus icon (+) to display the Add Network page.
- Enter the network name and specify any custom labels (optional).
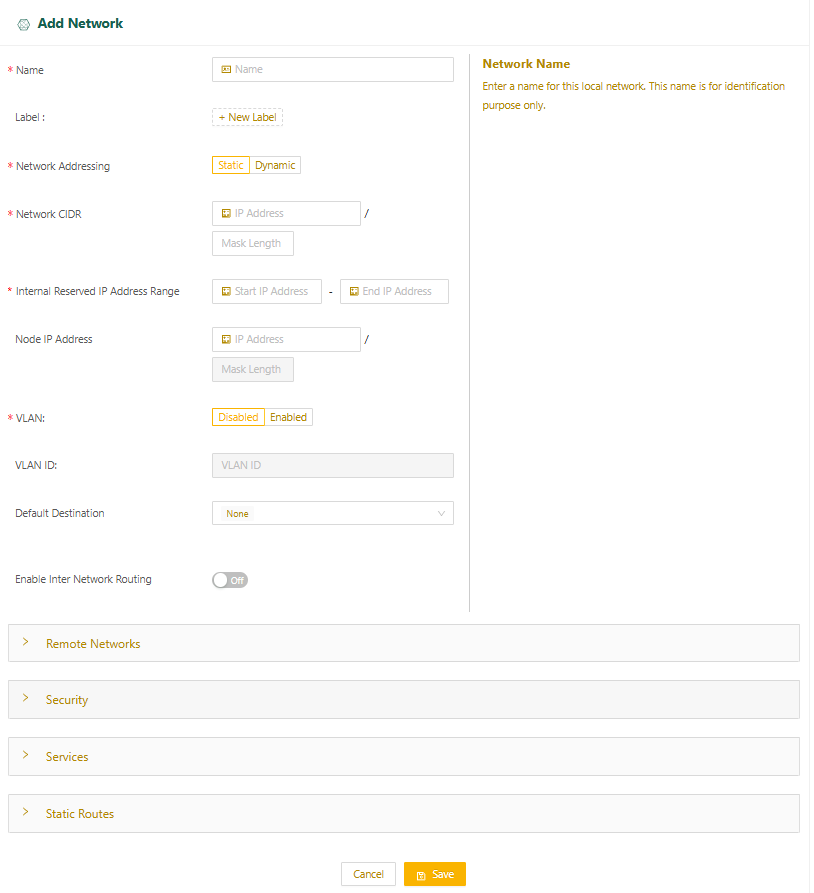
- The Network Addressing field is set to Static. Manually configure static IP addresses for the hosts in this network.
- Specify the network's CIDR in the Network CIDR field.
- Specify a range of IP addresses (at least one) for internal use, ensuring they are within the same subnet as the local network's CIDR.
- You can configure a default gateway in your local network. If you don't specify a default gateway, the Start IP Address in the Internal IP Reserved Address Range is assumed to be the default gateway.
- You may have the option of configuring Virtual LANs (VLANs).
- Any traffic from the local network with a destination outside the local network (for example, traffic going to the internet or LAN) is sent to the default destination. You can set the Default Destination to one of the following:
- None (default): Drops the traffic.
- Specify IP Address: Sends the traffic to the IP address of a gateway in the local network that you specify.
- WAN Network: Sends the traffic through the node's uplink.
- Select Save.
Set up addressing for services
If you aren’t planning to run services on this network, skip this step.
By default, the Virtual Edge Node dynamically assigns IP addresses to services on the network from the Internal Reserved IP Address Range you specified. If you’re using the default, make sure you’ve reserved enough IP addresses. You need at least one more than the number of services you plan to run.
To configure the services manually with static IP addresses:
- Select the Services expansion panel and set Service Addressing to Static.
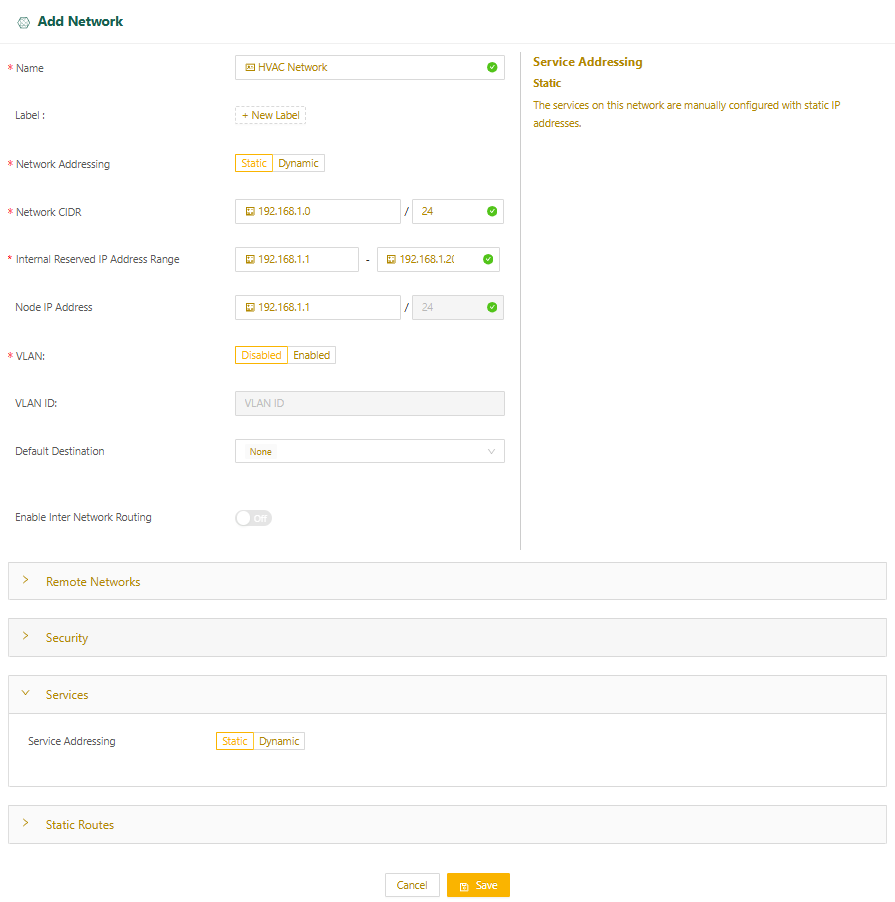
- Select Save.
Create static routes for a Virtual Edge Node
Static routes allow you to:
- Direct traffic from services running on the Virtual Edge Node to reach specific routed network segments
- Enable hosts in the local network to reach specific networks in your LAN or the internet
To create static routes for a Virtual Edge Node:
- In the Static Routes expansion panel, select Add to create a new static route. You can configure up to 64 static routes per network.NoteIf you set Default Destination to any value other than None, it will count as a static route.
.png)
- In the Destination Network CIDR field, specify the CIDR of the destination network.
- In the Via field, select where to send the traffic. You have two options:
- Specify IP Address: Sends the traffic to the IP address of a gateway in the local network that you specify.
- WAN Network: Sends the traffic through the node's uplink to an external network.
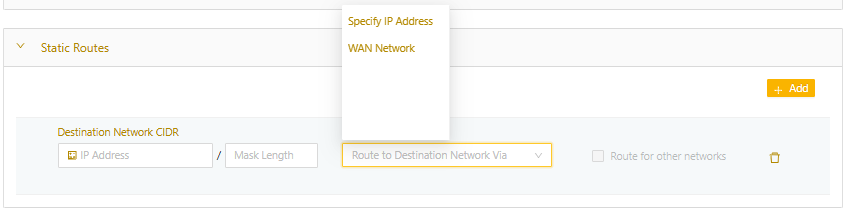
- Select Save.
Launch Virtual Edge Nodes
To launch a Virtual Edge Node:
- Sign in to your AWS account using your AWS credentials.
- Ensure you have access to the Secure Edge Cloud Connector AMI for the region in which you want to launch. If you don’t already have the AMI, contact Secure Edge support for assistance.
- When you have access to the AMI, select the AWS region where you want to launch it.
- In the AWS Management Console under All services, in the Compute section select EC2.
.png)
- Under Create Instance, select Launch Instance.
- When you’re prompted to choose the AMI, select the AMI Secure Edge gave you under My AMIs.
.png)
- On the Choose an Instance Type page, select t2.medium or higher. The minimum requirement is t2.medium. Then select Next: Configure Instance Details.
- On the Configure Instance Details page, select the Network (Virtual Private Cloud, VPC) and the Subnet in which you want to deploy the Virtual Edge Node.
- Set Auto-assign Public IP to Disable.
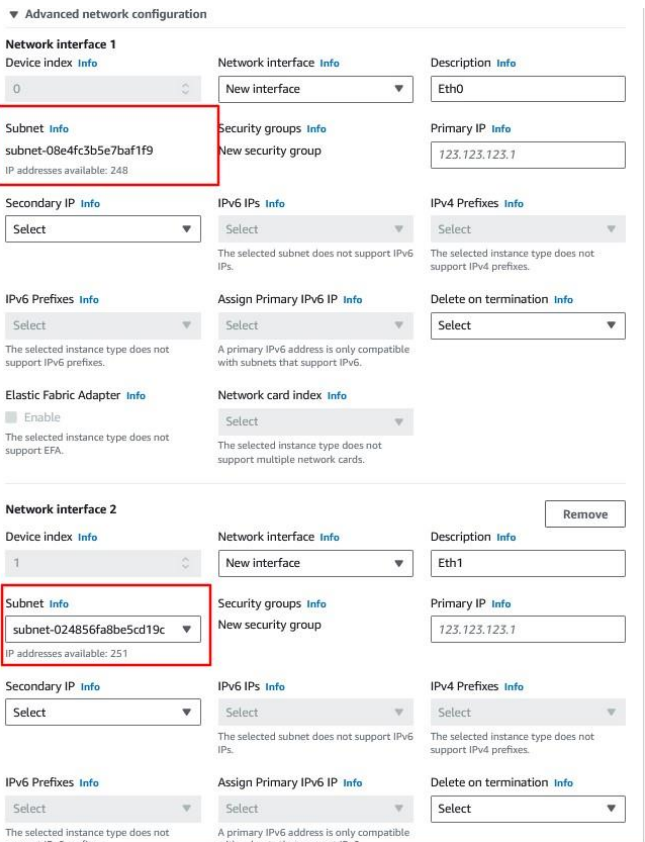
- From Advanced network settings, add two interfaces to the instance from the same availability zone, but different networks. Network subnet 1 will be public network and network subnet 2 can be public or private.
- Leave the default settings for Configure Storage.
- Select Advanced Details. For User data, select As file and attach the security credentials file you downloaded during provisioning.
- Once the instance is created, attach an elastic IP to the 1st interface (eth0).
- Select Actions > Networking > Change Source/Dest. Check. Disable the Source/Dest Check.
- In the AWS Management Console, attach a security group with following rules to the instance :
orType Protocol Outbound All traffic All 0.0.0.0/0 Type Protocol Source DNS TCP/UDP port 53 0.0.0.0 HTTPS TCP 34.217.170.7
54.185.195.11 - When the instance has successfully launched, you’ll see its status as ALIVE in the Secure Edge Portal.
.png)
- When configuring a TAN in a Virtual Edge Node, set the gateway IP as the private IP that is associated with network interface #2. Also, ensure that the TAN CIDR is same the subnet of network #2. If you specify a reserved IP range for the TAN, make sure that this same range is excluded from the subnet auto-assignment.
Configuring routing
To configure routing for devices behind the Virtual Edge Node:
- Copy the TAN Interface ID of the Virtual Edge Node.

- In the AWS Management Console, select VPC > Route Tables.
- Select your VPC and select Routes.
- Select Edit Routes. Add the network CIDR of the destination network protected by your Virtual Edge Node in the Destination. Select Target as Instance and then paste the copied Interface ID. This will auto-populate the Instance ID.
- Select Save Routes to complete the configuration.