Device Discovery is a feature that can be enabled at the Edge Node (formerly Edge iNode) or cluster level to identify and catalog connected devices across multiple LAN networks. It allows you to run network scans on demand or on a predefined schedule, helping you monitor changes across networks configured on the Edge Node or cluster. This feature supports efficient network management, security assessments, and resource optimization across your diverse network environments.
Enable Device Discovery on Edge Nodes
To enable Device Discovery for an Edge Node:
In the Secure Edge Portal left menu, select Nodes > All Nodes and then select the Edge Node you want to enable Device Discovery for.
From the Manage Node or Manage Cluster dropdown menu (top-right), select Edit.
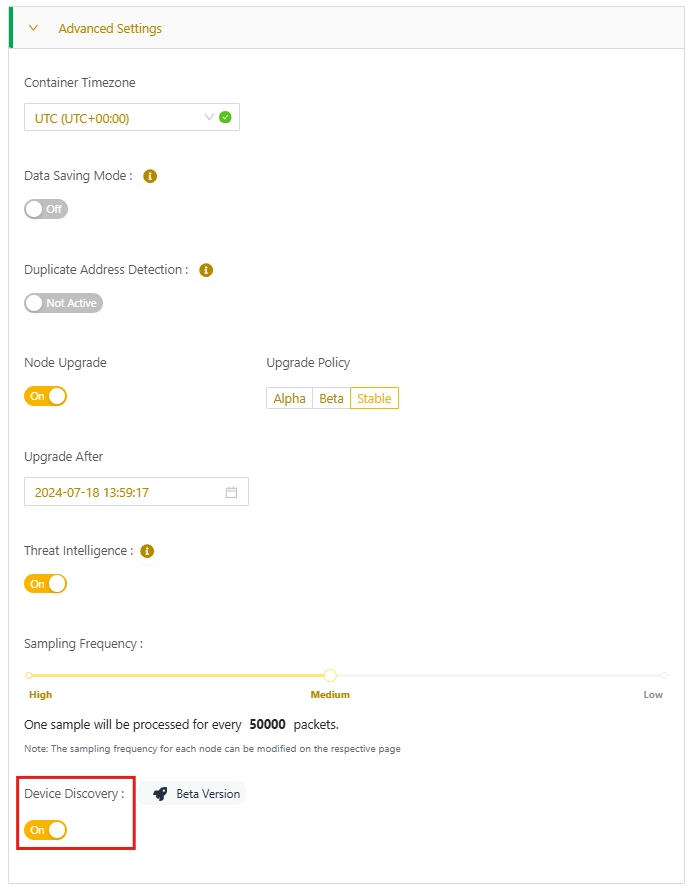
Under Advanced Settings, toggle Device Discovery to On and then select Update to save your change.
Once Device Discovery is enabled, the node detail page will show a summary of the number of scans configured and the most recent count of devices discovered across the node’s networks.
Enable Device Discovery on clusters
To enable Device Discovery for a cluster:
In the Secure Edge Portal left menu, select Clusters and then select the cluster you want to enable Device Discovery for.
From the Manage Cluster menu (top-right), select Edit.
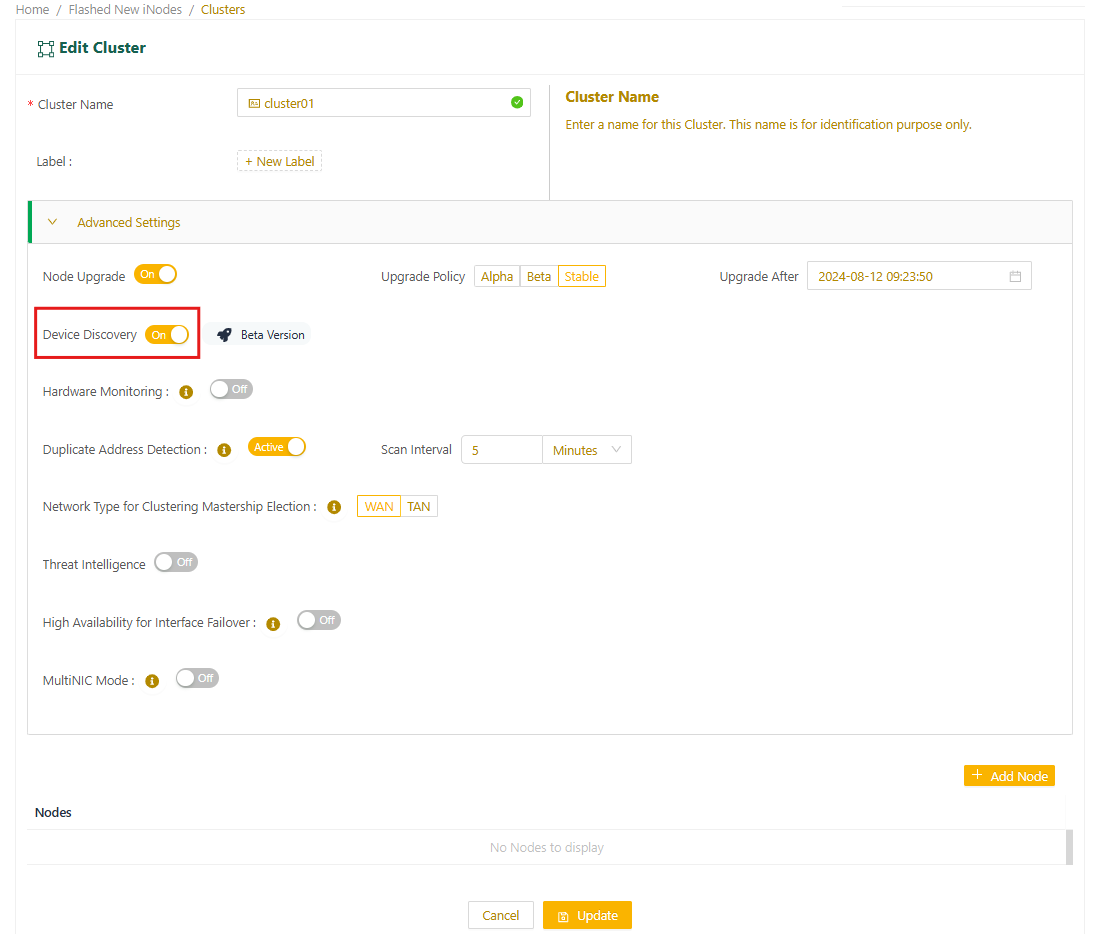
Under Advanced Settings, toggle Device Discovery to On and then select Update to save your change.
Once Device Discovery is enabled, the cluster detail page will show a summary of the number of scans configured and the latest number of devices discovered across the cluster’s networks.
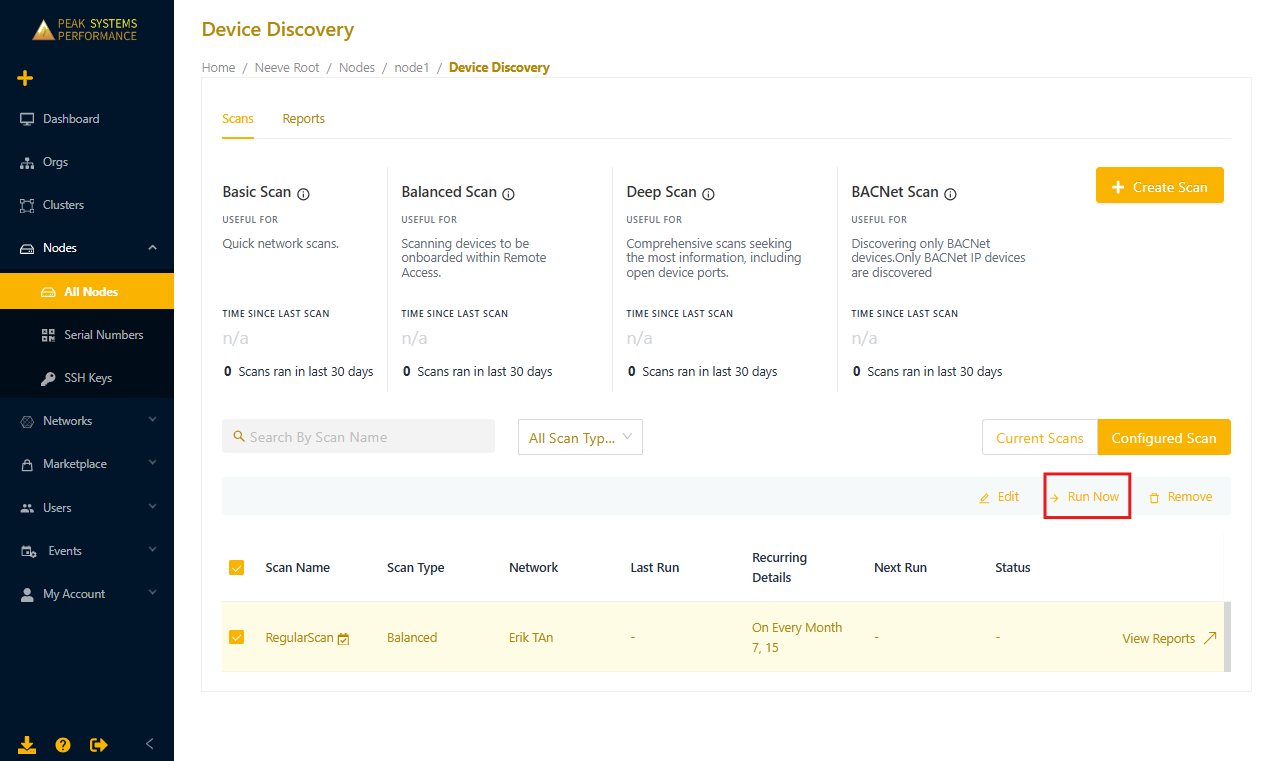
Device Discovery dashboard
You can access the Device Discovery dashboard from both the node detail page and the cluster detail page by selecting the arrow icon in the Device Discovery section.

The dashboard includes a scan summary, a Scans tab, and a Reports tab.
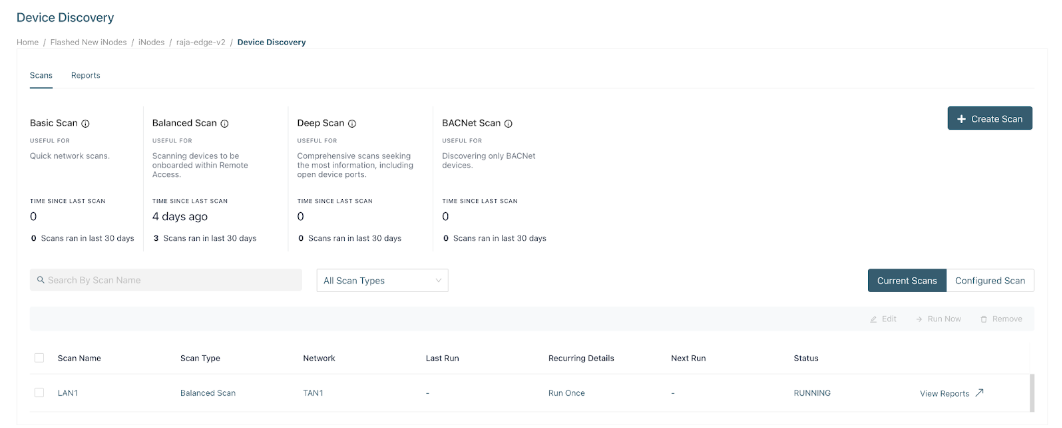
The Scans tab displays information for different current and configured scans, including the last successful scan and the number of successful scans completed in the last 30 days. It includes data on the following scan profiles, depending on what you have configured for your Edge Nodes or cluster:
Scan Type | General Description | Data Provided |
|---|---|---|
Basic Scan | A fast and lightweight scan. | IP address and MAC address only. |
Balanced Scan | A balanced scan that scans for open ports that are supported with Remote Access connections. Best used to support Device Discovery Onboarding within Remote Access portal. |
|
Deep Scan | A comprehensive scan that scans all ports. Good for security auditing of ports open on endpoints on the network. |
|
BACNet Scan | A targeted scan for IP addresses that have default BACnet port (47808) open. It does not scan BACnet MST devices. Best for discovering BACnet/IP devices on your network. |
|
For more details on using the dashboard, see Review and Modify Scans below.
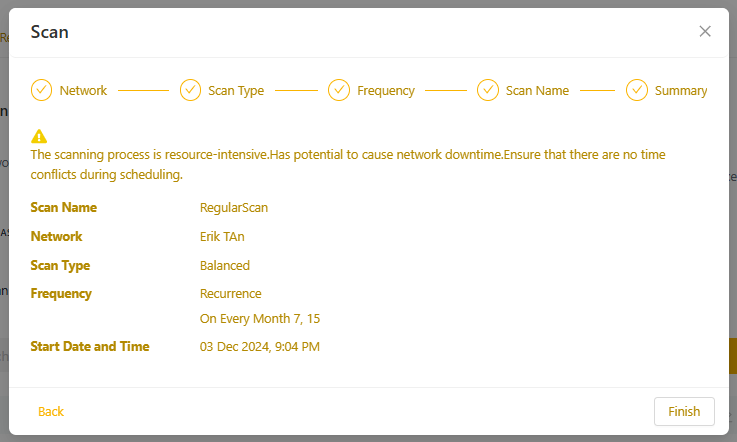
Configure a scan
On the Device Discovery page, select Create Scan. A pop-up window opens.

In the Network field, select the network where the scan will run. The drop down list will include LAN networks from the selected Edge Node or cluster. Then select Next.
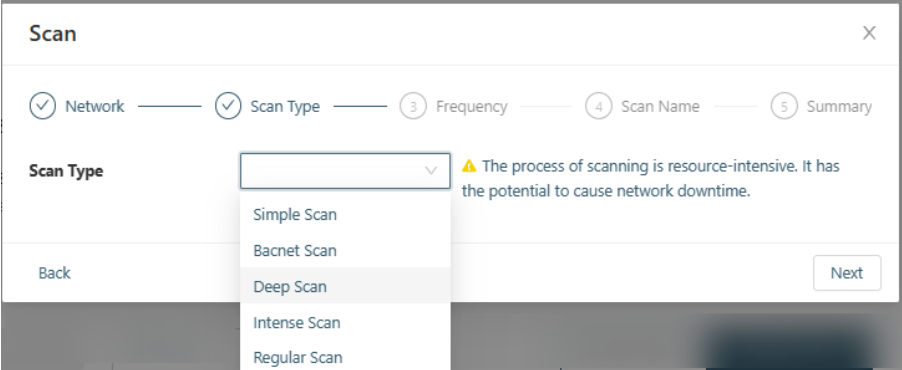
For Scan Type, select the desired scan profile (a check mark will appear) and select Next. Note that the scan duration depends on the network size and scan type.
For Frequency, choose between:
Run Now for a single, on-demand scan
Recurrence for scheduled scan with options for daily, weekly, or monthly intervals. Modify the start time as needed, and specify the days when applicable. The following example shows a monthly scan configuration.

Enter a user-friendly name for the scan (2 to 30 characters).
Select Next to review the scan summary. Select Finish to create the new scan. If you need to edit the configuration, select Back.
Review and modify scans
By default, the Scans tab shows the current running scans. To view all configured scans, switch to the Configured Scans view. This view displays scan details such as the scan name, type, network, status (RUNNING, QUEUED, SCHEDULED, or FINISHED), and next scheduled run.
Run an on-demand scan
You can run any of the configured scans on-demand from the Configured Scans view. Select the scan checkbox and then select Run Now.
Edit a scan
Select the scan checkbox and then select Edit.
.png)
Update the name and interval details for the scan and then select Confirm.
Delete a scan
Select the scans to be deleted and then select Remove.
Note
Deleting a scan will also remove its associated reports.

Scan reports
The Reports tab lists reports generated from past scans, sorted by completion date. Each report provides information on when the scan finished, the duration, and the number of devices detected as active (UP).

View report details
To view the details of each report, click on the > icon on the report line item. This will open a pop-up with a table with details on IP Address, MAC address, and open port infomration. For BACnet scans, additional information on BACnet devices is provided. To download the report, select Export CSV.

Compare reports
To compare reports from the same scan, choose two reports and select Compare.

The Compare Reports table opens, showing which devices were discovered in each scan, with a check mark (✔) for devices found and a cross mark (✘) for devices not found. To download the comparison, select Export CSV.
