This article describes how to provision and launch Cloud Connectors (formerly Virtual iNodes) and Virtual Edge Nodes (formerly Virtual Edge iNodes) with VMware.
Provisioning and launching Cloud Connectors with VMware
In this section, learn how to provision and launch a Cloud Connector with VMware.
Provision a Cloud Connector with VMware
To provision a Cloud Connector with VMware:
- In the Secure Edge Portal, select the plus icon (+) from the left menu to open the Add Node page.
- Enter a unique name for the Cloud Connector.
- Optionally, you can also specify custom attributes as labels.
- Select the Cloud Connector profile.
- Download the security credentials required for launching the Cloud Connector by selecting the VMware logo. You will only be able to download this file once. These credentials are crucial for secure deployment, so save the downloaded file in a secure location and don't share it.ImportantThe security credentials file is only available for download once. It contains critical security information needed for the Cloud Connector. Ensure this file is stored securely and deleted after the Cloud Connector is successfully created.
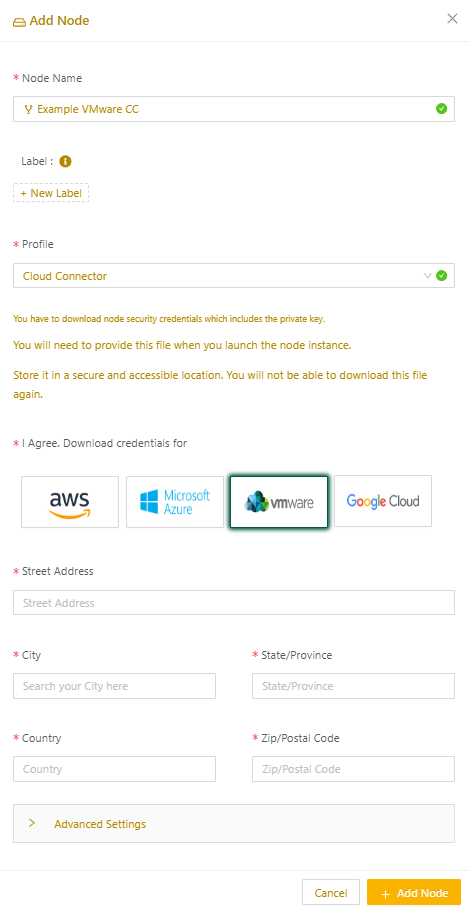
- Select Add Node to complete the provisioning.
Launch a Cloud Connector in VMware
To launch a Cloud Connector in VMware:
- Using VMware vSphere tool (or other tool like the OVF Tool), import the node image file (OVA) into VMware vSphere. The OVA file is available on the Download Software page, accessed from the Secure Edge Portal left menu.
- BEFORE STARTING the Virtual Machine, mount the downloaded security credentials file on the CD/DVD drive of the VM. This file contains the Cloud Connector security credentials you downloaded in the previous procedure.
- Start the VM.
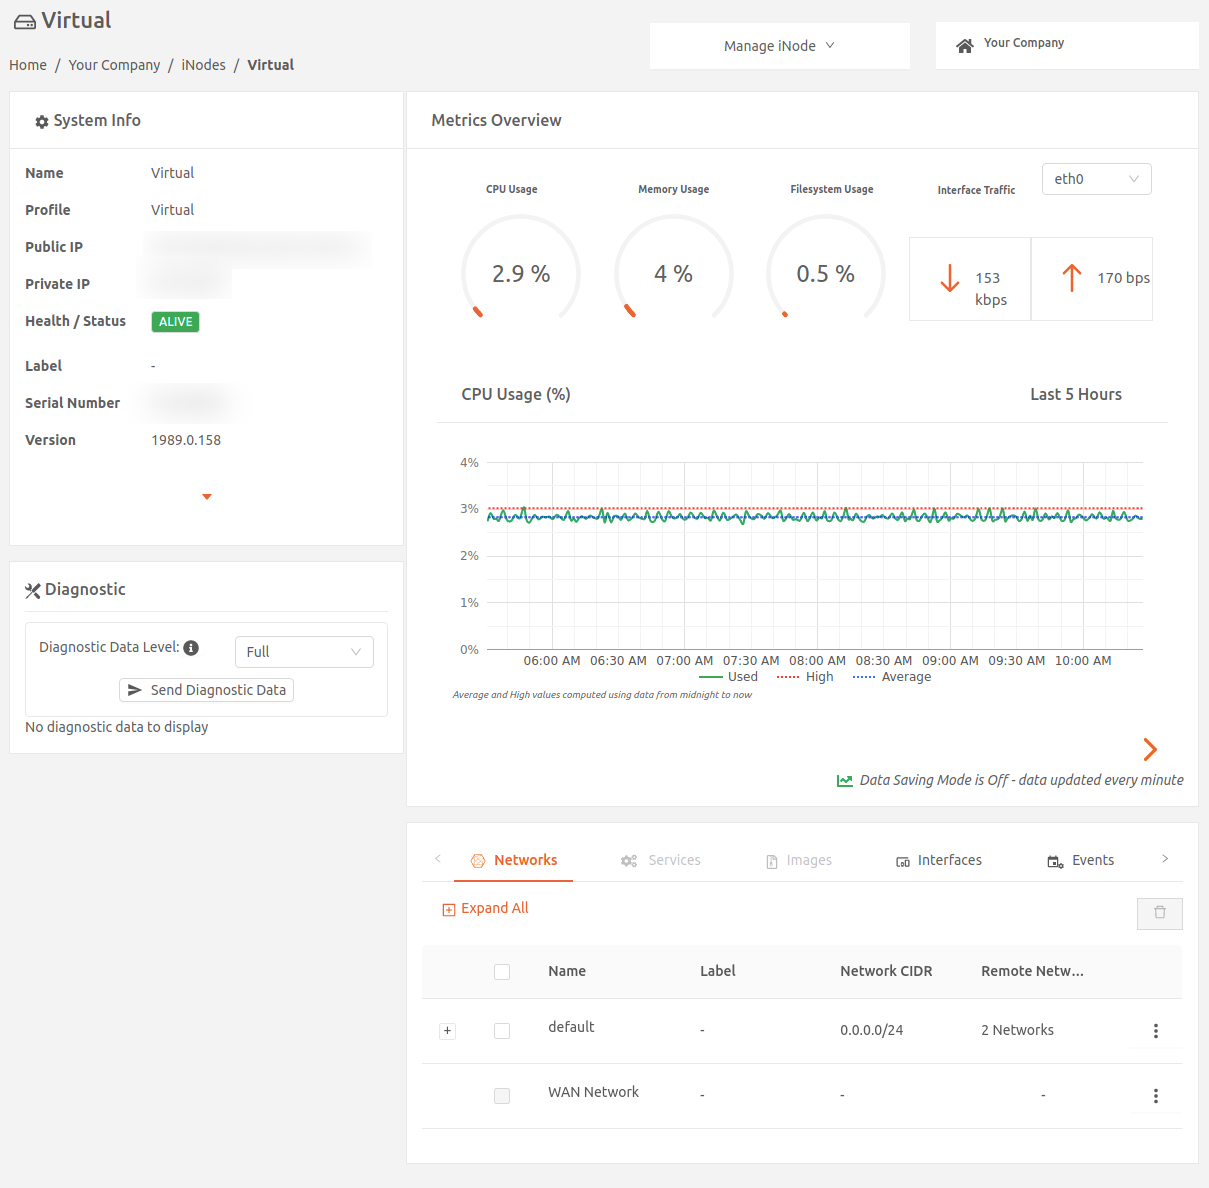
- To verify the Cloud Connector was provisioned successfully, log in to the Secure Edge Portal to confirm the status of the Cloud Connector shows as ALIVE
Provisioning and launching Virtual Edge Nodes with VMware
A Virtual Edge Node is an Secure Edge network element that, in this case, is a VMware instance located at the edge of your private network. In this section, learn how to provision and launch Virtual Edge Nodes.
Provision a Virtual Edge Node
Before you start, make sure you have an SSH public key to use for access authentication of the Edge Node console. For more details, see Managing SSH key authentication for a node
Add a Virtual Edge Node
To add a new Virtual Edge Node:
- In the Secure Edge Portal left menu, select the plus icon (+) > Add Node.
- Enter a name for the Virtual Edge Node.
- Optionally, add any custom labels. (For more on labels, see Using Labels.)
- Select the Virtual Edge profile.
- For SSH Key, select the name of the SSH public key for console access to the Virtual Edge Node.
- Download the security credentials required for launching the Virtual Edge Node by selecting the VMware logo. You will only be able to download this file once. These credentials are crucial for secure deployment, so save the downloaded file in a secure location and don't share it.ImportantThe security credentials file is only available for download once. It contains critical security information needed for the Virtual Edge Node. Ensure this file is stored securely and deleted after the Virtual Edge Node is successfully created.
- Select Add Node.
.png)
- You can change the Data Saving Mode in Advanced Settings. (For more on data saving mode, see Using data saving mode.)
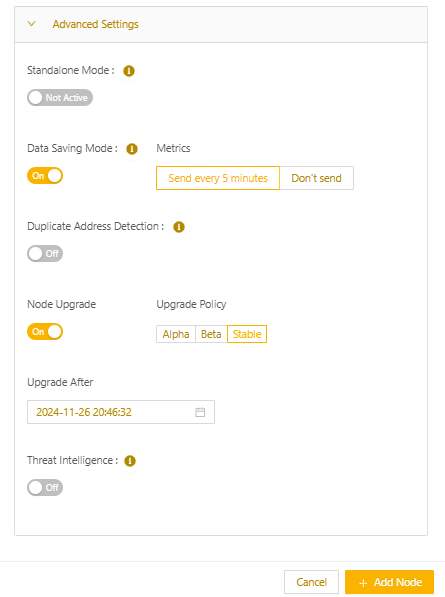
- Select Add Node.
Configure the local network
Use the following steps to configure the local network, which is the network that the Virtual Edge Node will protect:
- In the Secure Edge Portal, select the name of the new Virtual Edge Node to open the node details page.
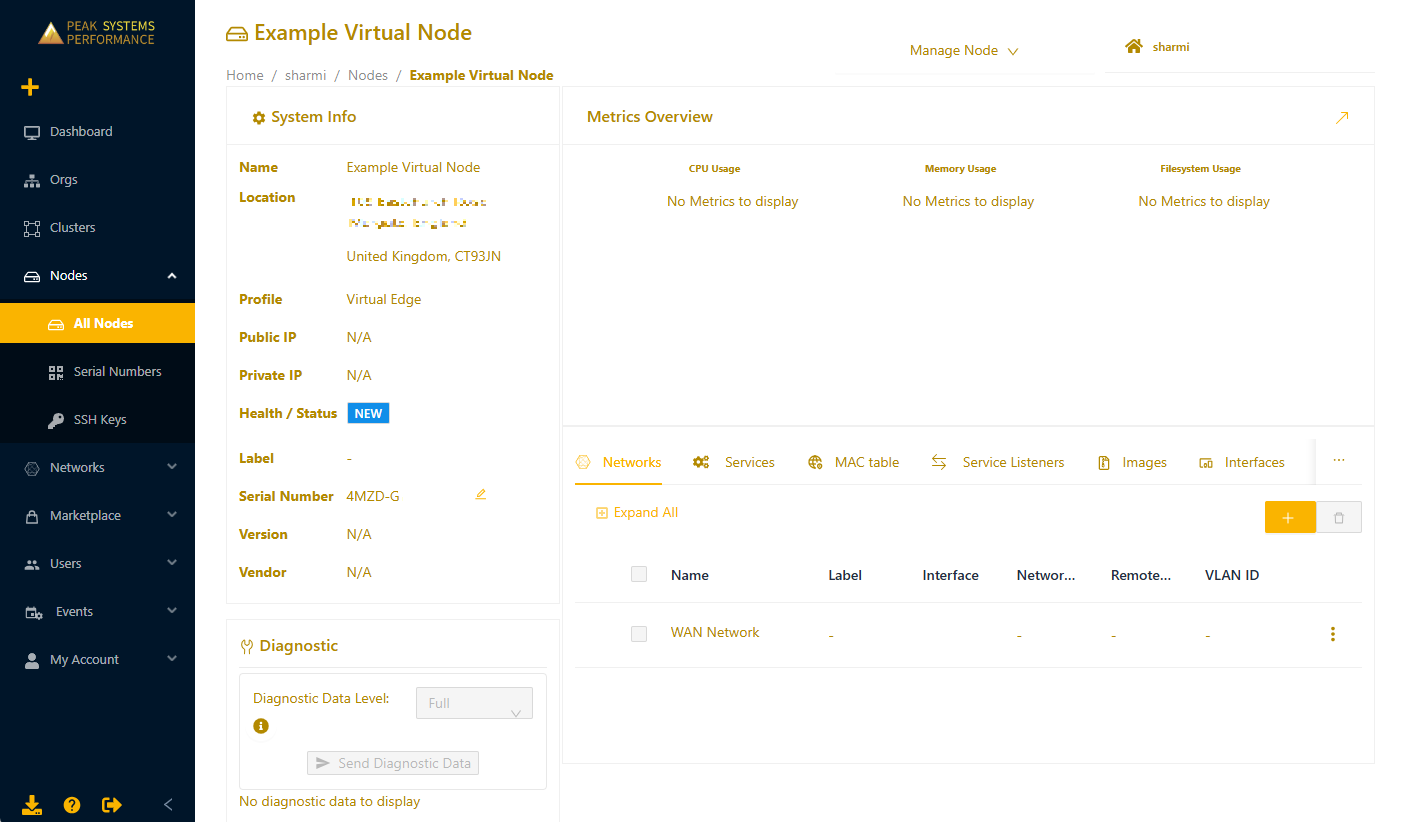
- Select the plus icon (+) to display the Add Network page.
- Enter the network name and specify any custom labels (optional).
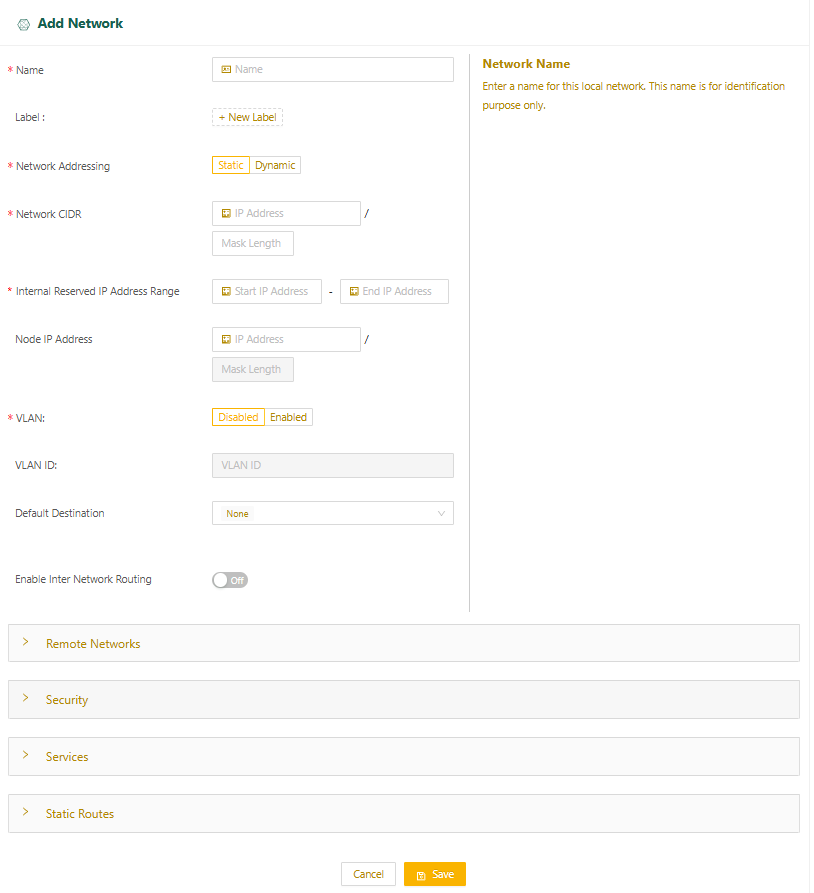
- The Networking Addressing for this network is set to Static. The hosts in this network must be manually configured with static IP addresses.
- Specify the network's CIDR in the Network CIDR field.
- Specify a range of IP addresses (at least one) for internal use, ensuring they are within the same subnet as the local network's CIDR.
- You can configure a default gateway in your local network. If you don't specify a default gateway, the Start IP Address in the Internal IP Reserved Address Range is assumed to be the default gateway.
- You may have the option of configuring Virtual LANs (VLANs).
- Any traffic from the local network with a destination outside the local network (for example, traffic going to the internet or LAN) is sent to the default destination. You can set the Default Destination to one of the following:
- None (default): Drops the traffic.
- Specify IP Address: Sends the traffic to the IP address of a gateway in the local network that you specify.
- WAN Network: Sends the traffic through the node's uplink.
- Select Save.
Set up addressing for services
If you aren’t planning to run services on this network, skip this step.
By default, the Virtual Edge Node dynamically assigns IP addresses to services on the network from the Internal Reserved IP Address Range you specified. If you’re using the default, make sure you’ve reserved enough IP addresses. You need at least one more than the number of services you plan to run.
To configure the services manually with static IP addresses:
- Select the Services expansion panel and set Service Addressing to Static.
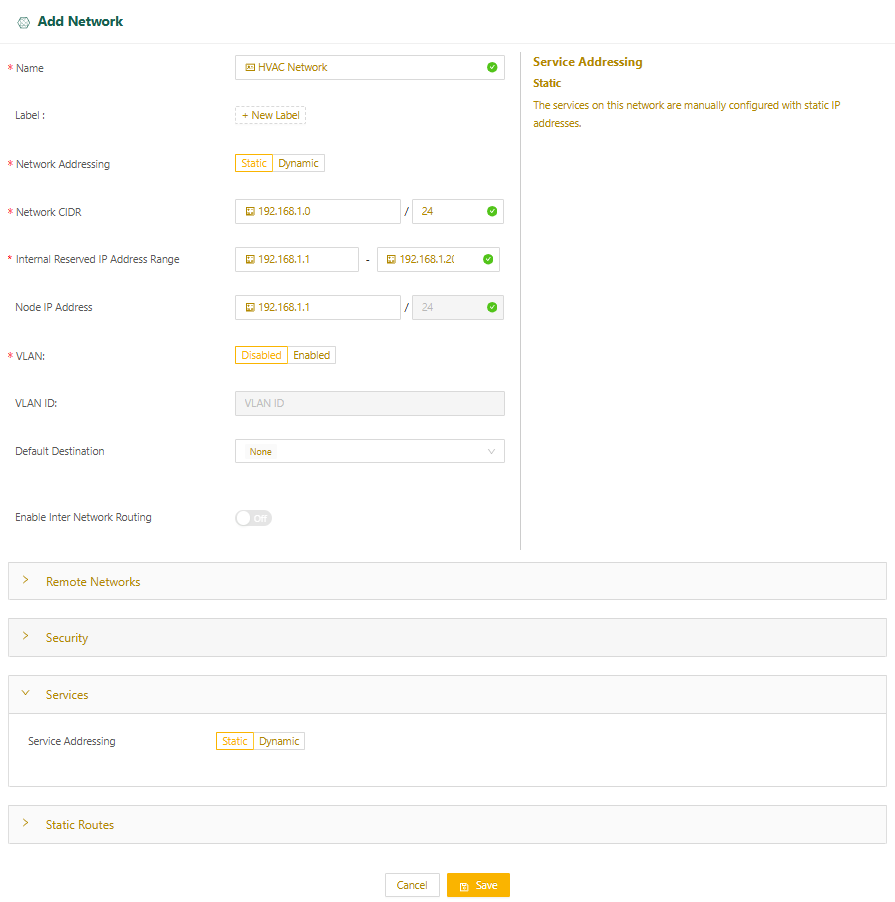
- Select Save.
Create static routes for a Virtual Edge Node
Static routes allow you to:
- Direct traffic from services running on the Virtual Edge Node to reach specific routed network segments
- Enable hosts in the local network to reach specific networks in your LAN or the internet
To create static routes for a Virtual Edge Node:
- In the Static Routes expansion panel, select Add to create a new static route. You can configure up to 64 static routes per network.NoteIf you set Default Destination to any value other than None, it will count as a static route.
.png)
- In the Destination Network CIDR field, specify the CIDR of the destination network.
- In the Via field, select where to send the traffic. You have two options:
- Specify IP Address: Sends the traffic to the IP address of a gateway in the local network that you specify.
- WAN Network: Sends the traffic through the node's uplink to an external network.
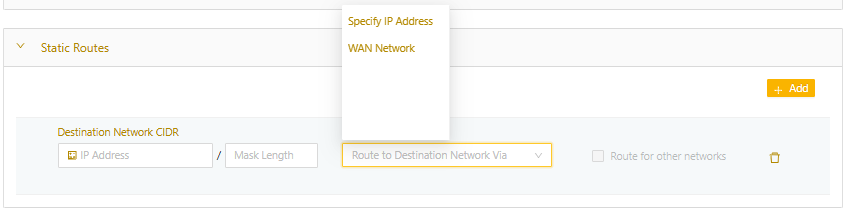
- Select Save.
Launch Virtual Edge Nodes with VMware
BEFORE STARTING the virtual machine (VM), you must mount the downloaded security credentials on the CD/DVD drive of the VM and configure the network adapters appropriately.
Complete each of the following procedures with VMware ESXi to prepare to launch the node:
- Create a portgroup
- Create a VM
- Mount the security credentials file
- Log in to the Virtual Edge Node
Create a portgroup
When using a Virtual Edge Node with VMware ESXi, you have to create a portgroup for the local network to connect to. These instructions are for VMware ESXi (6.x). For earlier version (ESXi 5.X), refer to the ESXi Hypervisor documentation.
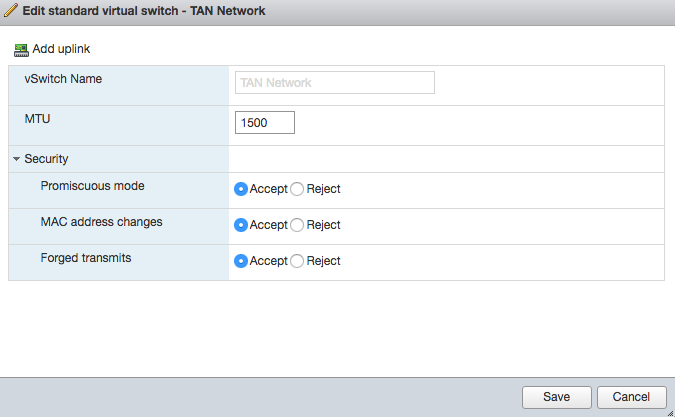
- Create a VMware vSwitch portgroup, as follows:
- Name: TAN
- VLAN ID: 100 (You can choose a different number. This is a port VLAN only, used internally by the vSwitch to group ports/network adapters connected to the same vSwitch portgroup.)
- Configure the Security settings on the vSwitch portgroup as follows:
- Promiscuous Mode: Accept. (The default is Reject.) Sett this to Accept to allow the Virtual Edge Node to read all traffic on the portgroup.
- MAC Address Changes: Accept
- Forged Transmits: Accept. (The default is Reject.) Set this to Accept to allow the node to send packets with a MAC address that is different from the network adapter that connects to the portgroup.
- Using VMware vSphere tool (or other tool like the OVF Tool), import the Virtual Edge Node image file (OVA) into VMware vSphere. The OVA file is available on the Download Software page, in the Secure Edge Portal left menu.
- Create a VM with two network adapters. Connect one adapter to the portgroup for the public internet. Connect the second adapter to the portgroup for the device network.

Create a virtual machine (VM)
To create a VM:
- Log in to the ESXi host with your credentials.
- On the home page, select Create/Register VM.

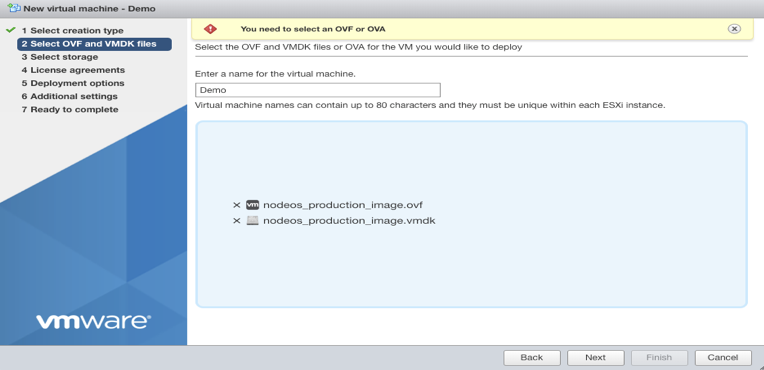
- In the pop-up, select Deploy a virtual machine from an OVF or OVA file, then select Next.

- Enter a name for the VM, and add/drag the OVF and VMDK or OVA file (unzipped if the file is zipped) downloaded from Secure Edge Portal. Select Next.
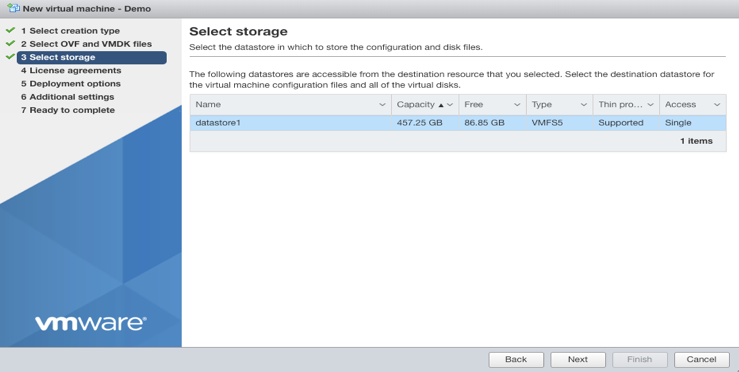
- Select where you want to store configuration and disk files, then select Next.
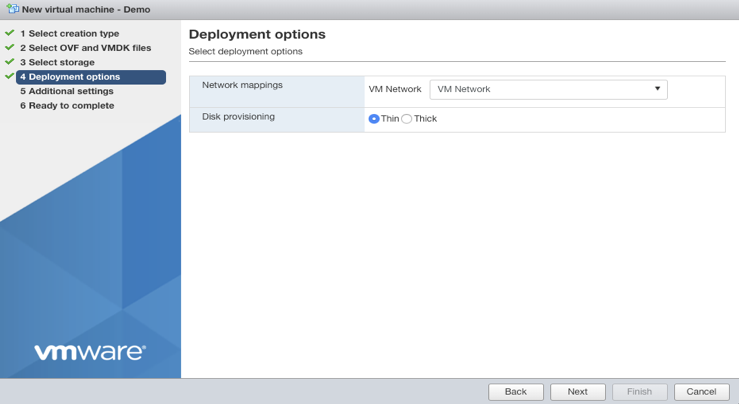
- Configure deployment options and the network mapping. The default network mapping is VM Network. Select Thin for Disk Provision. Then select Next.
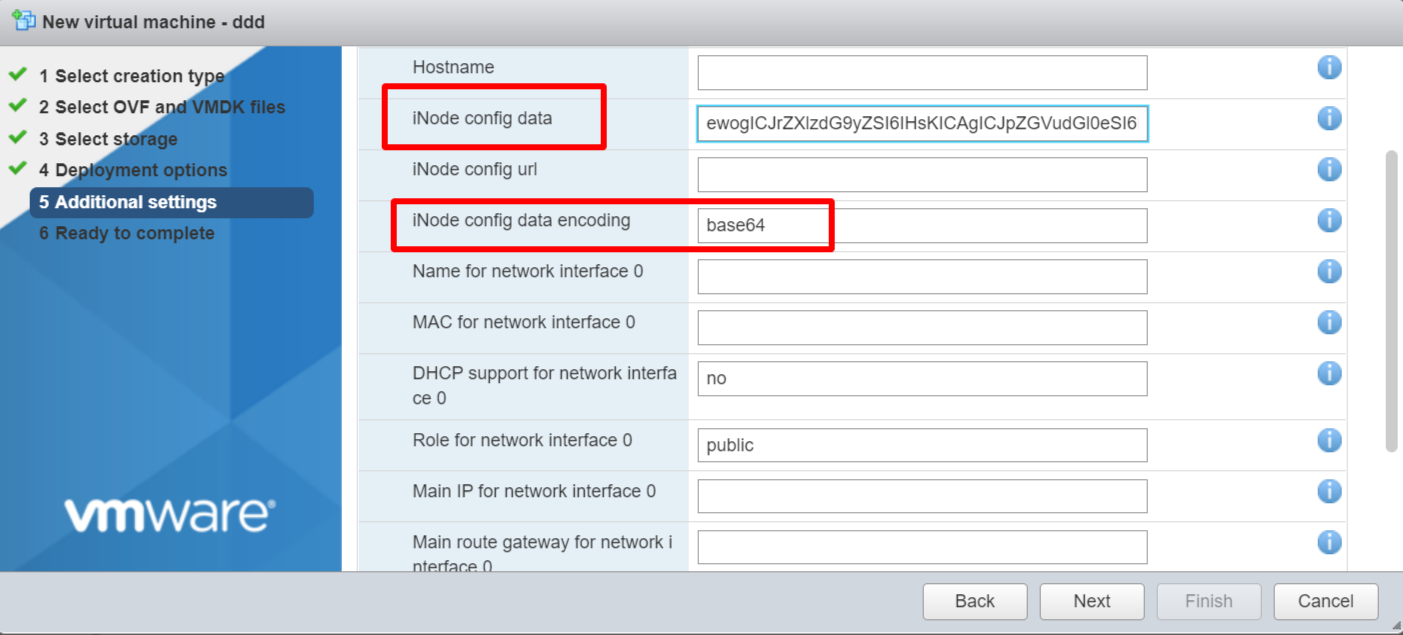
- Configure additional settings:
- iNode config data: Copy and paste the entire contents of the security credentials that you download from the Secure Edge Portal.
- iNode config data encoding: The node configuration data is encoded using Base64 format
- Verify the settings and select Finish. Don’t refresh the browser until the instance is deployed. You can monitor the progress in Recent Tasks at the bottom of the page.

- Once the VM is ready, the status shows as Completed Successfully.

Select the required network interface
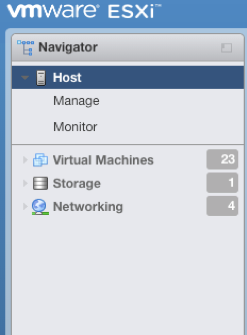
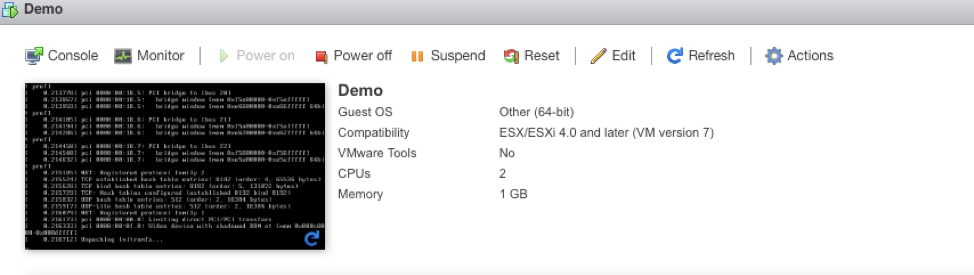
- In the ESXi Navigator, select Virtual Machines and choose the recently created VM from the list of VMs.
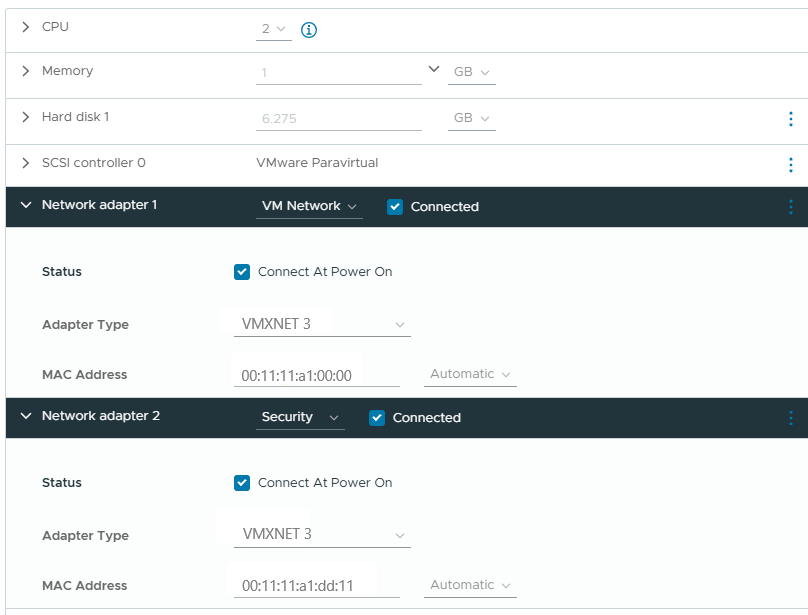
- On the VM menu bar, select Edit to display Edit settings.
- In Edit settings, expand the network adapters. In the Adapter Type field, make sure to select VMXNET 3 for both network adapters (instead of the default value E1000).
Reboot the Virtual Edge Node
- Log in to the Virtual Edge Node (follow the steps in Accessing an Edge Node console).
- Once logged in, use the reboot command to restart the system. The reboot process takes approximately two minutes.
The Virtual Edge Node reboots twice, and then will appear as ALIVE in the Secure Edge Portal.