This article explains how to access your endpoints via the Neeve Portal, and how to adjust advanced settings for certain connection types. The following sections also include specific instructions for using Remote Access Agent for TCP or UDP connections, and for using file or text transfer for RDP endpoints.
Access an endpoint
Navigate to your company’s domain name: https://<customer-name>.app.neeve.ai
Log in to your account (for instructions, see Using the Neeve Portal) to open the Launcher.
.png)
From the tiles view, click on the tile of the endpoint you want to connect to. Or, from the list view, select Launch in the Action column.
Depending on the connection type, you will either be redirected to an external webpage or a device login dialog will open (as shown below).

Enter your device credentials and select Submit to establish a remote connection to the device with the settings authorized by the device administrator.
Add favorites and filter
Select the star on a device tile to “favorite” a device and have it appear at the top of your tiles or device list. 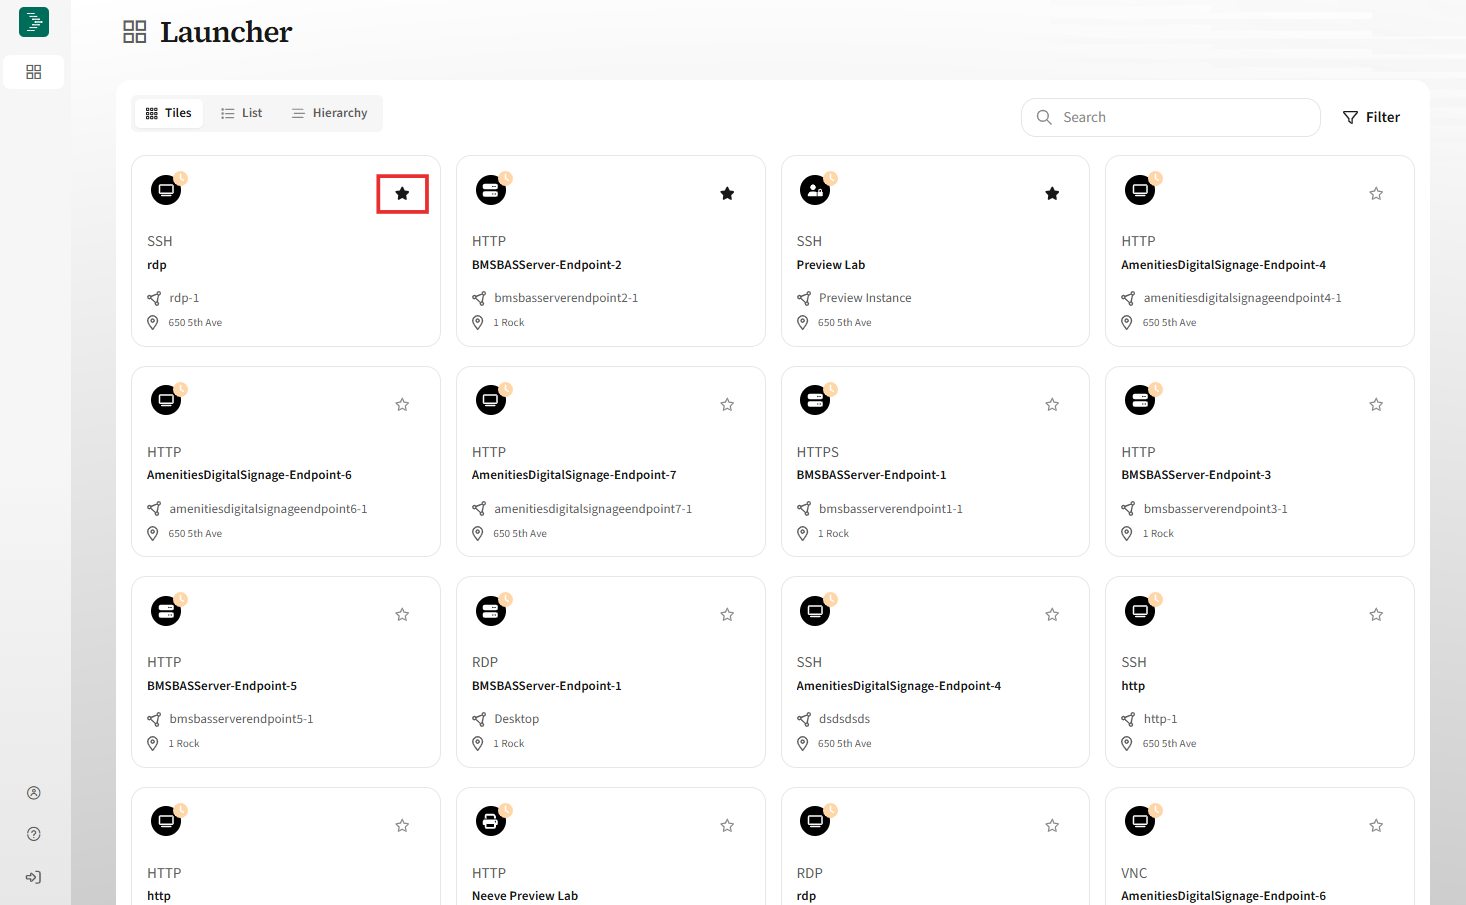
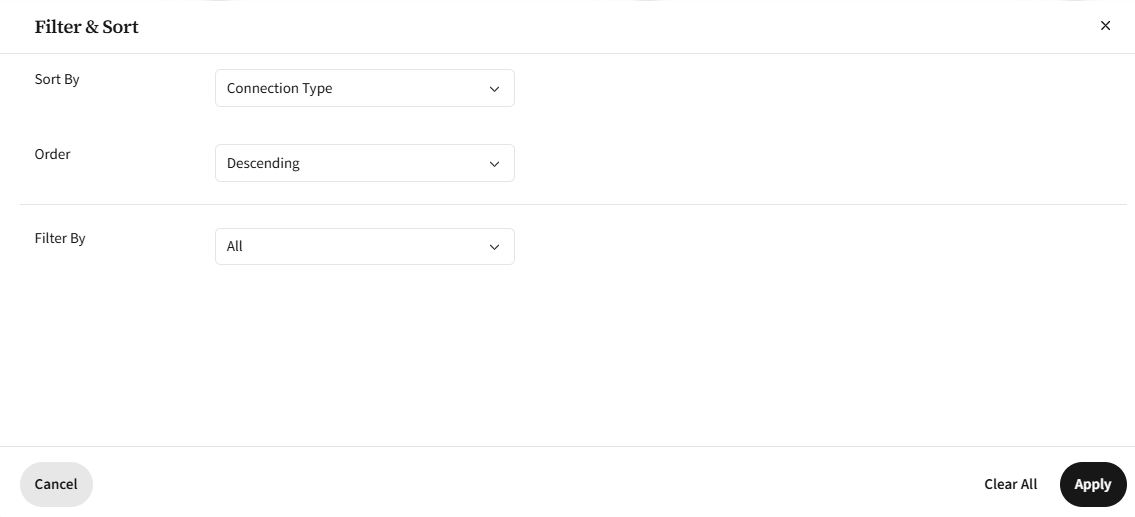
You can also filter and sort on device endpoints for faster access.
Using Remote Access Agent
This section explains how to install and run the Neeve Remote Access Agent app to access devices or networks with TCP/UDP connections. For more information, see Neeve Remote Access Agent applications.
Launch the remote agent
Log in to Neeve, and on the Launcher you can sort by connection type.
Remote Access Agent devices show TCP as the connection type.
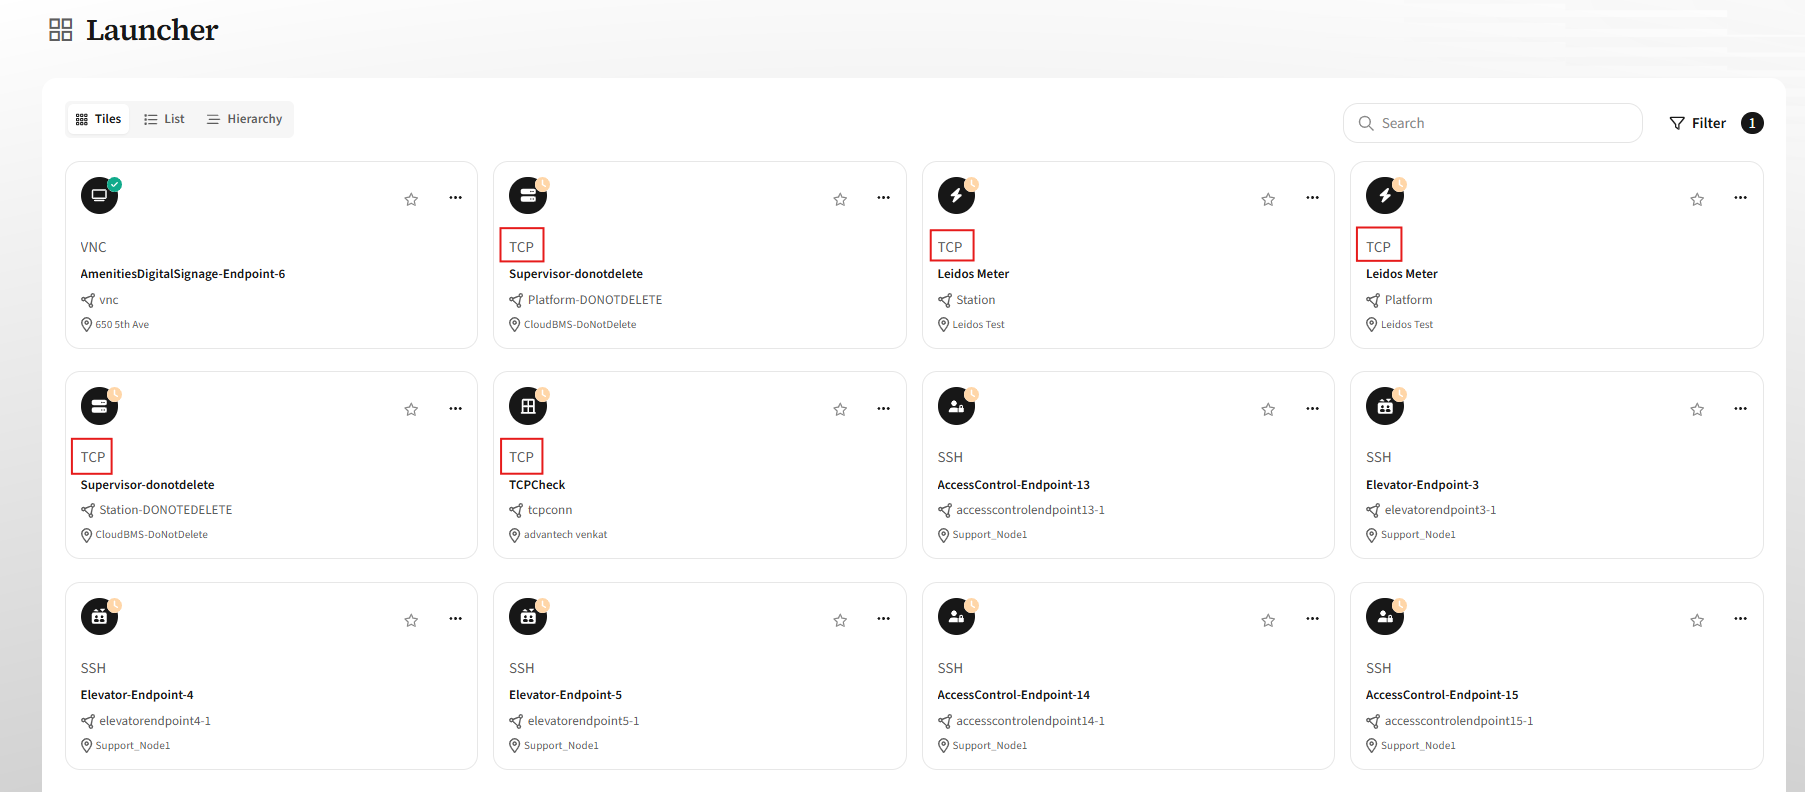
Select the desired connection. If Remote Access Agent (the remote agent) is not installed, you will be prompted to download it.
Download and install Remote Access Agent for your operating system. Note the Realm in the agent UI, which you will need in the next step.
If already installed, simply launch the application..png)
Launch Remote Access Agent and enter your user name (typically the email you use to log into the Neeve portal) and the realm that you noted in the previous step.

Select Login and then enter your Neeve credentials.
Wait a few moments for the agent to establish the connection. The agent status should show as Running. If you encounter a timeout, you may need to reauthenticate.
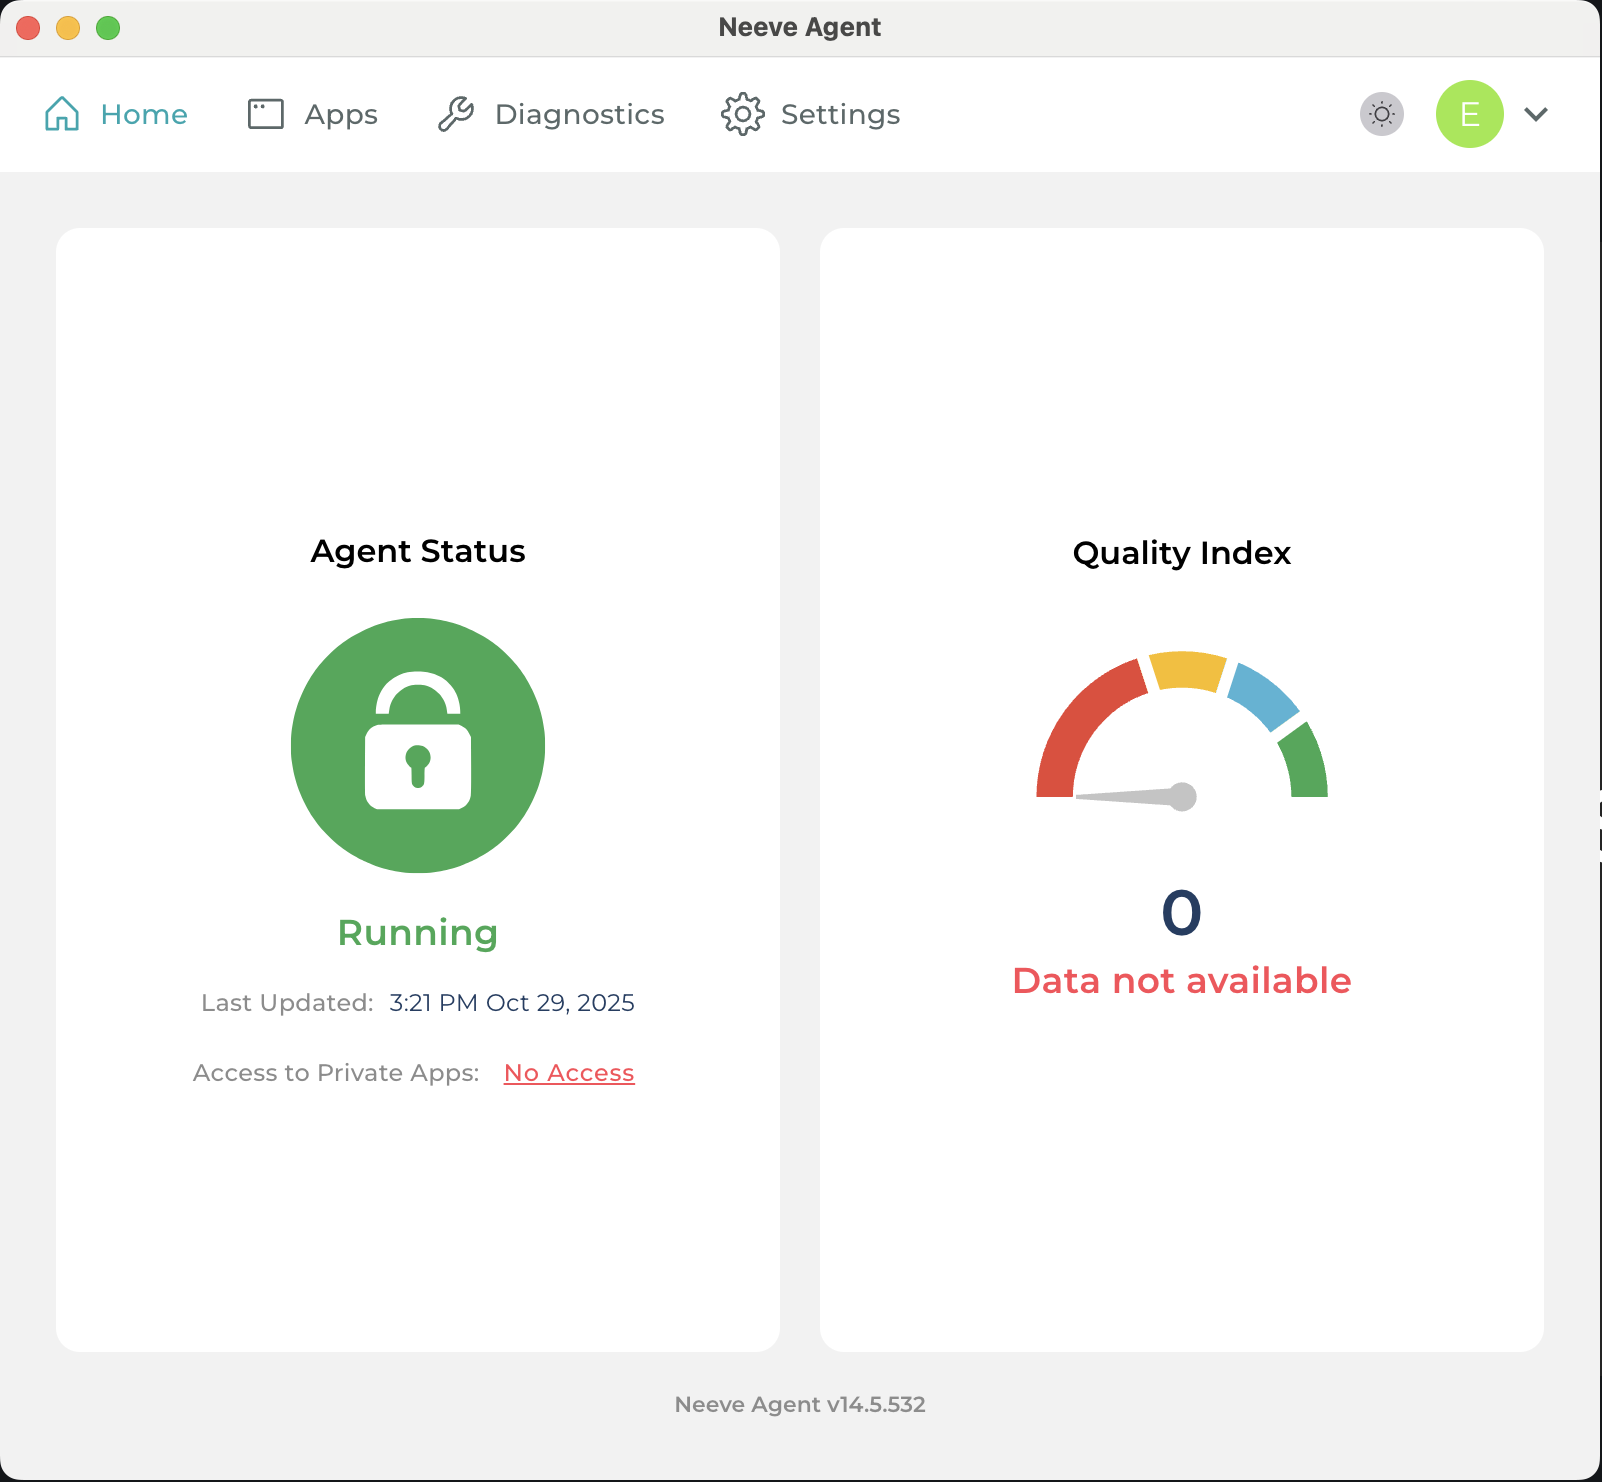
Once the agent status shows as Running, you can access the device via local applications.
Tip
Remember to quit Remote Access Agent when you finish your work. If not, it will continue running in the background and consume resources.
All assigned TCP/UDP connections will be available in Remote Access Agent. You can find your available connections in one of two ways, depending on how your environment is configured.
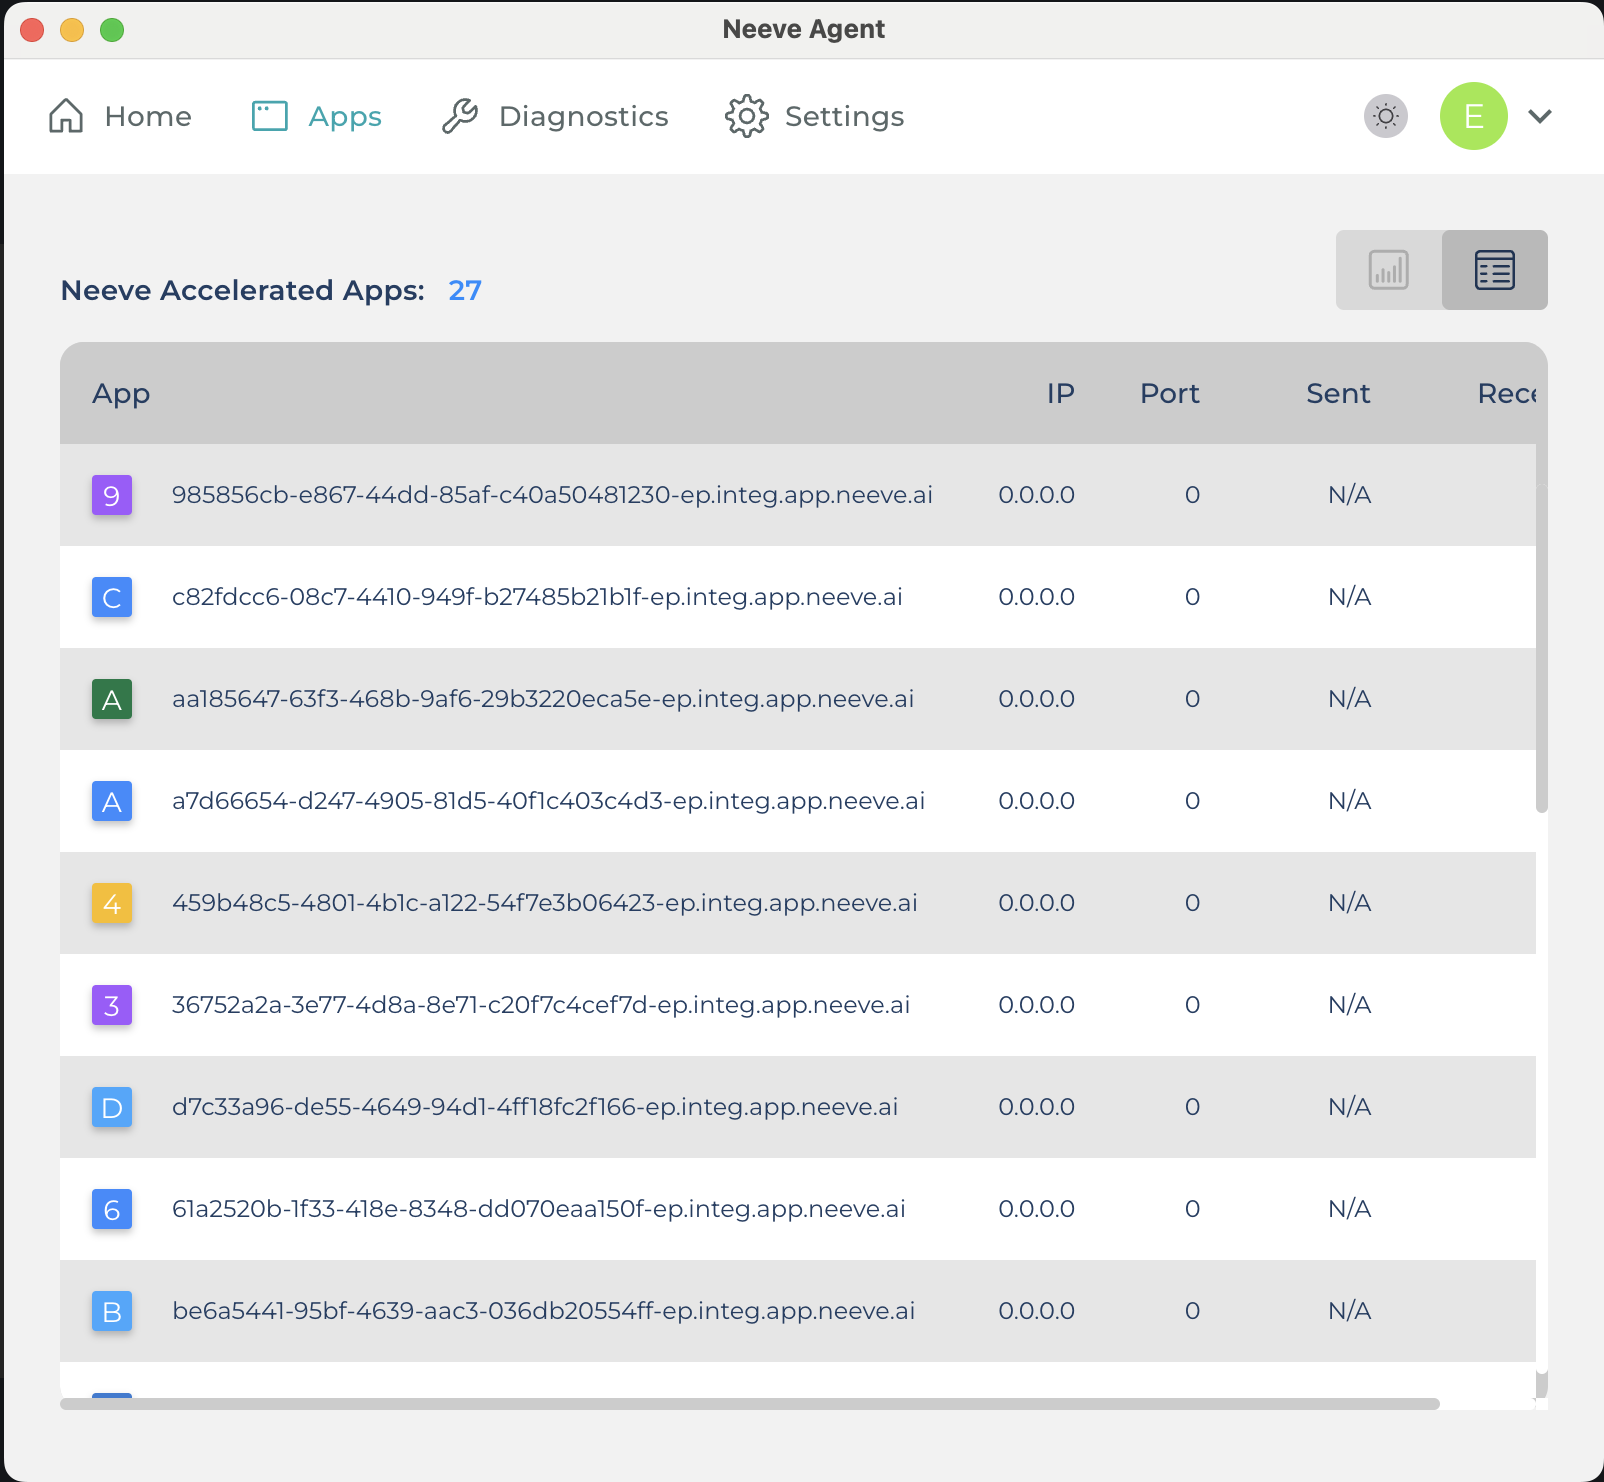
Either, you will have network-level access and see all available connections listed under the Apps tab in the agent UI:
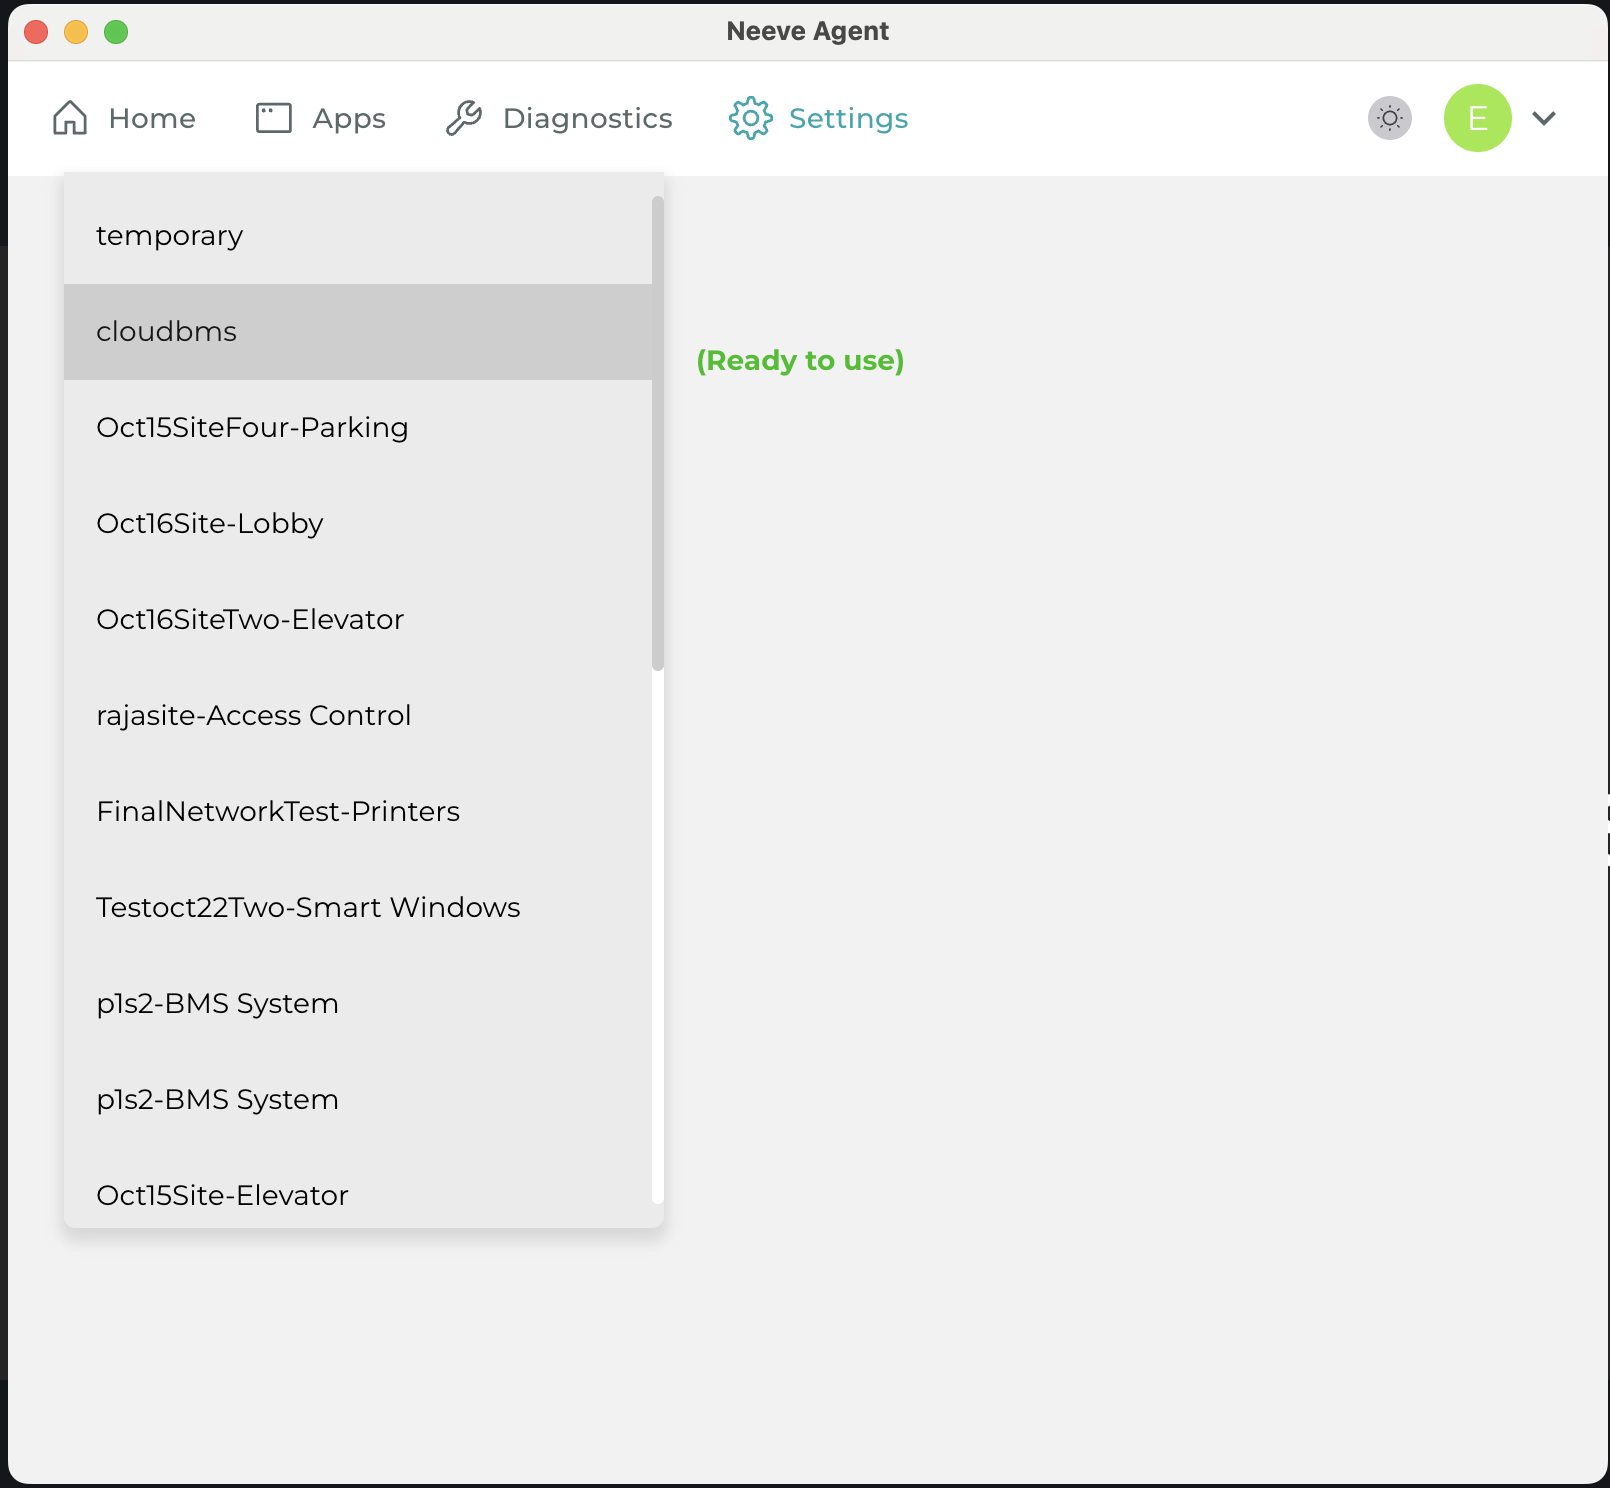
Or, you will have single IP access. In this case, you must first go to the Settings tab and select the site to connect to (formatted as “site-network”), and then select Apps:
Connect to a device using the desktop application
When using your desktop application, you will connect based on one of the two scenarios mentioned in the last step above.
If your organization has configured network access, you can use the IP address of the target connection.
Tip for Neeve Admins
On the Endpoints page, if you see the Add Network option, your environment is configured for network-level access.
If your organization has configured single IP access, you can’t use the IP address of the target connection. Instead, you can connect via RepNet IP or Fully Qualified Domain Name (FQDN)—whichever is appropriate for your application. To find the RepNet IP and FQDN for a TCP connection, select its tile in the Launcher. You can copy the values from the pop-up.
Configure advanced device settings
For RDP and VNC connection types, the login dialog includes a Show Advanced Settings menu, where you can configure additional settings:
Resolution Settings: For RDP connections, you can adjust the screen resolution. Higher resolutions make text and images sharper but smaller.
Color Depth Settings: For RDP and VNC connections, you can change the number of colors displayed. A higher color depth provides more vibrant and detailed images.
Keyboard Layout: For RDP connections, you can customize your keyboard for a specific language or format.
Using file or text transfer
If your Organization Admin has enabled file transfer for your remotely connected device, you can move text or files between your computer or mobile device and the remote device using the shared directory. This section explain how to access and use the shared directory, including the shared drive to transfer files and the clipboard to transfer smaller amounts of data.
Note
Transferred files are not scanned for viruses.
Accessing the menu
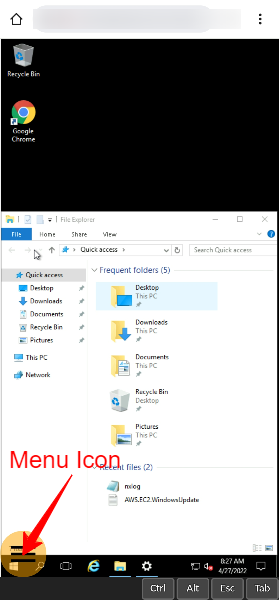
On mobile devices, you’ll find the menu icon at the bottom left of your screen. Use this icon to open the left menu slider. You can move the icon across the screen to keep it accessible while working.
Access the shared directory
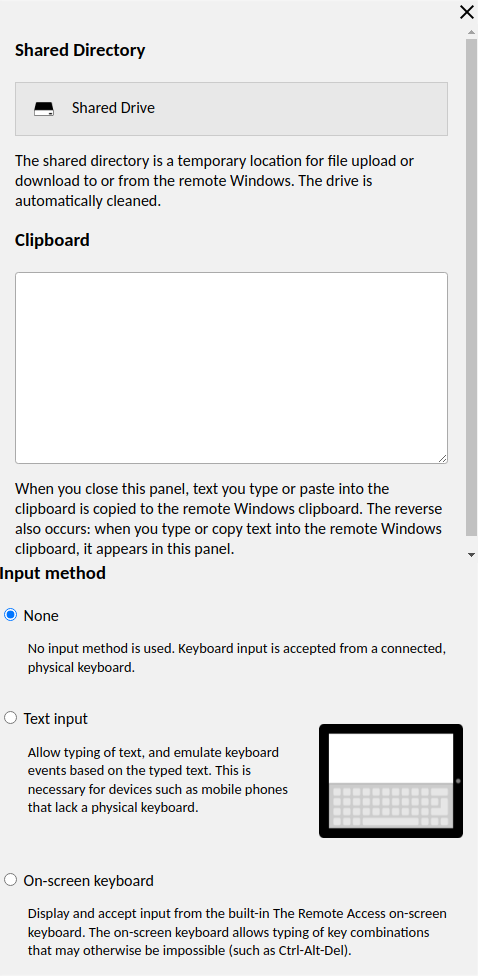
Follow these steps to access the Shared Directory panel for file transfer, clipboard use, or input settings:
From the Access section of your User Profile, log in to the device you want to access.
After logging in, select the key combination Ctrl+Alt+Shift (for Windows) or Control+Option+Shift (for MacOS). On mobile devices, use the menu icon to open the left menu.
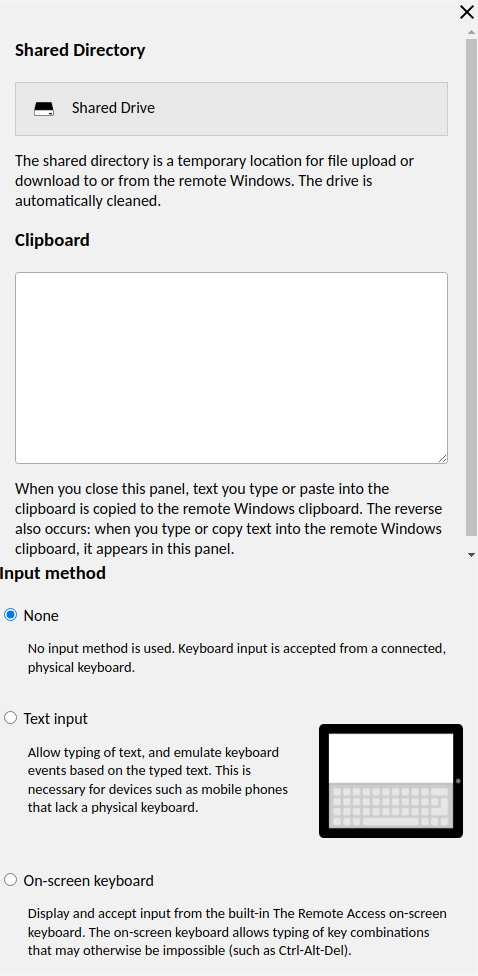
The Shared Directory is the temporary location for file and and data transfers.
The Clipboard allows you to copy and paste text to the remote device's clipboard.
You can also change your Input method.
The following sections explain these actions in more detail.
Change the keyboard input method
To change the keyboard input method to accommodate mobile devices or other touchscreens:
Log in to the Shared Directory panel.
In the left menu, under Input Method, select your preferred keyboard input option.
.png)
Choices include None, Text input, and On-screen keyboard. (Text Input is the default setting for mobile devices.)
Upload files to a remote device
To upload files from your computer to the remote device, follow these steps:
Transferring large files
Files larger than 8GB may encounter issues during transfer.
In the Shared Directory panel, select the Shared Drive.
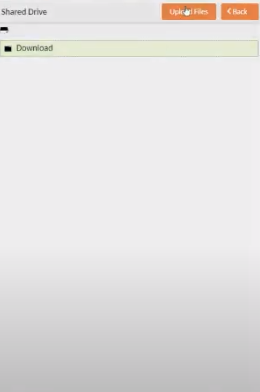
Select Upload Files and navigate to the file you want to upload.
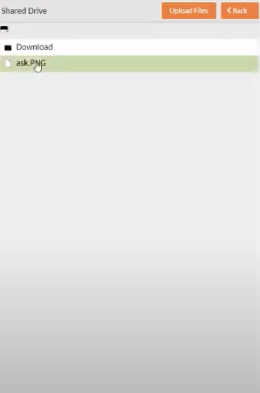
Once selected, the file will upload and become accessible from the shared drive.
On the remote device, open Windows File Explorer and navigate to the mounted shared drive. Then copy or move the file to a local directory on the remote device.
Download files from a remote device
To download files from the remote device to your computer:
Transferring large files
Files larger than 8GB may encounter issues during transfer.
On the remote device, open Windows File Explorer and navigate to the mounted shared drive.
Copy or move the file from the remote device's local directory to the shared drive.
The file will automatically download to your computer's Downloads folder.

Use the clipboard
To transfer text between your computer and the remote device:
In the Shared Directory panel, type or paste your text into the Clipboard field.
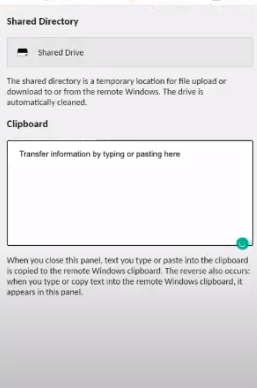
Close the Clipboard to copy the text to the remote device’s clipboard.