This article explains how to provision and launch Edge Nodes, which are the physical hardware that connects directly to your IIoT devices. Complete the following procedures to install the hardware device you received from Neeve and connect it to the network.
You have two options for configuring and launching Edge Node:
Configure a node with the onboarding workflow.
Manually provision an Edge node.
For instructions on provisioning Virtual Edge Nodes and Cloud Connectors, see Advanced use cases. If you’re planning to use Virtual LANs (VLANs), see also Enabling VLANs for an organization.
Setting up physical network connections
Note
You can configure Edge Node networks before physically connecting them to the network.
As a prerequisite for operation, the Edge Node needs to be connected to the network. One Ethernet port is reserved for WAN connectivity, which must be linked to a network with internet access. For detailed requirements, see Prerequisites for Edge Node connectivity.
The remaining port(s) are available for connecting to LAN networks to support the following activities:
Protection using the Edge Nodes firewall functionality
Remotely accessing devices via the Neeve Portal
Running services and applications
Facilitating cloud connectivity through secure tunnels
Depending on your Edge Node model, you'll have between two and four Ethernet ports available. You can see the available ports and the status of these network connections in the device's port diagram, which you'll find on the node details page in the Neeve Portal.
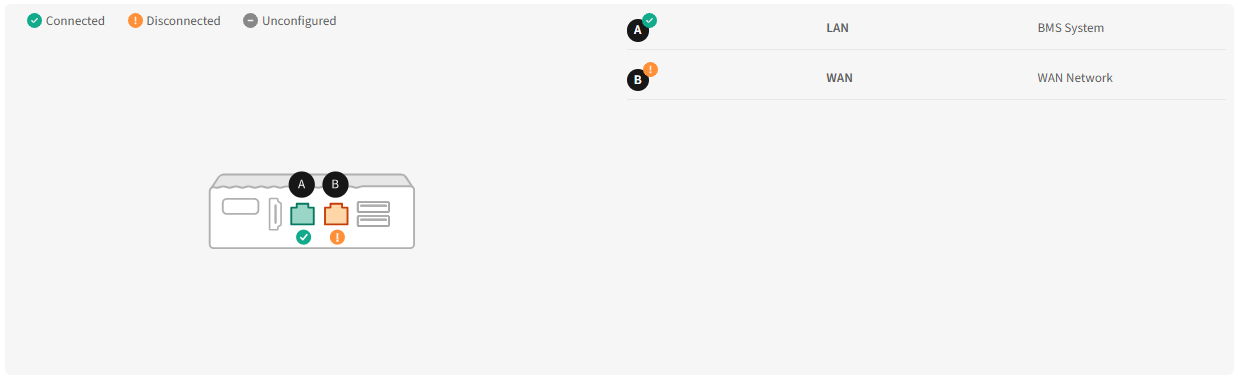
By default, on Model 2484 Edge Nodes, LAN A and LAN B are the only active ports. The labels shown in the diagram match the labels printed on the physical device. These labels are used throughout the portal to maintain consistency. To enable the other ports, refer to Advanced network interface configuration on Edge Nodes.
Connect the WAN-designated port to a network with internet access. Connect other ports as needed to the appropriate LANs. For converged networks, LAN ports on the Edge Node support VLAN segmentation.
Configure a node with the onboarding workflow
The Neeve Portal features a built-in workflow to help you set up and configure an Edge Node and its networks and endpoints.
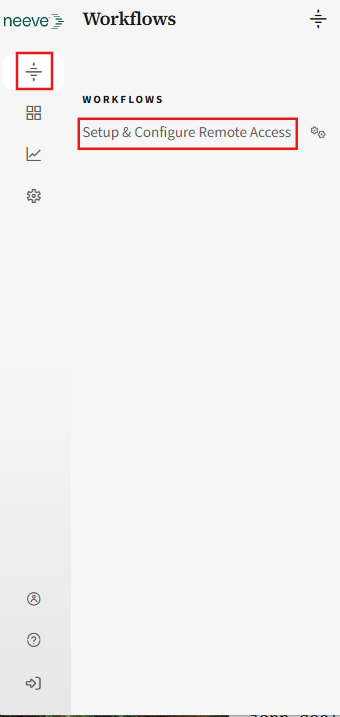
Log in to Neeve, select the Workflows icon > Set up & configure remote access and then select Begin.
Under Enter the Node details, select the site or choose to create a new site.
If you are creating a new site, in the Add Site dialog, complete the site address details and select the portfolio.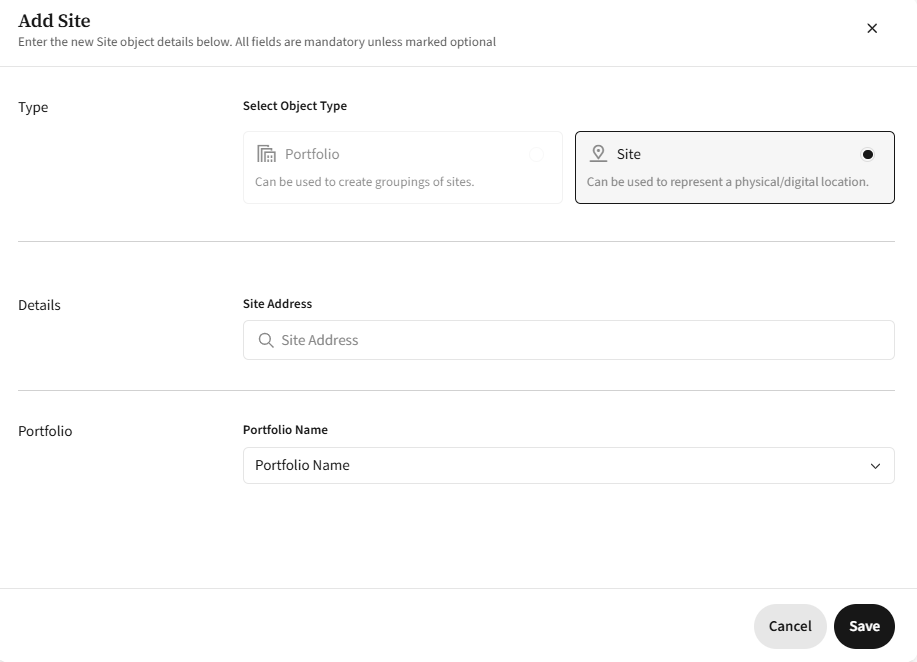
Enter the node serial number. (As you begin to type the node serial number, the dropdown field will auto-populate with a matching number from your inventory.) Then select Next.
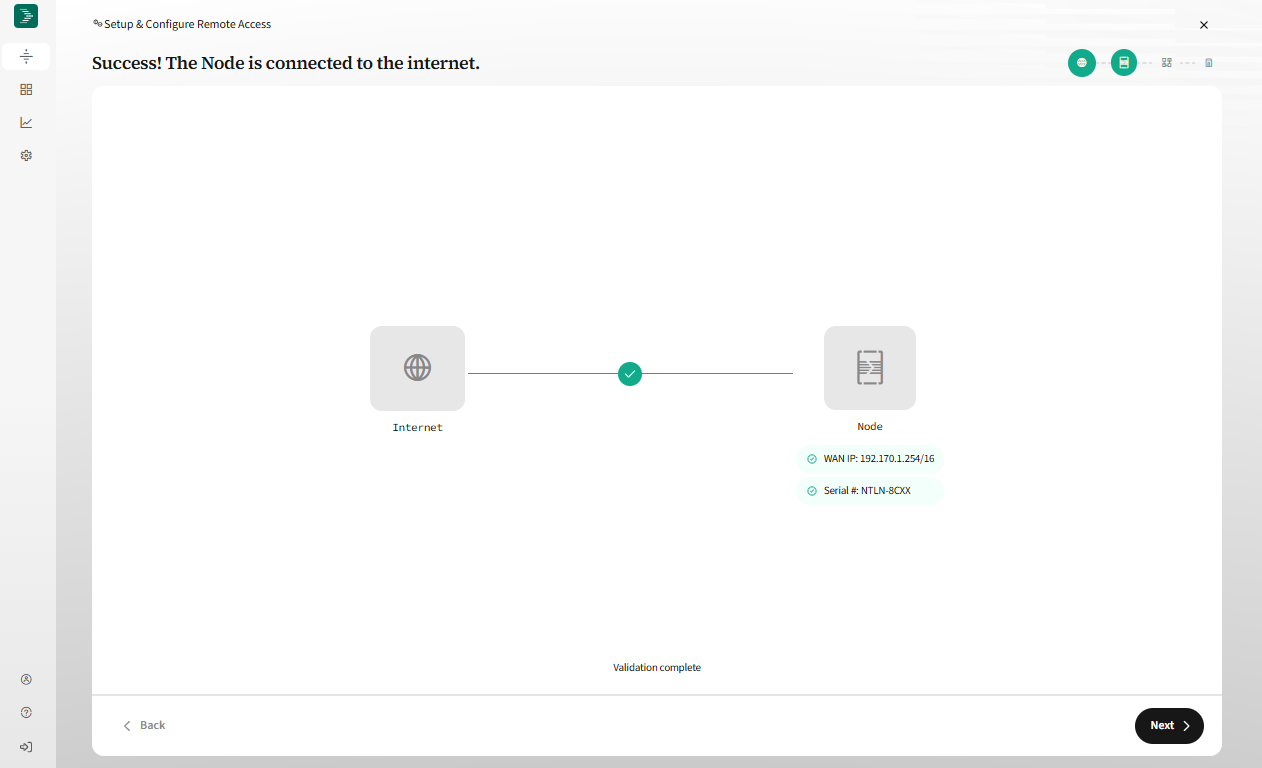
Physically connect the node to the internet, as explained in the diagram, and then select Next.
Once the portal validates the node's internet connection, select Next.
In the System network dropdown, select the node's function.
For Network Addressing, select Static, Automatic (DHCP), or DHCP Server, then select Next:
Static: Enter the node IP address and subnet. The node IP address will be the default gateway.
Automatic (DHCP): An existing DHCP server on the network provides and manages IP addresses.
DHCP Server: The Edge Node acts as the DHCP server for devices on this network. Select Customize to set the address pool, lease time, and host reservations. For full instructions, see Configuring a DHCP Server network.
If you want to allow users to remotely access the network through Remote Access Agent, select the checkbox Make available through Remote Access Agent?
Remote Access Agent setup considerations
Currently, there are two operation modes for Remote Access Agent: Single IP and Full Network Access. If your portal is configured for Single IP mode you will not see the "Make available through Remote Access Agent?" checkbox. Contact support@neeve.ai or your account manager for additional assistance.
Specify the TCP/UDP ports that should be made available to applications to connect. You can enter multiple ports or port ranges separated by commas.
For static networks, specify the IP address that the connector service will be assigned. This is the IP on the system network that will be used by the Remote Access Agent service that runs on the Edge Node to facilitate the connection. Ensure this IP address is available on the system network.
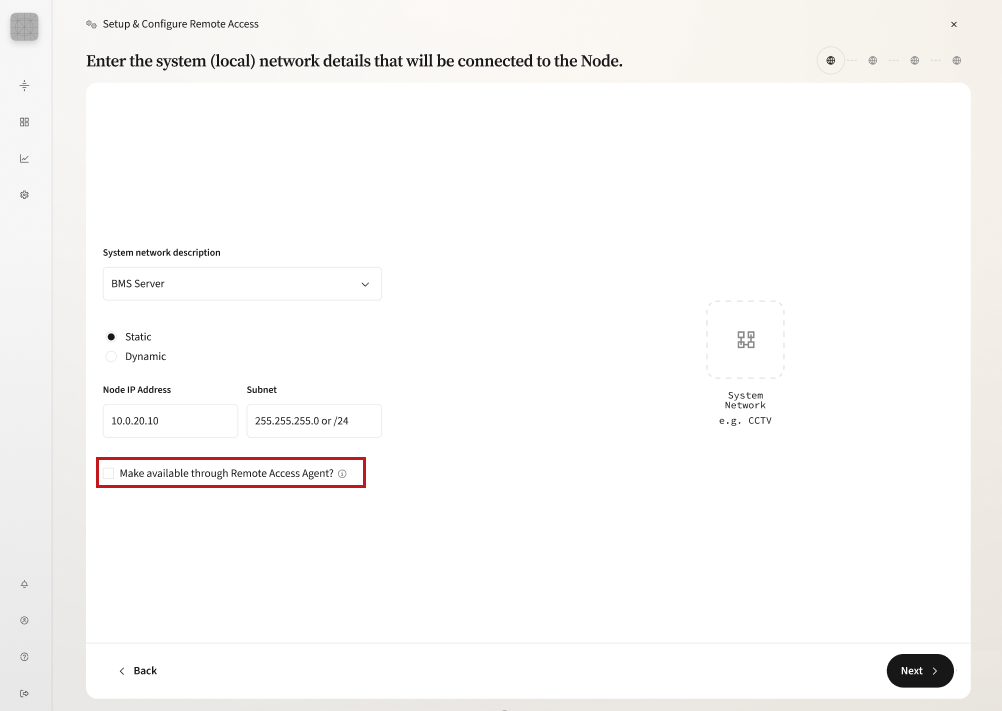
Physically connect the node to the system network, as explained in the diagram.
If you are not ready to connect your node to the system network, you can continue with node setup, but you will not be able to connect to endpoints on your network.Once the system network connection is successful, select Next. The portal will run a scan and provide a list of endpoints available on the network.
Select the checkboxes of the endpoints to onboard, edit their names as necessary, and select Next.
Alternatively, select Setup Later to exit the flow and add the node without onboarding endpoints..png)
The portal will identify any open ports that map to established defaults for those connection types (for example, the SSH and HTTP connections in the following screenshot). You can modify or delete these found connections (three-dot menu to the right), and configure additional connections (+ Add) as necessary.
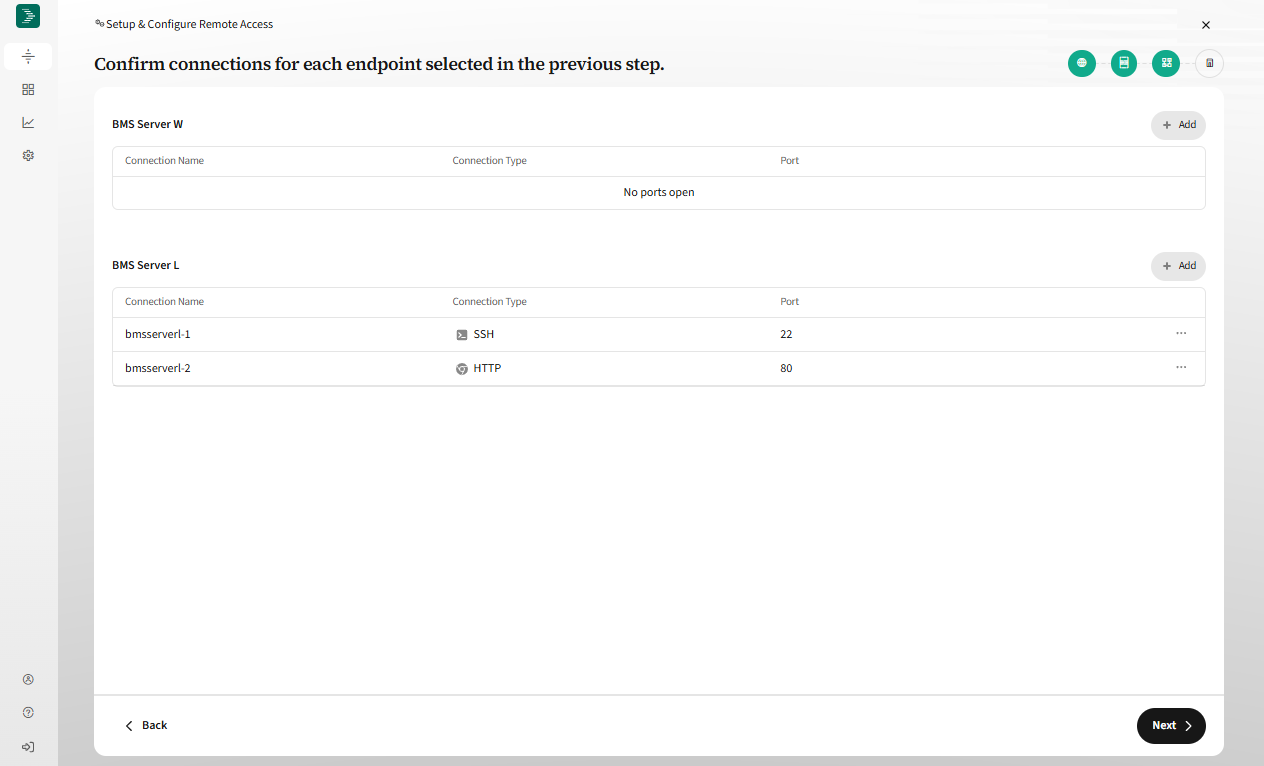 For detailed information on configuring connections, see Adding endpoints in Neeve.
Review the node configuration and select Confirm.
.png) You will return to the Launcher, where your new connections will appear.
You will return to the Launcher, where your new connections will appear.
Manually provision an Edge Node
The following sections explain how to add Edge Nodes as network elements, assign them to local networks, and configure their attributes.
Add a node
In the Neeve Portal, select Manage (gear icon) > Nodes.
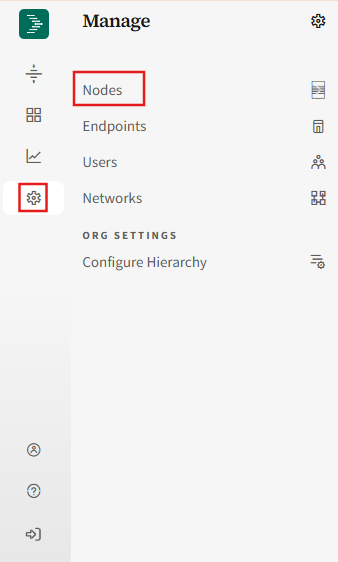
On the Nodes page, select + Add.
In the Add Node dialog, select the site. This will auto-populate the node name, but you can edit the name as needed.
Enter the node serial number. (As you begin to type the node serial number, the dropdown field will auto-populate with a matching number from your inventory.)
Assign any labels to the node.
Adjust the advanced options, if necessary. For more information on these features, see Using data saving mode and Duplicate Address Detection.
Select Add to complete the setup. Once added, the node will appear on the Nodes page.
Add a network to a node
From the Nodes page, select the arrow icon (>) in the node's row to open its details page.
Select the System Networks tab and select + Add.
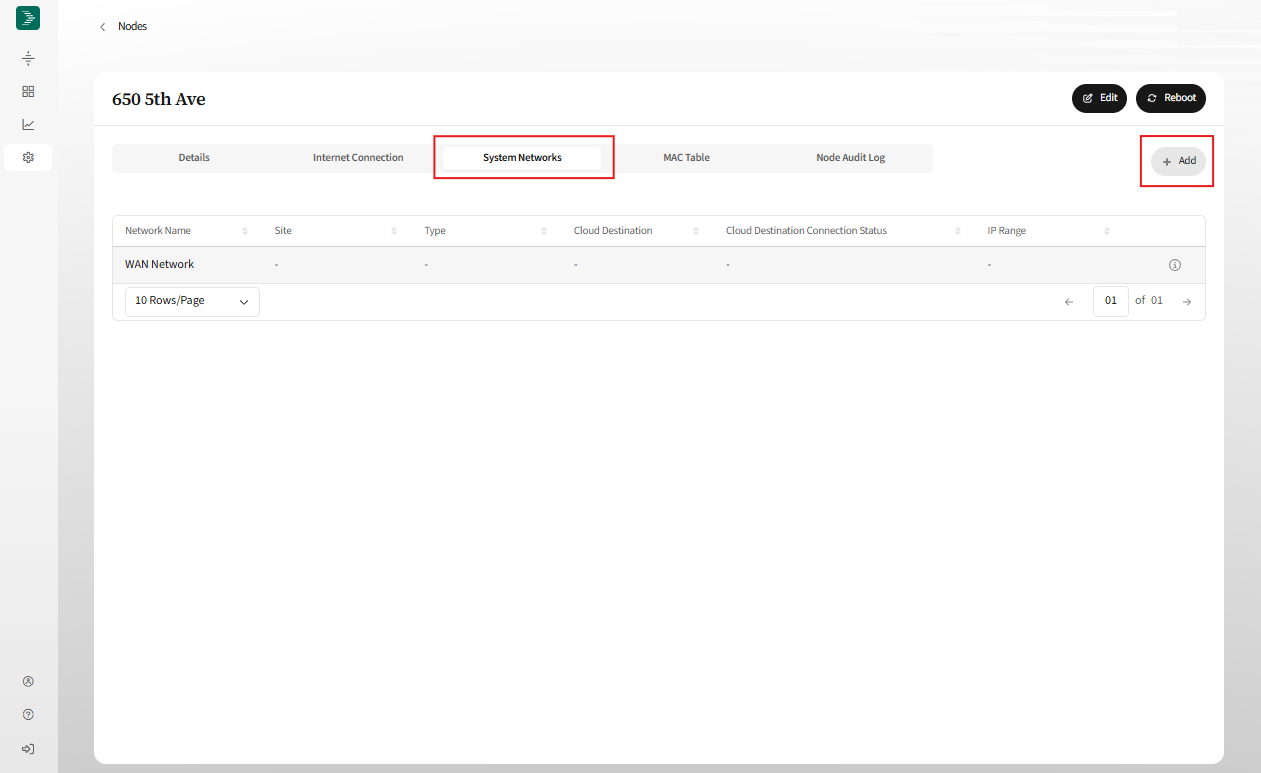
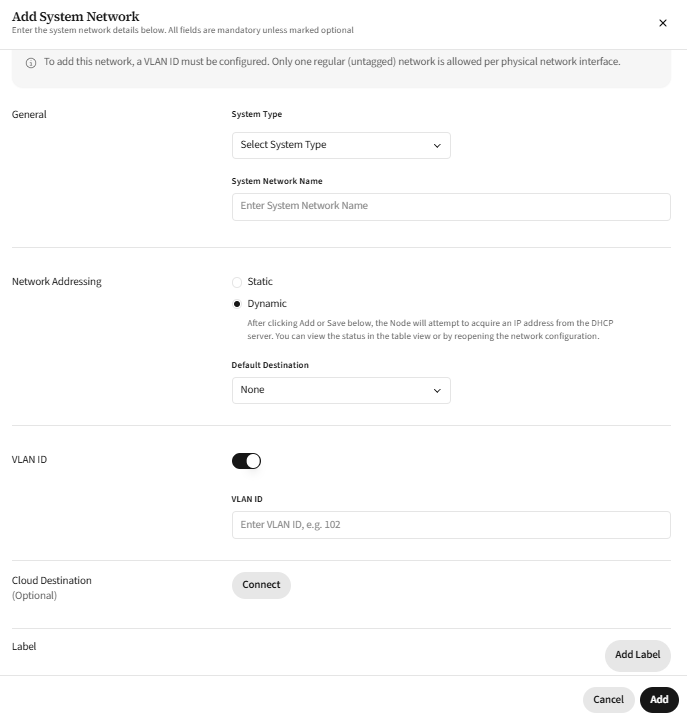
In the Add System Network dialog, select the system type from the dropdown field and adjust the name as necessary.
If your node has multiple ports, select the node interface to run the network on.
For Network Addressing, select Static, Automatic (DHCP), or DHCP Server:
Static: Specify the network’s CIDR in the Network CIDR field.
Automatic (DHCP): An existing DHCP server on the network provides and manages IP addresses.
DHCP Server: The Edge Node acts as the DHCP server for devices on this network. Select Customize to set the address pool, lease time, and host reservations. For full instructions, see Configuring a DHCP Server network.
The network address type cannot be changed after the network is created. To use a different type, delete the network and create a new one.
When using a static network, if you want to allow users to remotely access the network through Remote Access Agent, select the checkbox Make available through Remote Access Agent?
Set the Default Destination for traffic from the local network with an outside destination (for example, traffic going to the internet or LAN):
None: (default) Drops the traffic
Specify IP Address: Sends the traffic to the IP address of a gateway in the local network that you specify
WAN Network: Sends the traffic through the Edge Node uplink
If you want to create multiple networks on the node’s interface, enable Show Advanced Options, toggle VLAN ID on, and then enter a unique VLAN ID in the range of 1 to 4094. Only one regular (untagged) network is allowed per physical network interface.
The Cloud Connector for this network is selected and connected automatically, so you do not need to choose one. Cloud Connectors are required to allow remote access to your endpoints. After the network is created, you can confirm the association on the network’s details page under Cloud Destination, where the Cloud Destination Connection Status shows CONNECTED once the tunnel is established.
Finally, add any labels for the network, review the configuration, and then select Add.
Onboard endpoint connections
Once the node has been added, follow the instructions in Adding endpoints in Neeve to manually add endpoint connections for the new node, or use the Discover Endpoint feature.