This article explains how to add network interfaces to Edge Node (formerly Edge iNode) networks, making all network traffic on the selected interface available to the network. It also gives steps for assigning a network interface to a service, which restricts traffic on that interface to only the assigned service. To learn how to configure high availability for your Edge Node using interface groups, see WAN network high availability.
Enable network interface configuration
- In the Secure Edge Portal, go to Nodes > All Nodes and select the Edge Node.
- From the Manage Node menu on the node details page, select Edit.
- On the Edit Node page, select Advanced Settings and then enable MultiNIC Mode.
.png)
Connect a network interface to a network
When adding or editing a network, you can select or change the network interface by choosing an interface from the drop-down list on the Add Network or Edit Network pages. If the selected interface is already in use by another network, you can use VLAN to share the interface.
.png)
Allocate network interfaces for use with services
By default, network interfaces are not available for services. To make an interface available, you need to mark it as a floating interface:
- On the top-right of the Interfaces page, select Edit.

- Select the required interface row and set the drop-down field to FLOATING.
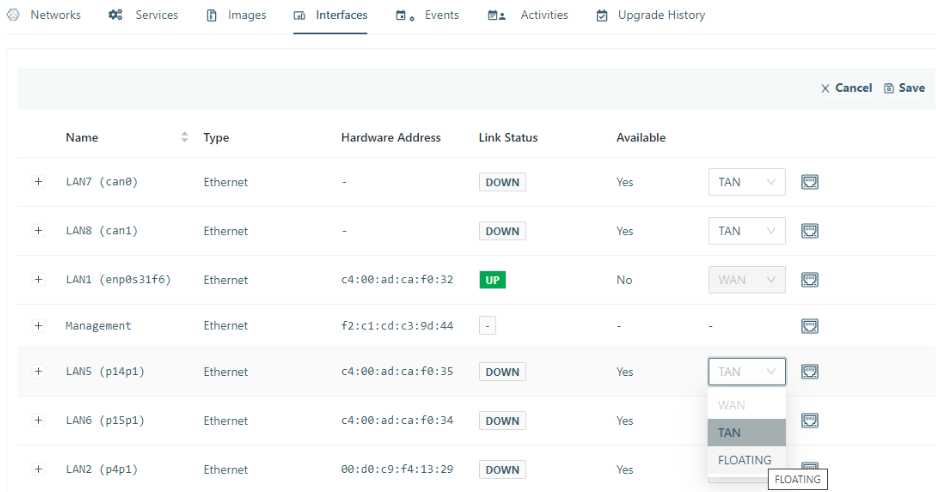
- Confirm the action and save the change.
The interface is now ready for use with a service.
Add network interface access to a service
When creating or editing a service that requires direct access to a network interface, you can select a network interface from the floating interface group during the service configuration process.