This feature allows administrators to configure scheduled access for specific users. When a user is set up with scheduled access, they can log in only during the designated time slots. Once the scheduled period ends, the user is automatically logged out and cannot log in again outside of their scheduled times.
To configure scheduled access for a new or existing user:
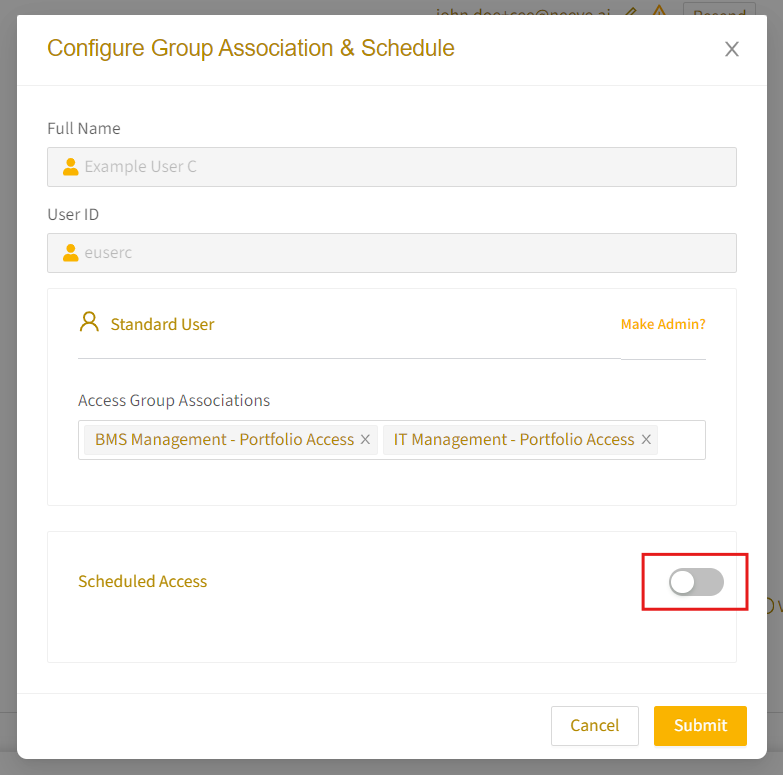
In the Remote Access Portal, navigate to the user’s Configure Access Roles & Schedule settings:
For a new user, choose the user type and then the Configure Access Roles & Schedule dialog will appear. (For detailed instructions, see Adding users to Remote Access.)
For an existing user, go to their User Profile page, and choose the Configure Access Roles & Schedule option from the Actions menu. (For detailed instructions, see Modifying user settings.)
In the Configure Access Roles & Schedule dialog, assign the user to one or more groups and enable (toggle on) Scheduled Access.
Complete the scheduled access fields:
Date: Set the start date, end date, and the timezone for the user’s access.
Time: Choose from:
9:00 AM to 5:00 PM: Daytime business hours (local time)
24 hours: Full-day access
Custom: Define specific access hours
Repeat: Set a recurring schedule:
Daily: Allow daily access.
Weekly: Select specific days, such as weekends.
Monthly: Set access on a particular day, like the last Friday of each month.
Choose whether to notify the user about their scheduled access via email, either immediately or at a different time.
If needed, select the option to Automatically Delete the user after their scheduled access expires. If this option is not selected, the user will be disabled after their access period ends, and you can re-enable them later if necessary.
Select Submit to save the changes.
Notes
If you want to notify the user about their updated scheduled access, you can use the Resend feature (on the main Users page) to send another email notification.