This article explains how to add new users to Remote Access, including password-less user creation and group assignments. For a brief overview of the process, see the following video.
Add a user
To begin, you’ll add some basic information for the new user. Then, proceed to the specific steps for adding an Access User (standard user) or an Admin User.
Log in to the Remote Access Portal, and go to the Users page.
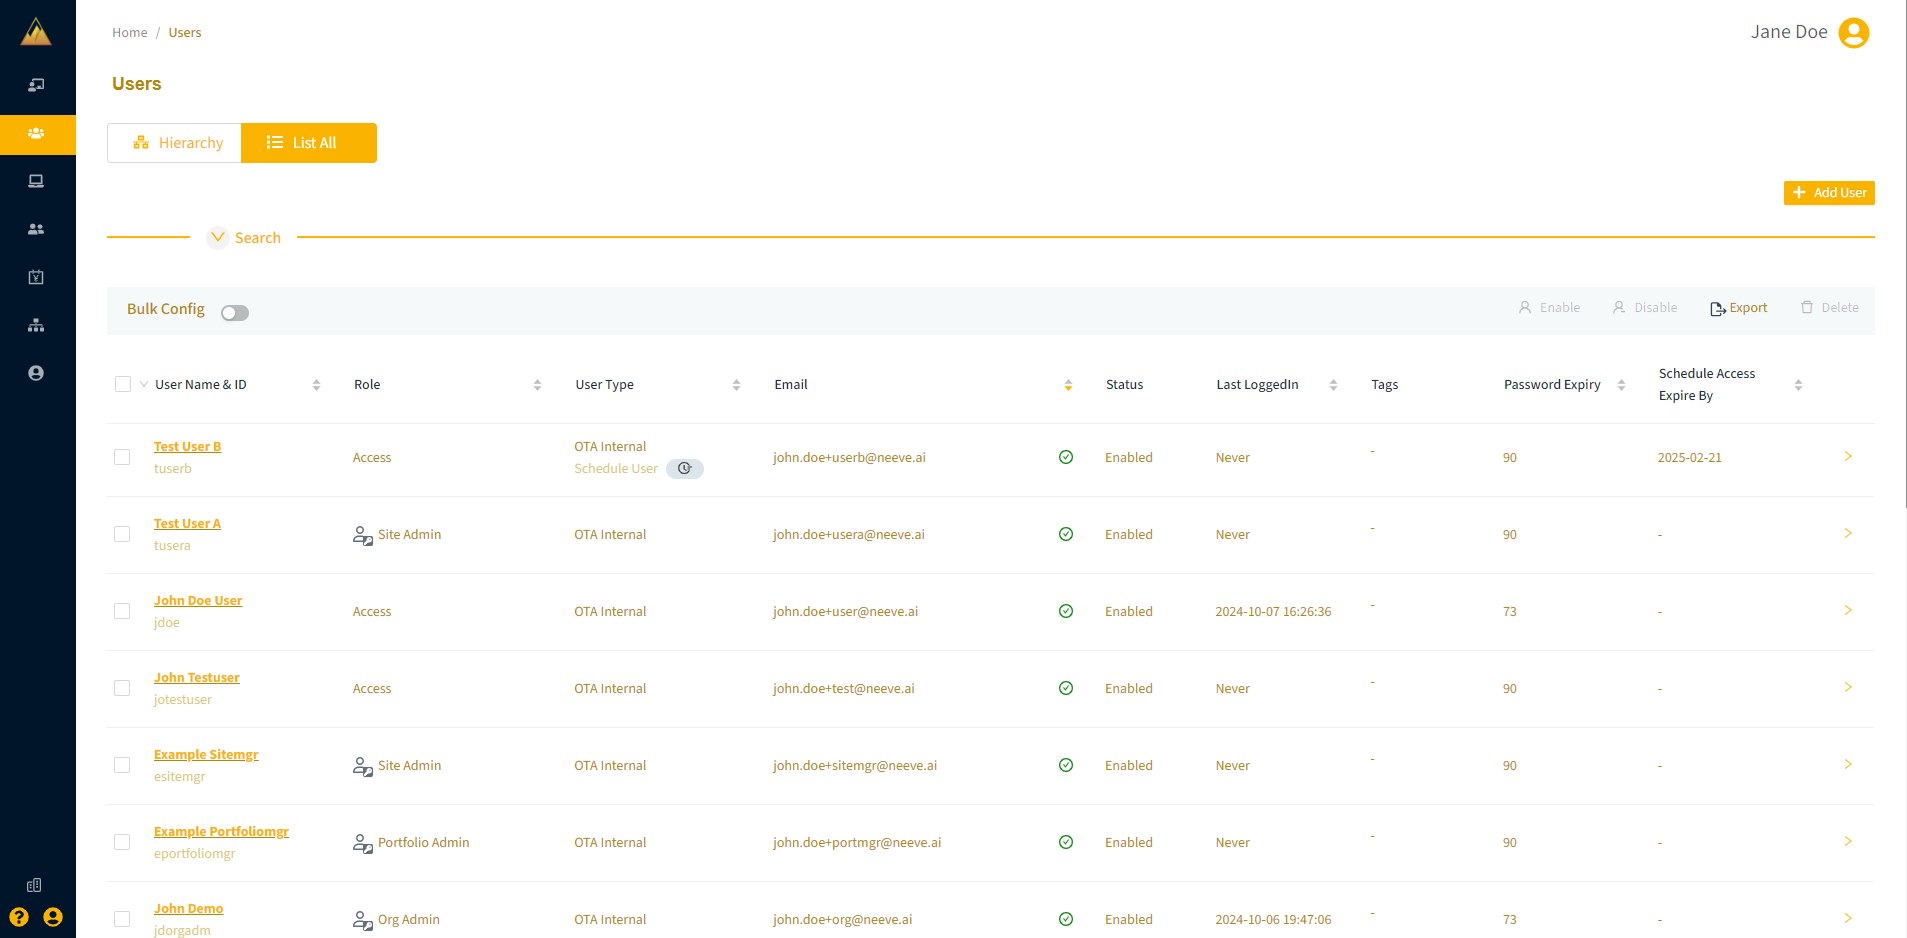
In the upper right, select + Add User to open the Add User dialog.

Enter the user’s first name, last name, and email address. Remote Access will automatically generate a username based on these fields.
Under Auth Domain, choose the user’s authentication method:
OTA Internal: Use this option for Remote Access internal logins.
Single Sign-On: If your company uses an external identity provider, select it from the dropdown list. Multiple providers may be configured.

Optionally, add the user’s phone number.
Specify the user’s Org.
Specify the Scope of authentication. The options are:
LOCAL: The user’s organization, as indicated in the Org field
MULTILEVEL: The user’s organization and child organizations
Select Submit & Add to Group.
In the Choose User Access Type dialog, confirm the user’s full name and their login ID.
Select whether to configure the user as an access user (a standard user) or an admin user. For more information on user types, see User roles.
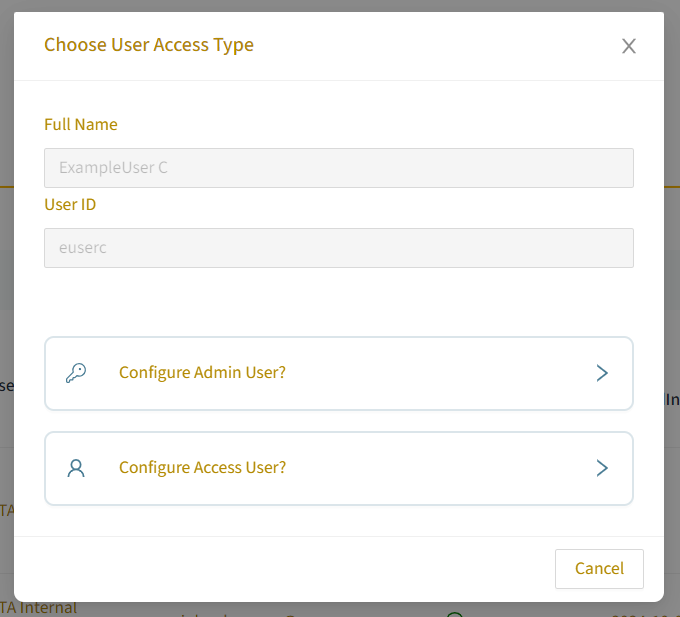
Continue with the next applicable procedure: Add an access user or Add an admin user.
Add an access user
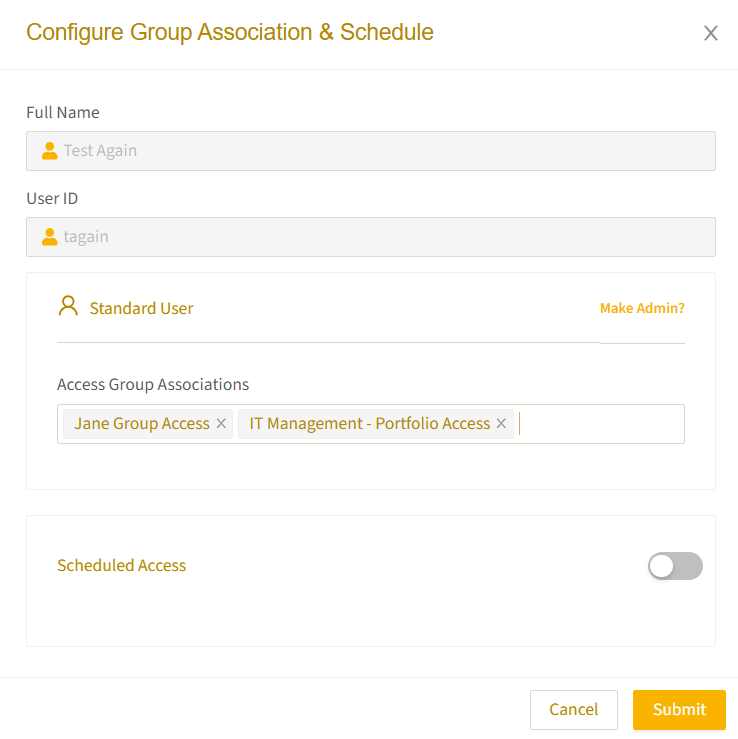
After selecting Configure Access User, the Configure Access, Group Association & Schedule dialog will appear.
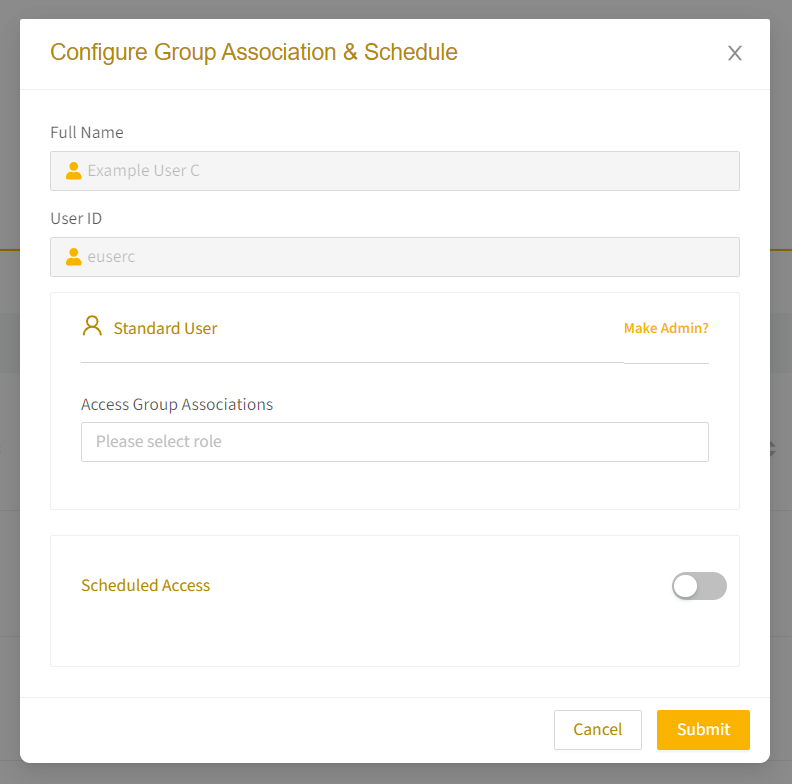
In the Access Group Associations field, assign the user to one or more groups. For more information, see the later section Assigning users to groups.
Configure scheduled User Access for the user, if applicable.
Select Submit.
Once the user has been added and assigned to a group, their information will appear on the Users page. To view their details, click the plus icon (+) next to the user’s name.
Add an admin user
After selecting Configure Admin User, the Configure Access, Group Association & Schedule dialog box will appear. Choose the admin role from the following options, and complete the substep noted below:
Org Admin: Skip to Step 3.
Portfolio Admin: Select the portfolio(s) for the user to manage from the dropdown field.
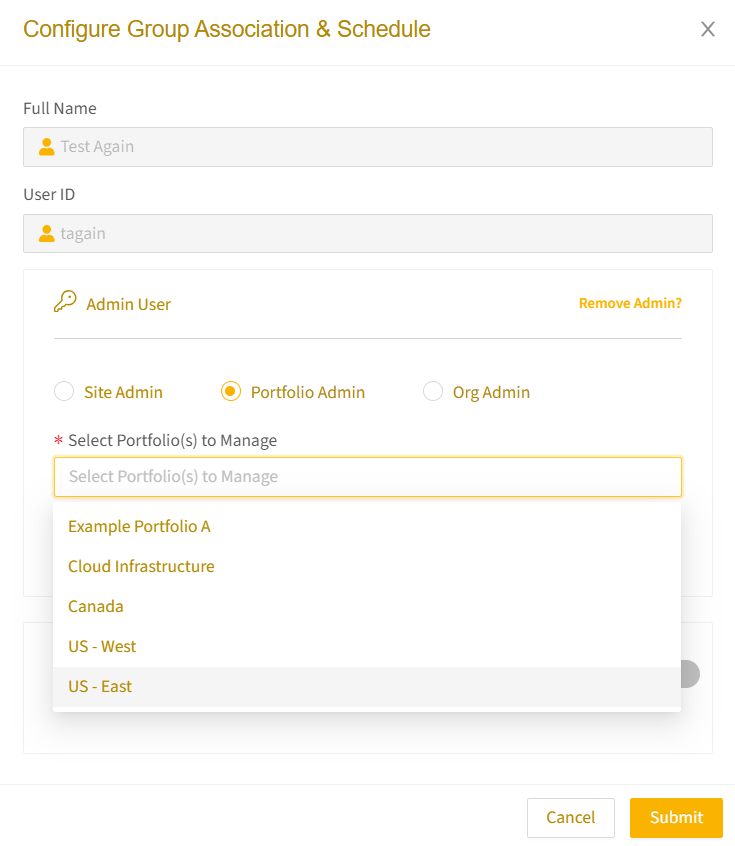
Site Admin: Select the site(s) for the user to manage from the dropdown field.
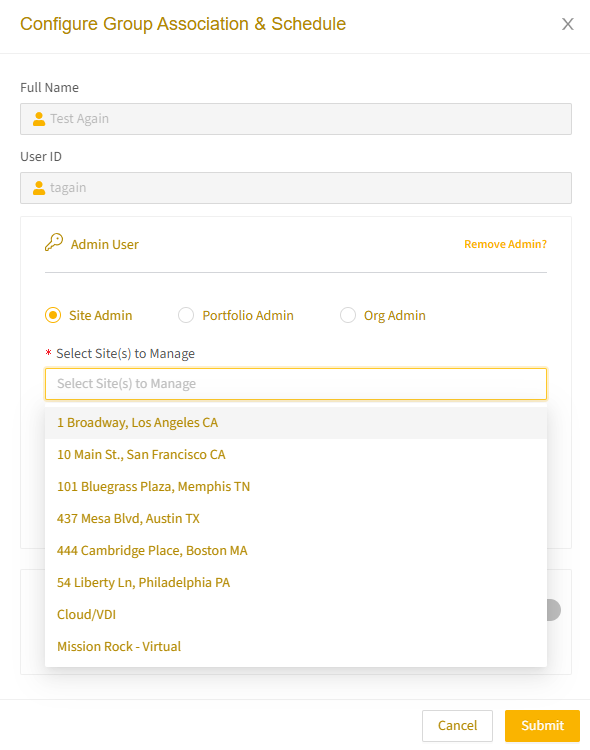
Set the permissions for the selected sites. You can apply the same permissions across all sites or customize the permissions for each site.
In the Access Group Associations field, assign the user to one or more groups. For more information, see the later section Assigning users to groups.
Configure scheduled User Access for the user, if applicable.
Select Submit.
Once the user has been added and assigned to a group, their information will appear on the Users page. To view their details, click the plus icon (+) next to the user’s name.
Password-less user creation flow
When you create a new user in Remote Access, assigning a password is not necessary. Instead, the user will receive an email to verify their account.
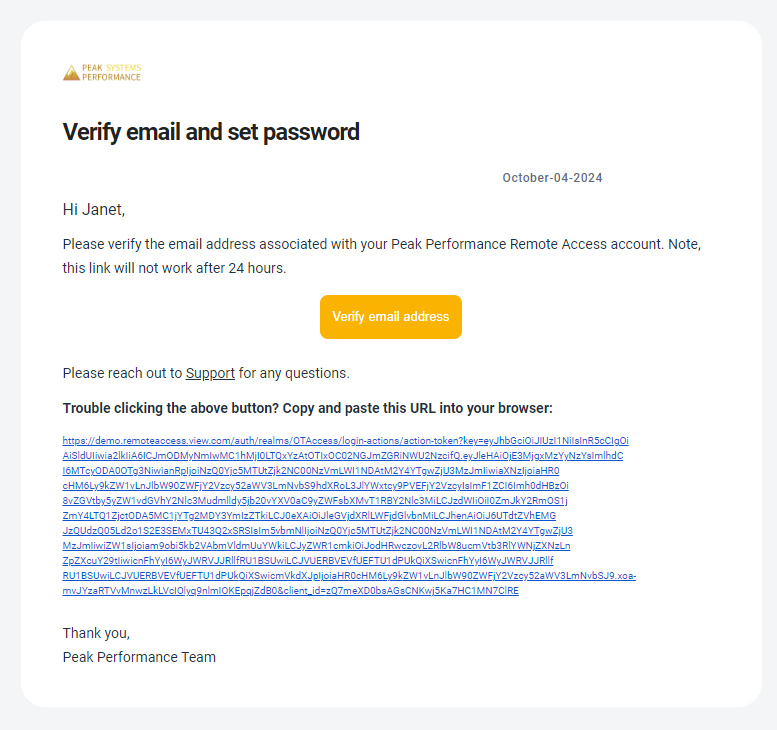
The email contains a link to verify the account and direct the user to the Set Password page. Once the password is set, the user will be redirected to the Remote Access login page.
.png)
Assigning users to groups
Users in a group typically share similar roles and have access to all devices enabled for that group. You can assign users to multiple groups, allowing them access to a broader range of devices.
Before assigning a user to a group, review the devices within the group. For information on viewing or modifying group details, see Managing groups. For detailed steps on assigning users to groups, see Modifying user settings.