A group links one or more users with one or more devices, simplifying the management of users (typically by role) with similar device access needs. The following sections explain how to add and modify groups in the Remote Access Portal. See the following video for a brief overview of the process.
Add a group
To create a new group:
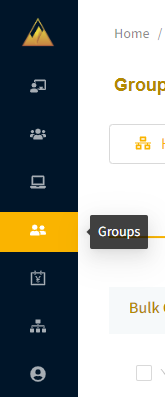
- From the Remote Access Portal left menu, select the Groups icon.
- On the upper right of the Groups page, select + Add Group.
- In the the Add Group dialog, enter a Name and Description for your group.
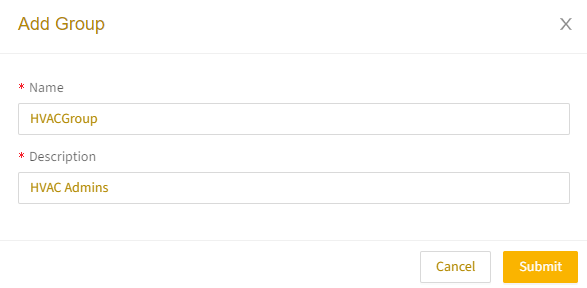
- Select Submit. Your new group will appear in the list on the Groups page.
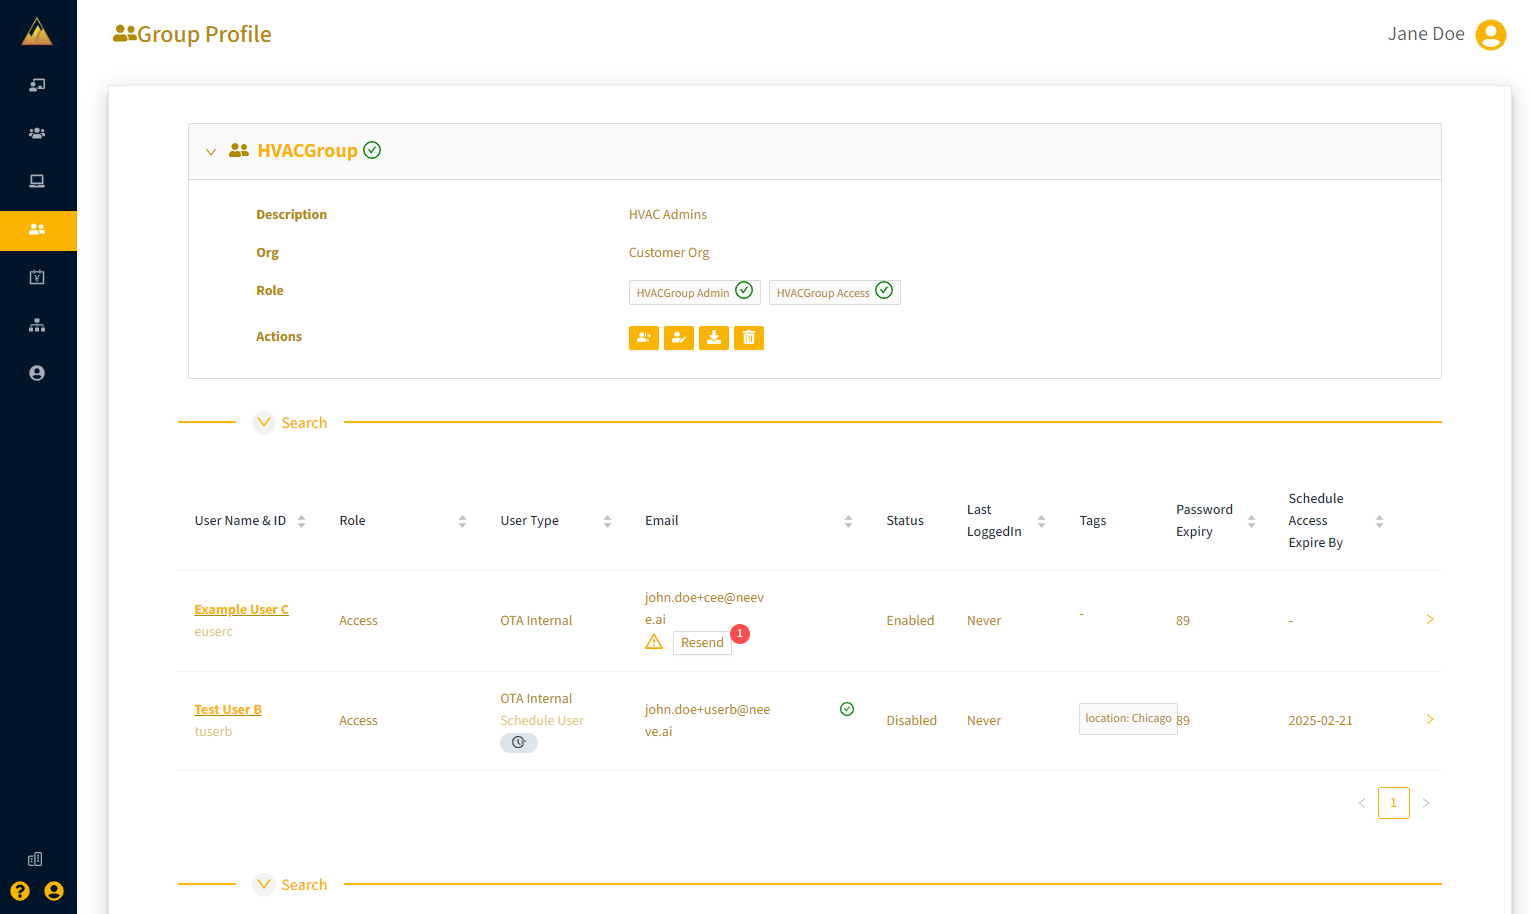
- Select the group in the list to open its Group Profile page, where you can review users and devices in that group (new groups won't have any assigned users or devices).
Modify a group
To modify a group’s name, description, users, or devices:
- From the Remote Access Portal left menu, select the Groups icon and then select the group.
- On the Group Profile page, expand the section under the group name to display the group modification panel.
- From the Actions menu, continue with the applicable step below.
- To add a user or device:
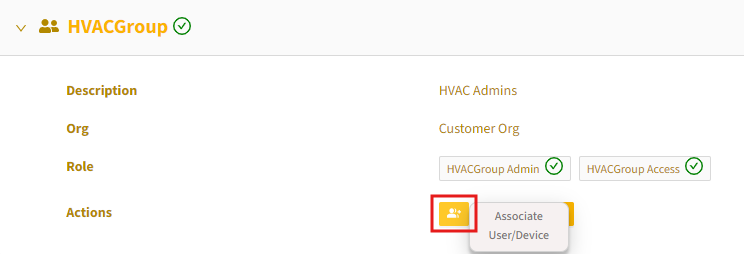
- Select the Associate User/Device icon.
- Select the resource type: User or Device Endpoint and then select the associated resource from the dropdown field.
You can select multiple users or devices. - Select Submit
- Select the Associate User/Device icon.
- To update the group name or description:
- Select the Edit Group icon.
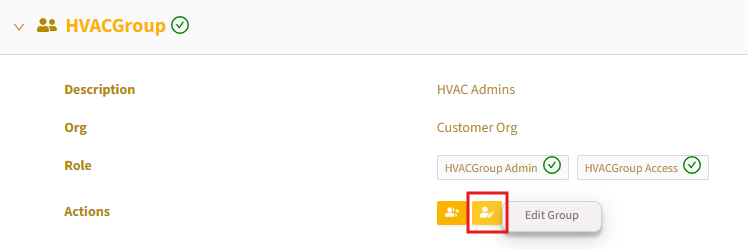
- Make the changes in the Update Group dialog and select Update.
- Select the Edit Group icon.
Note you can also assign users and devices to groups when configuring those resources:
- To add users, follow the instructions in Modifying user settings.
- To add devices, follow the instructions in Modifying devices.